
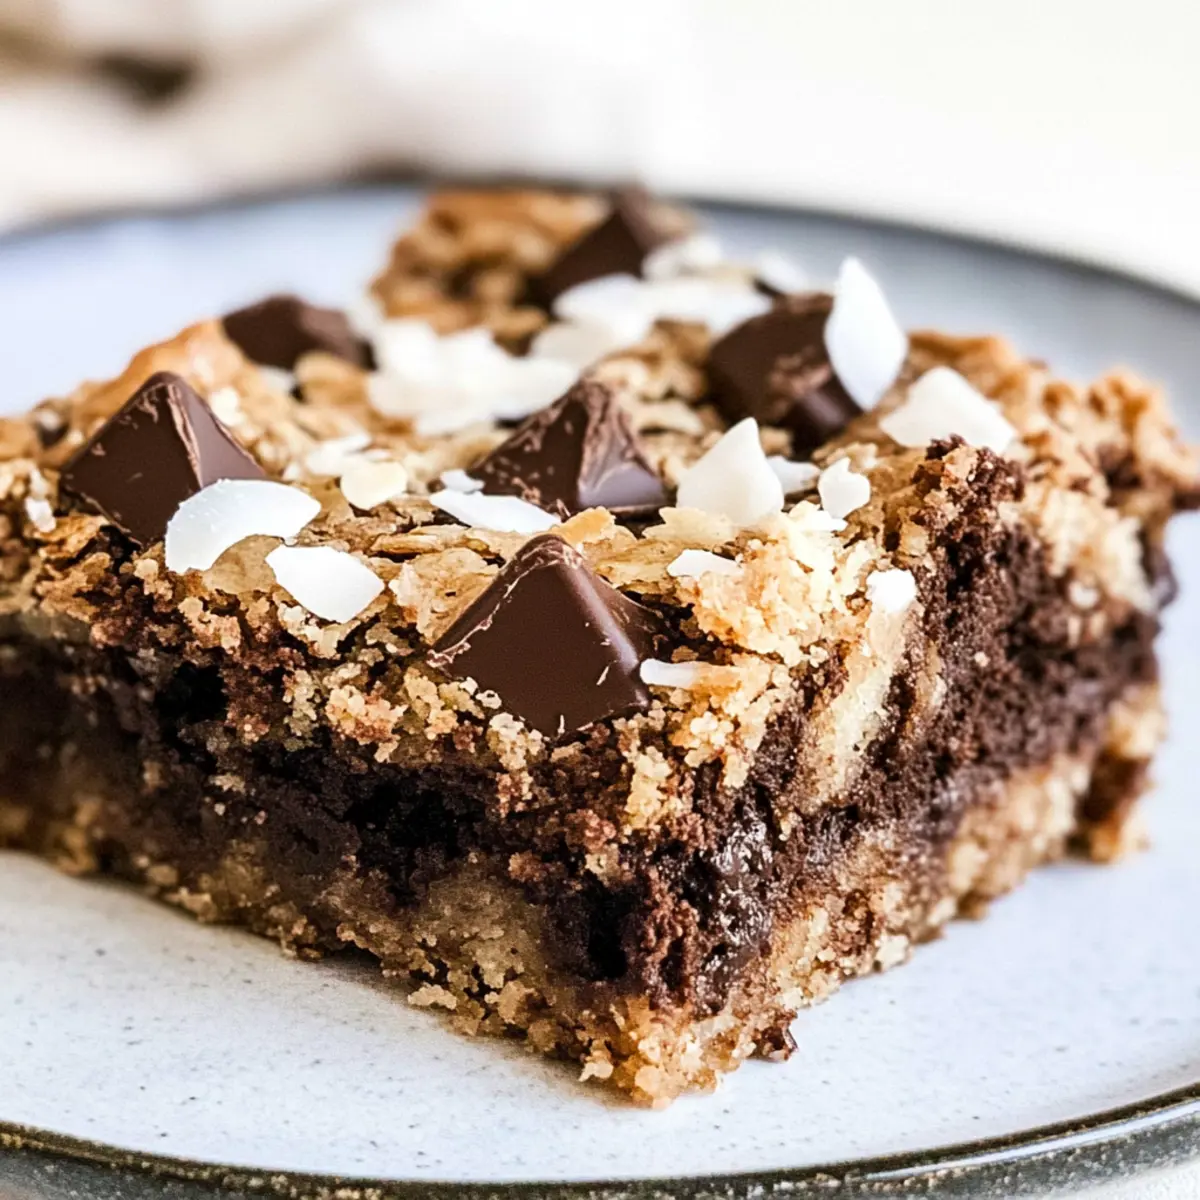
As I pulled the pan from the oven, a wave of chocolatey, coconut aromas wrapped around me like a warm hug. These Chewy Chocolate Coconut Blondies are the perfect treat for when I want something simple yet indulgent, combining gooey chocolate chunks with the satisfying chew of shredded coconut. This easy recipe takes less than an hour to whip up, making it ideal for unexpected guests or a sweet craving that can’t wait. They’re not just a delicious dessert; they’re also freezer-friendly, allowing me to save some for later or share a batch with friends. Can you say no to that? Let’s dive into the details of making these mouthwatering blondies that are sure to become a staple in your dessert repertoire!
Why are Chocolate Coconut Blondies irresistible?
Indulgent Flavor: Each bite of these blondies delivers a heavenly combination of rich chocolate and sweet coconut that satisfies your sweet tooth. Quick Prep Time: Whipping up these treats takes less than an hour, making them perfect for any last-minute dessert cravings. Endless Customization: Feel free to swap in your favorite nuts or chocolate variations for a personal touch. Freezer-Friendly: Bake a batch and store them for later—we won’t tell if you sneak one or two before guests arrive! Crowd-Pleasing Dessert: Whether for a party or an afternoon snack, these blondies appeal to everyone, and they pair beautifully with a scoop of ice cream. Dive into these Chocolate Coconut Blondies for a treat you’ll adore!
Chocolate Coconut Blondies Ingredients
• Get ready to indulge in these blissful treats!
For the Blondies
- Unsalted Butter – Adds richness and moisture; you can substitute with coconut oil for a delightful dairy-free option.
- Light Brown Sugar – Provides sweetness and depth; granulated sugar works too but won’t deliver the same rich flavor.
- Large Eggs (2) + Egg Yolk (1) – Help create that chewy, fudgy texture; omit the extra yolk for a lighter blondie.
- Vanilla Extract – Boosts the overall flavor; opt for pure vanilla extract for the best taste.
- Fine Sea Salt – Balances the sweetness beautifully; kosher salt can be used in equal measure if needed.
- All-Purpose Flour – Gives the blondies their structure; swap with a 1:1 gluten-free baking blend for a gluten-free version.
- Sweetened Shredded Coconut – Infuses flavor and chewy texture; feel free to use unsweetened shredded coconut for a less sugary treat.
- Semisweet Chocolate (chopped) – Offers rich chocolate flavor; chocolate chips can replace chopped chocolate for convenience.
Optional Toppings
- Additional Shredded Coconut – Sprinkle on top before baking for an extra coconut layer.
- Chopped Nuts (e.g., almonds, walnuts) – Add crunch and nuttiness; customize to your taste!
Step‑by‑Step Instructions for Chocolate Coconut Blondies
Step 1: Preheat the Oven and Prepare the Pan
Begin by preheating your oven to 350°F (175°C). While the oven warms up, grab an 8×8-inch metal baking pan and line it with foil or parchment paper, ensuring there’s an overhang for easy removal later. Lightly spray the lining with nonstick cooking spray to prevent any sticking, creating a well-prepared base for your Chocolate Coconut Blondies.
Step 2: Combine Butter and Sugar
In a large mixing bowl, melt your unsalted butter in the microwave or on the stove until it’s just buttery and warm. Once melted, whisk in the brown sugar until the mixture appears smooth and well combined. This step should take about 2-3 minutes, and you’ll be able to see the glossy sheen that indicates your blondie base is ready for the eggs.
Step 3: Incorporate Eggs and Vanilla
Now, add the two large eggs and one additional egg yolk to the bowl, mixing well after each addition to ensure they fully blend with the butter and sugar. Pour in the vanilla extract, allowing the fragrant notes to merge with the sweet mixture. Continue mixing until the batter is cohesive, which should take another 2 minutes, leaving you with a luscious base for your Chocolate Coconut Blondies.
Step 4: Mix in Dry Ingredients
Next, sprinkle in your fine sea salt and all-purpose flour, gently folding them into the wet ingredients. Use a spatula to combine until just incorporated, being careful not to overmix. The dough will start to thicken and come together into a sturdy batter, perfect for cradling those delightful chocolate chunks and coconut.
Step 5: Fold in Coconut and Chocolate
Now it’s time to add the magic! Gently fold in three-quarters of the sweetened shredded coconut and your chopped semisweet chocolate, ensuring an even distribution throughout the batter. You’ll want to see the beautiful flecks of chocolate and coconut throughout, giving you a preview of the chewy chocolatey goodness that awaits in your Chocolate Coconut Blondies.
Step 6: Spread the Batter and Top
Transfer the blondie batter into your prepared baking pan, using a spatula to spread it evenly into all corners. Make sure to press it down gently for an even bake. Next, sprinkle the remaining shredded coconut and additional chocolate on top, pressing them slightly into the surface to create a beautiful crust during baking.
Step 7: Bake to Perfection
Place your pan in the preheated oven and bake for about 40 minutes. Keep an eye on the blondies as they bake—the edges should be set, while the center remains slightly gooey. You want that perfect balance, so resist the urge to overbake; a little will ensure that delightful chewy texture typical of Chocolate Coconut Blondies!
Step 8: Cool and Cut
Once baked, remove the blondies from the oven and allow them to cool in the pan for about 15-20 minutes. This cooling time makes it easier to lift them out using the overhang. After they’ve cooled, use a sharp knife to slice them into bars, wiping the blade as necessary for clean edges. Enjoy your delicious Chocolate Coconut Blondies!
How to Store and Freeze Chocolate Coconut Blondies
Room Temperature: Store your Chocolate Coconut Blondies in an airtight container at room temperature for up to 3 days to maintain their chewy texture.
Fridge: For prolonged freshness, keep the blondies in the fridge in an airtight container for up to a week. Just let them sit at room temperature for a few minutes before serving.
Freezer: Freeze the blondies wrapped in plastic wrap and then placed in a freezer-safe bag for up to 2 months. Thaw in the fridge overnight before enjoying.
Reheating: For a warm treat, reheat individual blondies in the microwave for about 10-15 seconds or in the oven at 350°F (175°C) for 5-10 minutes.
Expert Tips for Chocolate Coconut Blondies
- Avoid Overbaking: Keep a close eye on your blondies; they should be slightly gooey in the center for that perfect chewy texture.
- Use Fresh Ingredients: Ensure your baking essentials, like eggs and vanilla extract, are fresh for the best flavor in your Chocolate Coconut Blondies.
- Knife Technique: For clean cuts, use a large, sharp knife and wipe it with hot water between cuts to avoid sticky edges.
- Mix Just Enough: Stir the flour and salt into the batter until just combined to prevent dense blondies; overmixing will ruin their texture.
- Chill for Flavor: Allow the blondies to cool completely before cutting; chilling them enhances the rich flavors of chocolate and coconut.
- Customize Wisely: Feel free to experiment with nuts or chocolate types, but make sure to keep the balance of wet and dry ingredients for the best results.
What to Serve with Chocolate Coconut Blondies
Indulging in these delightful treats is just the beginning; let’s create a fabulous spread to complement their rich flavors and textures.
- Vanilla Ice Cream: A scoop of creamy vanilla ice cream perfectly contrasts the chewy blondies, providing a delightful temperature and flavor balance.
- Fresh Berries: Raspberries or strawberries add a burst of tartness that beautifully cuts through the sweetness, elevating each bite to a new level.
- Coconut Whipped Cream: This airy topping adds another layer of coconut flavor while enhancing the overall tropical theme of your dessert.
- Coffee or Espresso: A warm cup of rich coffee balances the sweetness of the blondies; the bitter notes provide a harmonious contrast worth sipping with every bite.
- Chocolate Sauce Drizzle: A drizzle of chocolate sauce can take these blondies over the top, making them even more decadent for those special moments.
- Nutty Granola Crumble: Sprinkle nutty granola on top for added crunch, offering texture and a nutty flavor that pairs excellently with the soft blondies.
- Mint Tea: Refreshing mint tea offers a soothing companion, cleansing the palate and leaving a light aftertaste that complements the richness of the dessert.
- Caramel Sauce: A swirl of warm caramel sauce adds a buttery, sweet richness that elevates the blondie experience to heavenly heights.
- Peanut Butter Drizzle: For a nutty twist, a drizzle of creamy peanut butter brings an irresistible flavor harmony that chocolate lovers will adore.
Make Ahead Options
These Chocolate Coconut Blondies are perfect for busy home cooks looking to save time! You can prepare the batter up to 24 hours in advance by mixing all the ingredients and storing it in the refrigerator. To maintain freshness, tightly cover the bowl with plastic wrap to prevent any moisture loss. When you’re ready to bake, simply preheat your oven and pour the chilled batter into your prepared pan; bake as directed. If you’re making them a few days ahead, fully baked blondies can be stored in an airtight container at room temperature for up to 3 days. This way, you can have these delicious treats at your fingertips without any last-minute effort!
Chocolate Coconut Blondies Variations
Feel free to explore and make these blondies your own with delightful tweaks!
- Nutty Delight: Add chopped almonds or walnuts for an extra crunch and flavor boost. The nutty contrast beautifully complements the chocolatey coconut base.
- Dark Chocolate Touch: Swap in dark chocolate or milk chocolate chips if you’d prefer a rich and decadent variation. Each choice brings its own unique sweetness!
- Reduced Sweetness: Lighten things up by reducing the sugar or chopped chocolate in the recipe. This makes for a subtly sweet treat that’s still enjoyable.
- Oat Twist: Replace part of the shredded coconut with oats for an unexpected texture and a slight heartiness in every bite. The combination creates an irresistibly chewy blondie!
- Tropical Vibes: Incorporate pineapple tidbits to give a fun tropical twist. The extra moisture will add a fruity sweetness that balances well with coconut.
- Spiced Up: Sprinkle in a dash of cinnamon or cardamom to elevate the flavor profile with warm spices. This touch can transform the blondies into a cozy treat!
- Vegan Alternative: Use flax eggs (1 tablespoon ground flaxseed mixed with 3 tablespoons water per egg) and plant-based butter for a wonderful vegan version. Indulgence doesn’t have to be off-limits!
- Coconut Cream: Add a dollop of coconut cream on top right after pulling them out of the oven for an extra luxurious treat. The creaminess melds with the warm blondies perfectly.
For even more tasty ideas, consider pairing your blondies with a scoop of vanilla ice cream or a warm mug of hot chocolate, creating an extra touch of indulgence, just like my favorite Hot Chocolate Cupcakes! And if you’re in the mood for peppermint, check out my White Chocolate Peppermint Cookies. Let your creativity run wild!
Chocolate Coconut Blondies Recipe FAQs
How do I select the best shredded coconut for my blondies?
Absolutely! When choosing shredded coconut, look for unsweetened for a more authentic coconut flavor or sweetened if you prefer an extra touch of sweetness. Make sure it’s fresh and has not developed any dark spots or a rancid smell, which indicates that it’s past its prime.
How should I store my Chocolate Coconut Blondies to keep them fresh?
To keep your Chocolate Coconut Blondies at their best, store them in an airtight container at room temperature for up to 3 days. For longer storage, transfer them to the refrigerator, where they’ll stay fresh for up to a week. Just let them sit out for a few minutes to reach room temperature before diving in!
Can I freeze these blondies for future enjoyment?
Yes, you can easily freeze your Chocolate Coconut Blondies! First, wrap them tightly in plastic wrap and then place them in a freezer-safe bag or container. They can be stored in the freezer for up to 2 months. To enjoy, simply thaw them in the fridge overnight, or pop them in the microwave for about 10-15 seconds for a quick warm-up.
What should I do if my blondies turn out too dry?
If your Chocolate Coconut Blondies turn out too dry, it may be due to overbaking. Ensure you check them a few minutes before the end of the baking time; they should come out slightly gooey in the center. Next time, reduce the baking time, and consider adding a little extra melted butter or chocolate to enrich the batter further and prevent dryness.
Are these blondies suitable for gluten-free diets?
Absolutely! To make Chocolate Coconut Blondies gluten-free, simply substitute the all-purpose flour with a 1:1 gluten-free baking blend. Just remember to check that all your other ingredients, like the chocolate and baking powder (if used), are also gluten-free to maintain dietary safety. Enjoy guilt-free delight!
Iridescent Chocolate Coconut Blondies You Can't Resist
Ingredients
Equipment
Method
- Preheat your oven to 350°F (175°C) and prepare an 8x8-inch metal baking pan lined with foil or parchment paper, lightly sprayed with nonstick cooking spray.
- Melt the unsalted butter in a mixing bowl and whisk in the brown sugar until smooth and glossy, about 2-3 minutes.
- Incorporate the two large eggs and one egg yolk, mixing well after each addition, then add the vanilla extract and mix until cohesive.
- Sprinkle in the fine sea salt and all-purpose flour, gently folding them into the wet ingredients until just incorporated.
- Fold in three-quarters of the sweetened shredded coconut and the chopped semisweet chocolate, ensuring even distribution.
- Spread the batter into the prepared baking pan and top with the remaining shredded coconut and chocolate, pressing lightly.
- Bake in the preheated oven for about 40 minutes, keeping an eye on the edges and ensuring the center remains slightly gooey.
- Cool in the pan for 15-20 minutes before lifting out and cutting into bars.
Leave a Reply