
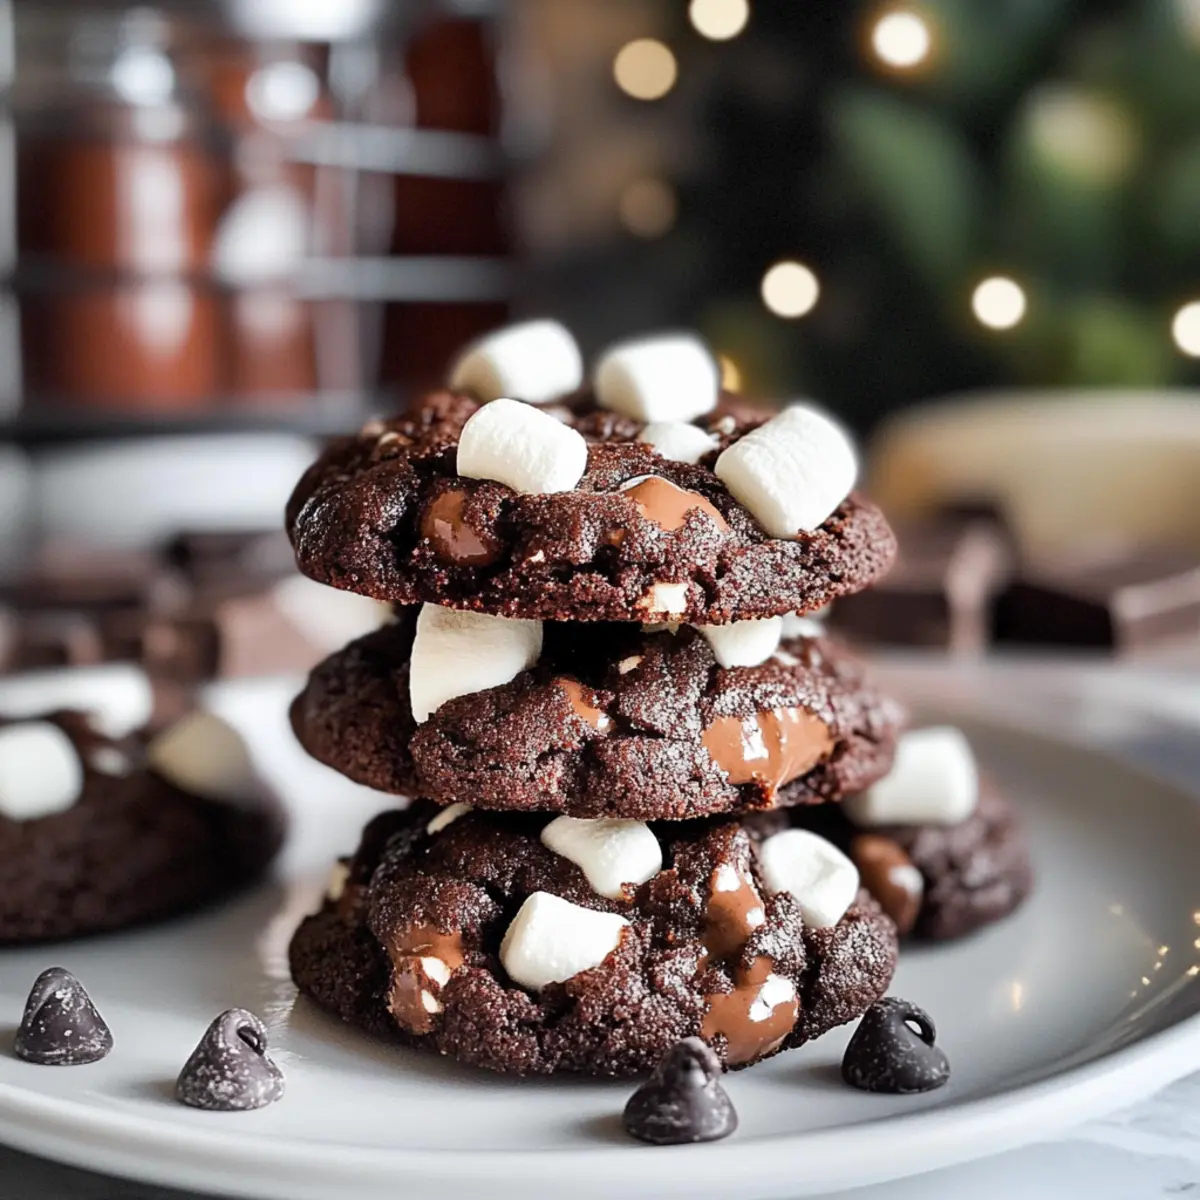
As I pulled the first batch of Hot Chocolate Cookies from the oven, the comforting aroma of melted chocolate and warm marshmallows enveloped my kitchen. Each cookie is a delightful homage to the cozy cups of hot cocoa enjoyed during winter nights, complete with gooey marshmallow bits that add a delightful twist. What I love most about this recipe is not only its quick prep but also how perfect these cookies are for holiday gatherings—whether you’re hosting a festive party or just craving some homemade comfort. Plus, with the option for a shortcut version, you can whip these up in no time! Curious about how to create these cozy delights? Let’s dive into this heartfelt recipe together.
Why Are Hot Chocolate Cookies So Irresistible?
Cozy Comfort: The combination of chocolate and marshmallows brings that warm and fuzzy feeling, just like your favorite winter drink.
Quick & Easy: The shortcut version means you can have freshly baked cookies ready in a flash, perfect for unexpected guests or late-night cravings.
Crowd-Pleaser: These cookies are ideal for sharing at holiday gatherings, making them a hit at cookie swaps or festive parties.
Customizable Delight: Whether you add a dash of cinnamon for a spicy kick or swap in dark chocolate chips for richness, you can easily make this recipe your own.
Gourmet Feel: With a comforting aroma and soft texture, these cookies will make your kitchen feel like a cozy café. Pair them with a warm drink, and you’ve got the perfect winter treat!
Hot Chocolate Cookies Ingredients
For the Dough
- Butter – Provides moisture and richness; substitute with margarine for a dairy-free option.
- Sugar – Sweetens the cookies; can be replaced with coconut sugar for lower glycemic alternatives.
- Brown Sugar – Adds depth and chewiness; both light and dark brown sugar work well.
- Egg – Acts as a binder for the cookie dough; substitute with a flax egg for an egg-free version.
- Milk – Adds liquid and richness; use almond milk or oat milk as dairy-free options.
- Vanilla Extract – Enhances flavor; opt for pure vanilla extract for the best results.
- Flour – Provides structure; gluten-free all-purpose flour is an excellent alternative.
- Powdered Hot Cocoa Mix – Delivers the signature hot chocolate flavor; ensure it’s unsweetened for better control over sweetness.
- Unsweetened Cocoa Powder – Adds a rich chocolate flavor; dark cocoa powder can intensify the taste.
- Baking Soda – Acts as a leavening agent for a lighter texture.
- Salt – Balances sweetness and enhances flavors.
For the Fun
- Marshmallow Bits – Provide a gooey texture and playful flavor; use mini marshmallows if needed, but be aware they’ll melt out.
- Semi-Sweet Chocolate Chips – Add delicious pockets of chocolate; substitute with dark chocolate chips for a bolder flavor.
These delightful Hot Chocolate Cookies are sure to warm your heart and home this holiday season!
Step‑by‑Step Instructions for Irresistible Hot Chocolate Cookies
Step 1: Preheat and Prepare
Begin by preheating your oven to 350°F (175°C). Line two baking sheets with parchment paper to ensure easy cookie removal later. This step is crucial for achieving evenly baked Hot Chocolate Cookies, so be patient and make sure your oven reaches the right temperature before moving on.
Step 2: Cream the Butters and Sugars
In a large mixing bowl, combine softened butter, sugar, and brown sugar. Using a hand mixer or stand mixer, beat the mixture on medium speed until it becomes light and fluffy, about 2-3 minutes. You’ll know it’s ready when the mixture is creamy and has a pale color; this creates the perfect texture for your cookies.
Step 3: Incorporate Wet Ingredients
Next, add in the egg, milk, and vanilla extract, mixing until fully combined. Ensure everything is blended smoothly, taking about 1-2 minutes. The wet ingredients will help to create a rich and moist dough for your Hot Chocolate Cookies, contributing to their chewy integrity.
Step 4: Mix the Dry Ingredients
Gradually sift in the flour, cocoa mix, unsweetened cocoa powder, baking soda, and salt. Mix on low speed just until combined, being careful not to overmix the dough. This step is vital to maintaining the right consistency, and the mixture should start coming together and looking fudgy.
Step 5: Add the Sweet Surprises
Stir in the marshmallow bits and semi-sweet chocolate chips using a spatula. Ensure they are evenly distributed throughout the dough to create those delightful pockets of chewy marshmallow and chocolate in your Hot Chocolate Cookies. The colorful bits will add both an aesthetic and flavor boost.
Step 6: Shape the Cookies
Using a tablespoon or cookie scoop, drop rounded portions of dough onto the prepared baking sheets, spacing them about two inches apart. This spacing is important because the dough will spread while baking. Each dollop should be generous to yield thick and satisfying cookies.
Step 7: Bake to Perfection
Place the baking sheets in the preheated oven and bake for 8-10 minutes. The cookies should look soft but set around the edges; they will firm up as they cool. Keep an eye on them to ensure they don’t overbake, which can lead to a drier texture.
Step 8: Add Extra Goodness
As soon as you remove the cookies from the oven, press additional marshmallow bits and chocolate chips on top of each one. This step adds a beautiful finishing touch that enhances both the visuals and flavors of your Hot Chocolate Cookies.
Step 9: Cool and Enjoy
Allow the cookies to cool on the baking sheets for 5 minutes to solidify slightly, then transfer them to a wire rack to cool completely. This cooling slows down the cooking process and gives you cookies that are perfectly soft and chewy on the inside, ready to be enjoyed any time of the day!
Make Ahead Options
These Hot Chocolate Cookies are a fantastic choice for busy home cooks looking to save time without sacrificing flavor! You can prepare the cookie dough up to 36 hours in advance by mixing all the ingredients and storing it in an airtight container in the refrigerator. This helps the flavors meld beautifully while preventing browning. When you’re ready to bake, simply scoop the chilled dough onto baking sheets and bake as directed. Additionally, you can freeze the formed cookie dough balls for up to 3 months. Just thaw them in the fridge overnight before baking, and you’ll have freshly baked Hot Chocolate Cookies that are just as delicious as if they were made from scratch the same day!
Expert Tips for Hot Chocolate Cookies
-
Avoid Overbaking: Cookies might seem soft when you take them out, but they’ll continue to cook on the tray. Remove them while they still have a slight jiggle in the center.
-
Chill Your Dough: For enhanced flavor and improved texture, consider refrigerating the cookie dough for up to 36 hours before baking. This allows the flavors to meld beautifully.
-
Watch Your Marshmallows: Opt for marshmallow bits instead of mini marshmallows, as the latter will melt completely and change the cookie texture adversely.
-
Customize Wisely: Feel free to add spices like cinnamon or cayenne, but start small and test flavors to suit your preference without overpowering the classic hot chocolate essence.
-
Substitution Tips: If you’re following specific dietary needs, remember you can use gluten-free flour or dairy alternatives without compromising the delightful taste of these Hot Chocolate Cookies.
How to Store and Freeze Hot Chocolate Cookies
Room Temperature: Store cookies in an airtight container at room temperature for up to 5 days. This helps maintain their soft, chewy texture for snacking any time.
Fridge: For longer shelf life, you can refrigerate Hot Chocolate Cookies, but keep them in an airtight container for up to 1 week. This is great if you prefer them slightly chilled.
Freezer: Freeze cookies for up to 2 months by wrapping each individually in plastic wrap before placing them in a freezer bag. This preserves their delightful flavors and textures.
Reheating: When ready to enjoy, simply warm them in the microwave for about 10-15 seconds or let them rest at room temperature for about 30 minutes for the perfect gooey bite.
Variations & Substitutions for Hot Chocolate Cookies
Customize your Hot Chocolate Cookies with these fun and flavorful ideas that will make your taste buds dance!
- Dairy-Free: Substitute butter with coconut oil and use almond or oat milk for a delicious vegan-friendly option.
- Lower Sugar: Replace regular sugar with a sugar alternative like monk fruit or erythritol for a healthier treat.
- Gluten-Free: Use a 1:1 gluten-free flour blend instead of all-purpose flour without sacrificing taste or texture.
- Spiced Twist: Add 1 teaspoon of ground cinnamon or a pinch of cayenne pepper to give your cookies a warm, spicy flavor.
- Nutty Surprise: Stir in chopped walnuts or pecans for an added crunch and richness that beautifully complements the chocolatey goodness.
- Minty Fresh: Mix in peppermint extract or crushed peppermint candies for a refreshing holiday flair reminiscent of festive treats.
- Shortcut Delight: For a speedy version, combine 1 box of brownie mix, a scoop of cocoa mix, a bit of oil, one egg, and marshmallow bits to whip up cookies in no time!
- Decorative Touch: Drizzle melted white chocolate on top of the cooled cookies to give them a beautiful and tasty finish, especially for holiday gatherings.
Explore these variations to create a batch of cookies that’s uniquely yours! If you enjoy the cozy chocolate vibes, you should also check out my Hot Chocolate Cupcakes for another delightful treat.
What to Serve with Hot Chocolate Cookies
Indulge in the ultimate winter experience by pairing these delectable cookies with delightful accompaniments that enhance every cozy bite.
- Warm Milk: Perfectly complements the chocolatey richness, offering a comforting balance to the sweetness of the cookies.
- Decadent Hot Chocolate: Elevate the experience with a warm cup of hot cocoa, topped with whipped cream and a sprinkle of cocoa.
- Creamy Vanilla Ice Cream: A scoop adds a luscious cold contrast, creating a delightful melt-in-your-mouth moment with each cookie bite.
- Peppermint Bark: This festive treat brings a refreshing crunch and contrasts beautifully with the warm flavors of the cookies.
- Fruit Medley: Fresh strawberries or sliced bananas add a burst of freshness and brightness that complements the cookies’ richness.
- Holiday Spiced Cider: Warm up some apple cider infused with cinnamon and cloves for a fragrant drink that ties in seasonal vibes.
- Nutty Trail Mix: A crunchy blend of nuts and dried fruits offers a satisfying texture contrast and a dose of healthy flavor.
- Chocolate Milkshake: Indulge your sweet tooth with a thick shake that pairs perfectly with the gooey marshmallow surprise in the cookies.
- Gingerbread Cookies: For a double treat, serving these with spicy gingerbread brings out the warmth of the season in every bite.
- Caramel Sauce: Drizzle some warm caramel over the cookies for an extra layer of rich, buttery sweetness that everyone will adore.
Hot Chocolate Cookies Recipe FAQs
How do I know when my ingredients are ripe or fresh?
Absolutely! For the best results, use fresh ingredients. Look for butter that’s softened but not melted, sugars that are free from clumps, and eggs with uncracked shells. Your cocoa should smell rich and aromatic; if it smells musty, it’s time to toss it. Also, check your marshmallow bits—avoid any that are hard or have turned stale.
What’s the best way to store Hot Chocolate Cookies?
Very good question! To keep your Hot Chocolate Cookies fresh, store them in an airtight container at room temperature for up to 5 days. This helps maintain their irresistibly chewy texture. If you choose to refrigerate them, they’ll last for about a week, but make sure they’re in an airtight container to prevent drying out.
Can I freeze these cookies?
Absolutely! You can freeze Hot Chocolate Cookies for up to 2 months. To do this, wrap each cookie individually in plastic wrap, then place them in a freezer bag or airtight container. When you’re ready to enjoy them, simply thaw at room temperature or microwave for 10-15 seconds for that fresh-out-of-the-oven warmth!
What should I do if my cookies spread too much while baking?
If your cookies spread excessively, it could be due to using melted butter instead of softened butter, or not chilling the dough before baking. To troubleshoot, you can refrigerate the dough for at least 30 minutes before shaping and baking. This will help firm up the butter and prevent too much spreading.
Are there any dietary considerations I should keep in mind?
Indeed! For egg allergies, use a flax egg (1 tablespoon flaxseed meal mixed with 2.5 tablespoons water) for the binding effect. For gluten sensitivities, simply substitute all-purpose flour with gluten-free all-purpose flour. And if you’re accommodating dairy-free diets, almond or oat milk paired with margarine will work wonderfully in this recipe.
Can I modify the flavors of the Hot Chocolate Cookies?
Very much so! You can customize these cookies to your taste. For instance, add a dash of cinnamon or a pinch of cayenne for a spicy twist. If you’d like a more intense chocolate flavor, swap semi-sweet chocolate chips for dark chocolate chips. Feel free to have fun and make it your own!
Decadent Hot Chocolate Cookies for a Cozy Holiday Treat
Ingredients
Equipment
Method
- Preheat your oven to 350°F (175°C) and line two baking sheets with parchment paper.
- In a large mixing bowl, combine softened butter, sugar, and brown sugar. Beat on medium speed until light and fluffy, about 2-3 minutes.
- Add the egg, milk, and vanilla extract, mixing until fully combined, about 1-2 minutes.
- Gradually sift in flour, cocoa mix, cocoa powder, baking soda, and salt. Mix on low speed just until combined.
- Stir in marshmallow bits and chocolate chips using a spatula until evenly distributed.
- Drop rounded portions of dough onto prepared baking sheets, spacing them about two inches apart.
- Bake for 8-10 minutes until cookies look soft but set around the edges.
- As soon as you remove the cookies from the oven, press additional marshmallow bits and chocolate chips on top.
- Allow the cookies to cool on the baking sheets for 5 minutes, then transfer them to a wire rack to cool completely.
Leave a Reply