
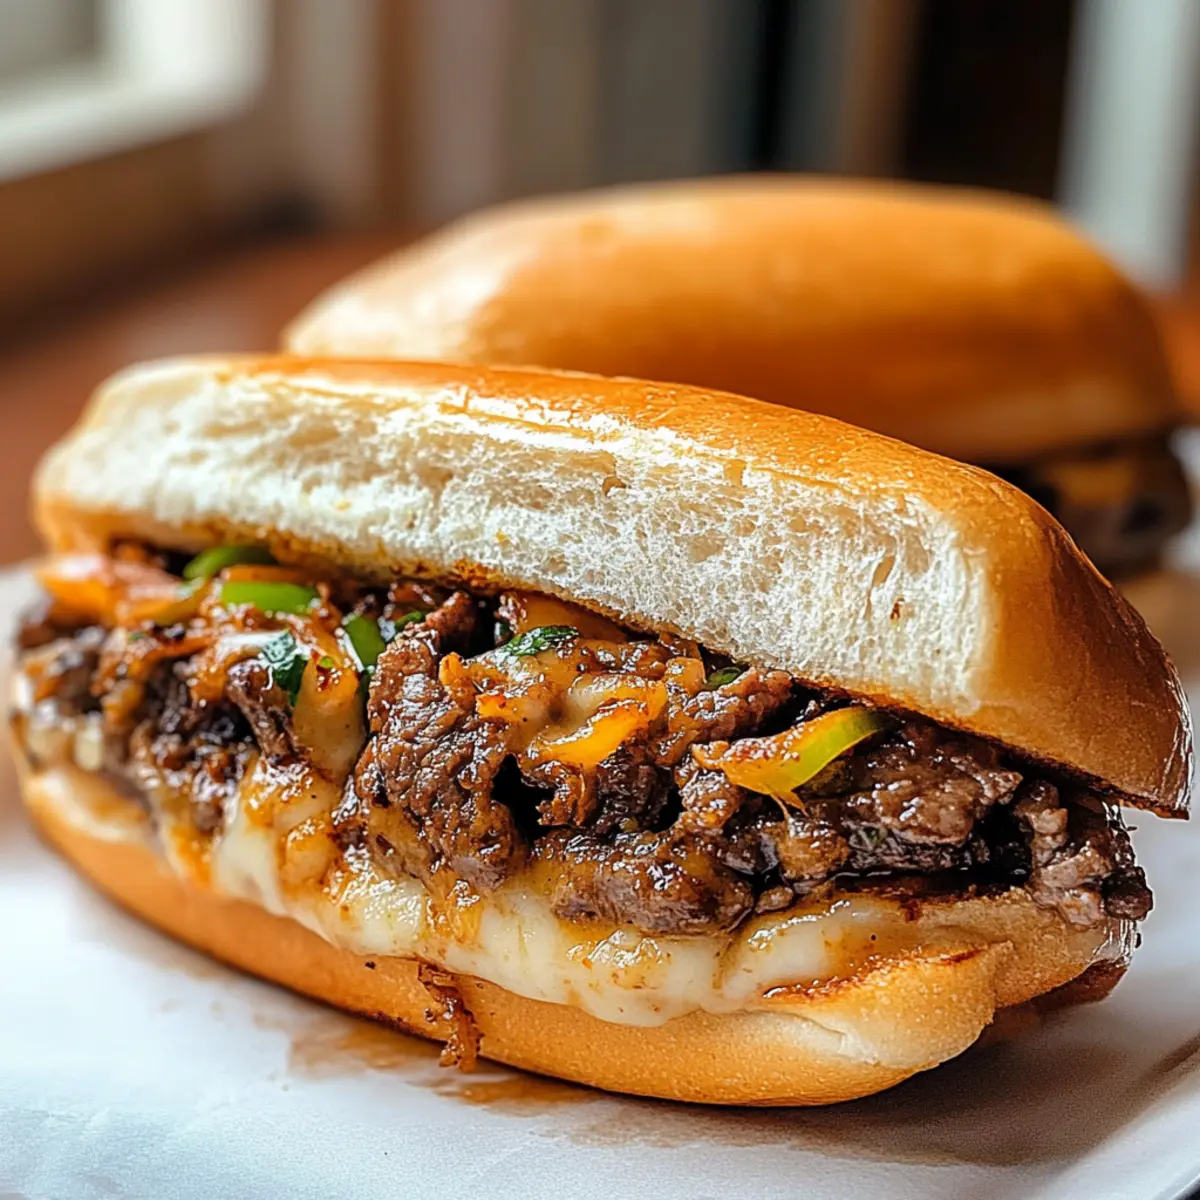
As I sifted through my pantry for a quick dinner solution, a spark of inspiration hit me: what if I married Korean flavors with a classic cheesesteak? Enter the Kimchi Bulgogi Cheesesteak! This fusion dish combines tender, marinated beef with the delightful crunch of fresh veggies and the layer of flavor that only kimchi can provide. Perfect for a game day celebration or a cozy weeknight meal, it’s not just quick to whip up, but also a customizable flavor bomb that will leave you craving more. So, what’s cooking in your kitchen tonight? Let’s dive into this tantalizing recipe together!
Why Try Kimchi Bulgogi Cheesesteak?
Bold flavors come together in this irresistible twist on a classic. With succulent beef marinated in savory seasonings, each bite bursts with richness and a kick from kimchi. Quick and customizable, this recipe allows you to swap in your favorite vegetables or proteins, like chicken or tofu, for a meal that suits everyone’s taste. Perfect for gatherings, easily double the recipe for a crowd or savor as a delightful solo dinner. And if you’re looking for side dish inspiration, pairing it with Cauliflower Rice Kimchi brings a fresh and healthy touch!
Kimchi Bulgogi Cheesesteak Ingredients
For the Beef
• Beef Sirloin – Slice thin for a tender and juicy texture.
• Soy Sauce – Provides a savory depth; low-sodium versions work for healthier choices.
• Sesame Oil – Adds a rich, nutty flavor; can substitute with canola oil if needed.
• Minced Garlic – Fresh garlic enhances flavor significantly; garlic powder works in a pinch.
• Sugar – Balances the savory elements; you can use honey as an alternative for a different sweetness.
For the Vegetables
• Onion (chopped) – Adds a natural sweetness and texture; yellow or red onions are great options.
• Bell Peppers (chopped) – Contributes color and crunch; any variety works, but jalapeños bring the heat!
• Kimchi (chopped) – Offers that spicy tang; opt for store-bought or whip up your own for freshness.
For the Assembly
• Hoagie Rolls – Fresh rolls are key for optimal texture; consider whole grain for a nutritious twist.
• Cheese (e.g., provolone or mozzarella) – Creamy toppings like these add richness; feel free to experiment with cheddar or pepper jack for extra flavor.
Step‑by‑Step Instructions for Kimchi Bulgogi Cheesesteak
Step 1: Prepare Ingredients
Begin by slicing the beef sirloin into thin strips, ensuring tenderness in your Kimchi Bulgogi Cheesesteak. Chop the onion and bell peppers, setting them aside to maintain freshness. This prep step is essential for a quick cooking process, allowing the vegetables to maintain their crunch when sautéed.
Step 2: Marinate Beef
In a mixing bowl, combine the sliced beef with soy sauce, sesame oil, minced garlic, and sugar. Toss well to coat the beef, then let it marinate for at least 15 minutes. This step enhances flavor absorption, resulting in a wonderfully savory base for your cheesesteak.
Step 3: Sauté Vegetables
Heat a skillet over medium-high heat and add a splash of oil. Once hot, add the chopped onions and bell peppers, and sauté for about 5 minutes until they soften and become slightly caramelized. This colorful mixture will add sweetness and texture to your Kimchi Bulgogi Cheesesteak.
Step 4: Cook Beef
Push the sautéed veggies to one side of the skillet, making room for the marinated beef. Add the beef to the hot pan and cook for approximately 5 minutes, stirring occasionally until browned and cooked through. This creates a delectable combination of beef and veggies that’s bursting with flavor.
Step 5: Incorporate Kimchi
Stir in the chopped kimchi and cook for an additional 2 minutes, allowing it to meld beautifully with the beef mixture. The tangy kimchi will infuse the filling with a spicy kick, enriching the flavors in your Kimchi Bulgogi Cheesesteak and elevating every bite.
Step 6: Assemble Sandwiches
Toast your hoagie rolls under the broiler until lightly crisp, exhibiting a golden color. Then, generously scoop the beef and veggie mixture onto each roll, ensuring the vibrant colors show. Top each sandwich with a slice of cheese, like provolone or mozzarella, for creamy richness.
Step 7: Broil for Melting Cheese
Return the assembled sandwiches to the broiler for about 2 minutes, keeping a close eye to prevent burning. The cheese should melt beautifully, creating a luscious layer that complements the savory beef and spicy kimchi perfectly. Your Kimchi Bulgogi Cheesesteak is now ready to enjoy!
Kimchi Bulgogi Cheesesteak Variations
Feel free to put your own spin on this recipe and explore a world of flavors!
- Dairy-Free: Substitute cheese with dairy-free alternatives like cashew cheese or avocado for creaminess without the dairy.
- Protein Swap: Use chicken, turkey, or tofu in place of beef for a different protein option that still delivers sumptuous flavor.
- Heat Level: Add diced jalapeños or a drizzle of sriracha to spice things up, tailoring the heat to your preference.
- Veggie Boost: Incorporate additional vegetables like mushrooms or zucchini for extra nutrition and delightful texture.
- Whole Grain Rolls: Opt for whole grain hoagie rolls for a heartier option or gluten-free rolls to cater to dietary needs.
- Smoky Flavor: Mix in some smoked paprika or liquid smoke for a deeper, smoky flavor that enhances the overall taste profile.
- Herb Infusion: Garnish the finished sandwiches with fresh cilantro or green onions for an aromatic lift and added fresh flavor.
And if you want to whip up something deliciously unique, try pairing your Cheesesteak with a side of Cauliflower Rice Kimchi for a light yet satisfying contrast, or explore mixing in some spicy kimchi within the filling for an even bolder choice!
Make Ahead Options
These Kimchi Bulgogi Cheesesteaks are perfect for busy weeknights! You can marinate the beef and chop the vegetables up to 24 hours in advance, storing them separately in the refrigerator to ensure your ingredients stay fresh. Just remember to seal the marinated beef in an airtight container to lock in flavor and prevent browning. On the day you plan to serve, sauté the prepped veggies and cook the marinated beef, then mix in the kimchi and assemble your sandwiches. Broil for 2 minutes just before serving for that melty, delicious finish. With these make ahead tips, you’ll have a scrumptious meal ready with minimal effort!
How to Store and Freeze Kimchi Bulgogi Cheesesteak
Fridge: Store leftover Kimchi Bulgogi Cheesesteak in an airtight container for up to 3 days. This keeps the flavors fresh while minimizing spoilage.
Freezer: For longer storage, freeze assembled sandwiches wrapped tightly in plastic wrap and foil. They can last up to 3 months without losing taste quality.
Reheating: To enjoy, thaw overnight in the fridge, then reheat in the oven at 350°F for about 10 minutes to maintain crispiness in the hoagie rolls.
Assembly Notes: If you have leftover filling, store it separately to prevent the rolls from getting soggy. Enjoy your delicious kimchi bulgogi cheesesteak even after a few days!
What to Serve with Kimchi Bulgogi Cheesesteak?
Elevate your dining experience with delightful side dishes that perfectly balance the bold flavors of this scrumptious sandwich.
- Crispy Sweet Potato Fries: Their sweet, tender bite complements the savory flavors of the cheesesteak, adding the perfect crunch. Plus, who doesn’t love fries?
- Light Cucumber Salad: A refreshing side that cuts through the richness of the meal, balancing each hearty bite with a crisp, cooling crunch.
- Pickled Vegetables: These tangy bites enhance the flavor profile of the cheesesteak, offering a zesty contrast that ignites your taste buds.
- Coleslaw: A creamy, tangy slaw adds texture while its slight sweetness harmonizes beautifully with the spicy kick of the kimchi.
- Kimchi on the Side: Amplify the excitement of each bite with extra kimchi, bringing a delightful kick and vibrant color to your plate.
- Sesame Noodles: Serve these alongside for a chewy, savory contrast. The nutty flavor of sesame will enhance the dish’s unique blend of tastes.
- Beer or Soju: Raise a glass of your favorite beer or traditional soju to accompany the meal, making every bite a celebration of flavors!
- Chocolate Brownies: For dessert, a fudgy brownie adds a sweet finish after the savory tang, leaving you with comforting, rich satisfaction.
Expert Tips for Kimchi Bulgogi Cheesesteak
• Slice Against the Grain: Ensure beef is sliced against the grain for maximum tenderness, making each bite easier to enjoy.
• Marination Time: Allow the beef to marinate for at least 15 minutes. This enhances flavor absorption, creating a tastier Kimchi Bulgogi Cheesesteak.
• Keep an Eye on the Broiler: Broil the assembled sandwiches for only about 2 minutes, and watch closely to prevent burning. Melting cheese should be perfect, not charred!
• Taste Before Serving: Always sample the beef and vegetable mixture before serving. Adjust seasoning to balance flavors; you want it just right!
• Customize Your Veggies: Feel free to swap in your favorite vegetables, like zucchini or mushrooms, to make the Kimchi Bulgogi Cheesesteak truly your own.
Kimchi Bulgogi Cheesesteak Recipe FAQs
How do I select the best beef for my Kimchi Bulgogi Cheesesteak?
Absolutely! When choosing beef, look for sirloin that is bright red and well-marbled for tenderness. Ask your butcher to slice it thinly if you’re unsure how to do it yourself. Freshness is key, so avoid any cuts that look dull or have dark spots.
How should I store leftover Kimchi Bulgogi Cheesesteak?
Leftovers can be stored in an airtight container in the fridge for up to 3 days. Just make sure to cool the sandwiches completely before sealing to maintain freshness. When ready to eat, reheat them in the oven at 350°F for about 10 minutes, ensuring they stay crisp and delicious!
Can I freeze Kimchi Bulgogi Cheesesteaks?
Yes, you can certainly freeze them! Wrap the assembled cheesesteaks tightly in plastic wrap and then in foil to prevent freezer burn. They can last up to 3 months. For reheating, thaw them overnight in the fridge and then bake or broil until heated through to maintain a delightful crunch.
What if I want to make this dish vegetarian?
The more the merrier! For a vegetarian option, substitute beef with tofu or seitan. Simply marinate it in the same soy sauce mixture and follow the cooking instructions as usual. Pairing it with extra vegetables, like zucchini or mushrooms, can add additional flavor and texture!
What should I do if my kimchi is too spicy?
Very understandable! If you find your kimchi adds too much heat, balance it out by incorporating more vegetables, like cucumbers or even avocado, into the filling. Another trick is to mix in a bit more cheese or a sweet glaze to mellow the spiciness. Adjusting to your taste is key!
Is there a specific diet I should follow while preparing this dish?
Definitely! If you have dietary restrictions, consider using low-sodium soy sauce and healthier oils like avocado oil. Opt for whole grain hoagie rolls for added fiber. If it’s a concern for pets or allergies, always ensure to keep any kimchi separate, as some ingredients may not be suitable for pets, like garlic.
Savor the Flavor: Kimchi Bulgogi Cheesesteak Delight
Ingredients
Equipment
Method
- Begin by slicing the beef sirloin into thin strips, ensuring tenderness.
- Chop the onion and bell peppers, setting them aside to maintain freshness.
- In a mixing bowl, combine the sliced beef with soy sauce, sesame oil, minced garlic, and sugar. Toss well and let marinate for 15 minutes.
- Heat a skillet over medium-high heat and add a splash of oil. Add the chopped onions and bell peppers, and sauté for about 5 minutes.
- Push the sautéed veggies to one side of the skillet, and add the marinated beef. Cook for about 5 minutes, stirring occasionally.
- Stir in the chopped kimchi and cook for an additional 2 minutes, allowing it to meld with the beef mixture.
- Toast hoagie rolls under the broiler until lightly crisp. Scoop the beef and veggie mixture onto each roll, adding cheese on top.
- Return the sandwiches to the broiler for 2 minutes until cheese melts, then serve and enjoy!
Leave a Reply