
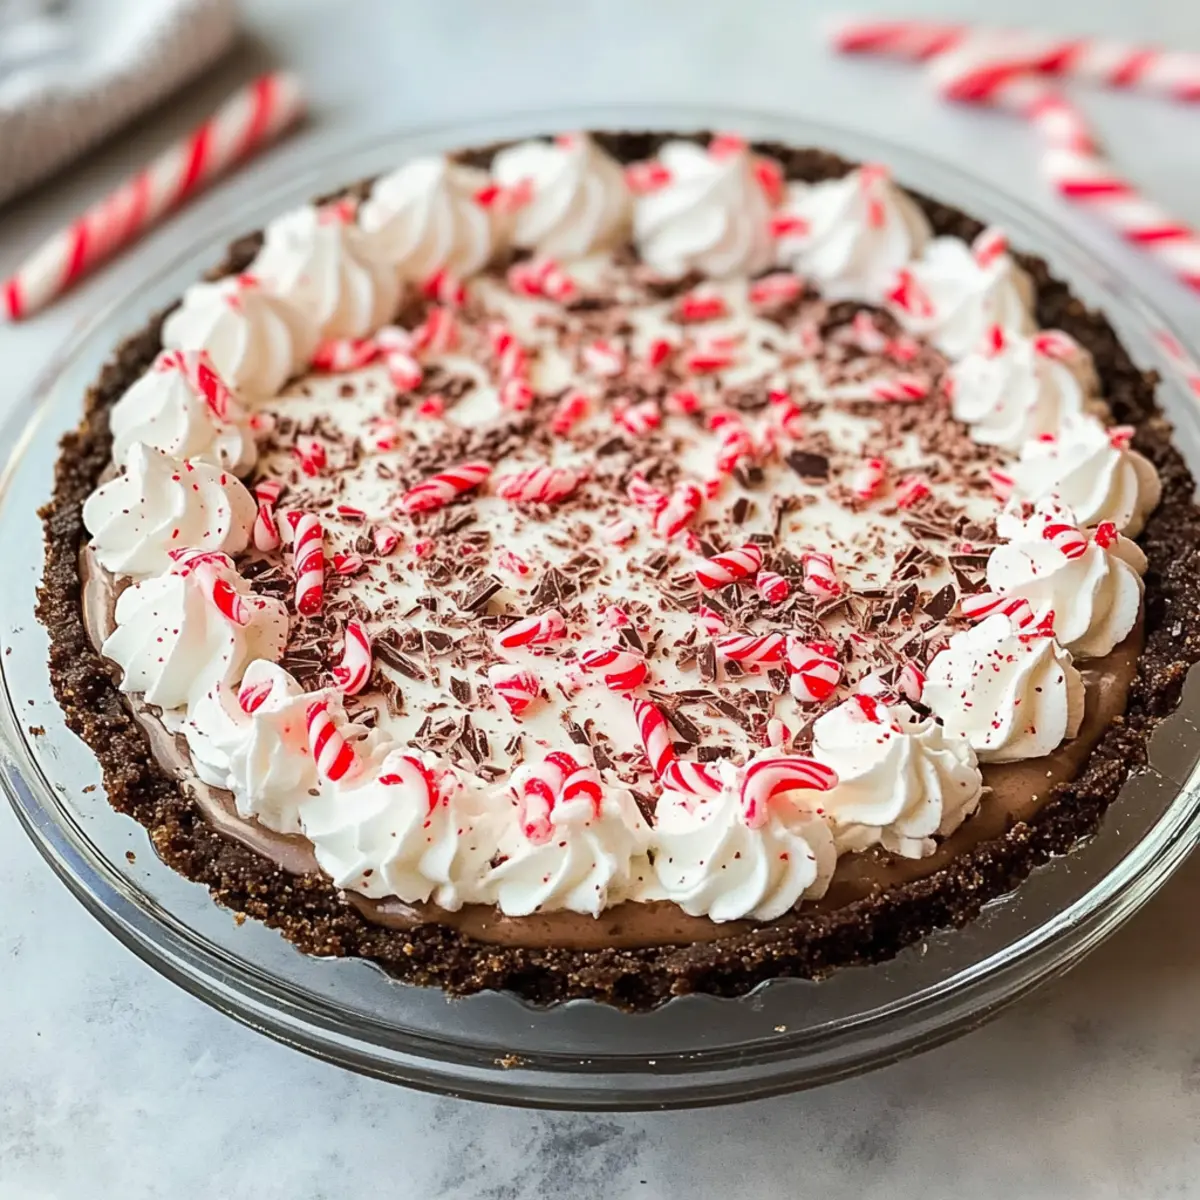
As the first hints of winter chill fill the air, there’s something undeniably cozy about curling up with a slice of Peppermint Mocha Pie. This no-bake dessert is the perfect way to celebrate the season, combining rich chocolate and refreshing peppermint for a festive experience that’s sure to impress. Plus, it’s incredibly easy to whip together, making it a delightful option for both seasoned bakers and kitchen novices alike. Whether you’re bringing it to a holiday gathering or enjoying a quiet evening at home, this pie adds a touch of elegance to any occasion. Are you ready to dive into the comforting world of chocolate and mint? Let’s get started!
Why is Peppermint Mocha Pie irresistible?
Decadent, Chocolatey Goodness: This pie boasts a luscious combination of rich chocolate and festive peppermint that will melt in your mouth.
No-Bake Convenience: Skip the oven! This simple recipe allows you to create a stunning dessert without any baking fuss.
Crowd-Pleasing Delight: Perfect for holiday parties, this pie impresses guests and family alike. Pair it with coffee or cocoa for the ultimate treat!
Versatile Flavor Options: Feeling adventurous? Try swapping the peppermint extract for vanilla to create your own unique spin, or go gluten-free by using a gluten-friendly cookie for the crust.
Satisfy your sweet tooth and make holiday gatherings memorable with this delightful Peppermint Mocha Pie, a true showstopper!
Peppermint Mocha Pie Ingredients
For the Chocolate Crust
• Chocolate Crust – Provides a rich, chocolatey base that pairs perfectly with the filling; save time by using a pre-made crust.
For the Filling
• Heavy Cream – Adds a luxurious creaminess; remember to whip it when cold for the best texture.
• Powdered Sugar – Sweetens the filling without the graininess of granulated sugar, making the dessert smooth and delectable.
• Espresso Powder – Deepens the chocolate flavor; you can substitute it with instant coffee powder if desired.
• Chocolate Chips (Milk/Dark) – The primary flavor source for the filling; opt for dark chocolate if you love rich flavors.
• Peppermint Extract – Infuses that classic mint flavor; if you prefer, vanilla extract makes an excellent alternative.
For Garnishing
• Whipped Topping – Adds a light, airy finish; try homemade whipped cream for a personal touch.
• Crushed Candy Canes – Brings a festive crunch and visual appeal, making this pie truly holiday-ready and irresistible.
Now, let’s dive into crafting your delightful Peppermint Mocha Pie and share the joy of homemade festivities!
Step‑by‑Step Instructions for Peppermint Mocha Pie
Step 1: Prepare the Crust
Start by preheating your oven to 350°F (175°C). If you’re using a pre-made chocolate crust, bake it according to the package instructions until it’s crisp, about 8-10 minutes. Once it’s done, remove it from the oven and let it cool completely on a wire rack to ensure it holds up the pie filling beautifully.
Step 2: Make the Filling
In a large mixing bowl, pour in the heavy cream. Using an electric mixer, whip it on medium speed until soft peaks begin to form, approximately 2-3 minutes. Gradually add the powdered sugar and espresso powder while the mixer is running, blending until combined. This delightful mixture will provide a rich base for your Peppermint Mocha Pie.
Step 3: Melt Chocolate
Grab a microwave-safe bowl and add your chocolate chips. Microwave on high in 30-second intervals, stirring between each, until the chocolate is completely smooth and melted—this should take about 1-2 minutes in total. Be careful not to overheat the chocolate, as it can scorch easily.
Step 4: Combine Mixtures
Carefully pour the melted chocolate into the whipped cream mixture. Gently fold the chocolate in using a spatula, being cautious not to deflate the whipped cream. Once well-combined, add the peppermint extract and give it one last gentle stir to infuse that delightful minty flavor into your Peppermint Mocha Pie filling.
Step 5: Assemble the Pie
Pour the luscious filling into your cooled chocolate crust, using a spatula to smooth the top evenly. Cover the pie with plastic wrap and place it in the refrigerator to chill for at least 4 hours or overnight. This step is vital, as it allows the filling to set properly, resulting in a creamy, delightful texture.
Step 6: Serve
When you’re ready to serve your Peppermint Mocha Pie, remove it from the refrigerator. Top it with a generous layer of whipped topping and sprinkle crushed candy canes over the top for a festive finish. Slice the pie, serve it to your delighted guests, and bask in the compliments of this easy, no-bake dessert!
What to Serve with Peppermint Mocha Pie
Enhance your festive gathering with complementary treats that beautifully balance the flavors of this delightful dessert.
- Rich Hot Cocoa: Warm, creamy cocoa with a hint of vanilla enhances the peppermint flavors while providing cozy vibes. Perfect for a holiday evening with family!
- Espresso Coffee: The boldness of espresso stands up to the pie’s sweetness, creating a delightful contrast that’s perfect for coffee lovers.
- Spiced Ginger Cookies: These cookies add a chewy, spicy warmth, creating a comforting experience alongside the cool minty pie.
- Chocolate Mint Chip Ice Cream: The creamy mint ice cream echoes the pie’s flavors while adding a deliciously cold element to your dessert table.
- Classic Cheesecake: A rich, creamy cheesecake can be a delightful yet contrasting dessert choice, balancing the lightness of the peppermint pie. Serve with a berry compote for an extra pop!
- Festive Fruit Salad: Fresh, tart fruits like berries and pomegranates lift the palate and add a refreshing crunch, making for a well-rounded meal.
- Sparkling Cider: Light and bubbly cider brings a festive touch, pairing well with both the richness of the pie and the holiday spirit. It’s a non-alcoholic favorite that everyone can enjoy!
Expert Tips for Peppermint Mocha Pie
- Chill Thoroughly: Ensure the pie sets in the fridge for at least 4 hours or overnight. This is key for achieving the perfect creamy texture.
- Perfectly Whip: When whipping heavy cream, stop at soft peaks to keep the filling light and airy. Over-whipping can lead to a grainy texture.
- Careful Chocolate Melting: Melt chocolate chips in short bursts, stirring frequently to prevent scorching. Smooth chocolate is crucial for a tasty filling.
- Filling Flavor Flexibility: Feel free to adjust the peppermint extract based on your preference; less gives a subtle hint, while more creates a stronger mint flavor in the Peppermint Mocha Pie.
- Candy Cane Crunch: Adding crushed candy canes not only enhances visual appeal but also provides a satisfying crunch; don’t skip this festive touch!
Make Ahead Options
These Peppermint Mocha Pies are perfect for meal prep, saving you time during the busy holiday season! You can prepare the chocolate crust up to 3 days in advance — just store it in an airtight container at room temperature. The filling can also be made ahead; whip the cream and mix with the chocolate up to 24 hours prior to serving, refrigerating it until you’re ready to assemble. To maintain its delightful texture, avoid over-mixing when you fold the chocolate into the cream. When it’s time to serve, simply pour the filling into the crust, refrigerate until set, and top with whipped cream and crushed candy canes. This simple prep lets you enjoy your festivities with minimal stress!
Peppermint Mocha Pie Variations
Feel free to adjust the recipe to match your tastes and dietary needs while still savoring the delightful flavors!
-
Vanilla Twist: Swap peppermint extract for vanilla or almond extract to create a warmer flavor profile, perfect for those who may not enjoy mint.
-
Gluten-Free: Use gluten-free cookies for the crust, ensuring everyone at your holiday gathering can enjoy this decadent dessert.
-
Chocolate Variety: Experiment with different types of chocolate chips—dark for rich flavors, semi-sweet for balance, or even white chocolate for a sweeter pie.
-
Decadent Layering: Consider adding a layer of chocolate ganache on the bottom of the crust before pouring in the filling for extra indulgence.
-
Nutty Crunch: Incorporate crushed nuts like pecans or walnuts into the crust for a crunchy, buttery twist that complements the pie beautifully.
-
Spice It Up: Mix in a pinch of cinnamon or nutmeg into the filling to add a hint of warmth and spice, elevating the festive flavor.
-
Dairy-Free Delight: For a dairy-free version, substitute heavy cream with coconut cream and use dairy-free chocolate chips.
-
Double the Flavor: Enhance the espresso flavor by using brewed espresso instead of espresso powder for a bolder taste experience, especially for coffee lovers.
Whether you’re adapting for guests or just exploring flavors, these twists will help you enjoy your White Chocolate Peppermint or White Chocolate Peppermint treats in new ways!
Storage Tips for Peppermint Mocha Pie
Fridge: Store leftovers in an airtight container in the refrigerator for up to 5 days. This helps maintain the creamy texture of the Peppermint Mocha Pie.
Freezer: If you’d like to keep it longer, wrap the pie tightly in plastic wrap and aluminum foil, then freeze for up to 2 months. Thaw overnight in the fridge before serving.
Reheating: Reheating isn’t necessary for this no-bake pie; simply enjoy it chilled. You can add fresh whipped cream or a sprinkle of crushed candy canes for a delightful touch.
Serving Suggestions: Remember to garnish just before serving to ensure the presentation is as festive as the taste!
Peppermint Mocha Pie Recipe FAQs
How do I choose ripe ingredients for the Peppermint Mocha Pie?
While this recipe primarily uses processed ingredients like chocolate chips and powdered sugar, ensuring your heavy cream is fresh is crucial. Check the expiration date and ensure the cream is cold before whipping for the best results.
How should I store leftover Peppermint Mocha Pie?
Store any leftovers in an airtight container in the refrigerator for up to 5 days. This will maintain its creamy texture and delightful flavor. If you have a large amount of pie left, you can also wrap it tightly in plastic wrap and aluminum foil for freezing.
Can I freeze Peppermint Mocha Pie?
Absolutely! To freeze, first let the pie cool completely in the refrigerator. Then, wrap it tightly in plastic wrap followed by aluminum foil. It will keep well in the freezer for up to 2 months. When you’re ready to enjoy it, thaw in the fridge overnight before serving.
What should I do if my filling is too runny?
If your filling appears too runny, it might be due to insufficient whipping of the heavy cream or not allowing it to chill long enough. Ensure that the cream is whipped to soft peaks before mixing in the chocolate. To remedy this, re-chill the pie for an additional hour or so, allowing the filling to set more.
Are there any allergy considerations I should be aware of with this recipe?
Yes, this recipe contains dairy and chocolate, both of which are common allergens. If you need to accommodate allergies, consider using lactose-free heavy cream and dairy-free chocolate chips. Also, be mindful of the crushed candy canes, as some brands may contain allergens like gluten or nuts; check packaging for details.
Can pets have any of the ingredients in the Peppermint Mocha Pie?
No, many ingredients in this pie, such as chocolate and certain sweeteners, are toxic to dogs and cats. It’s best to keep this dessert out of reach of pets and ensure they enjoy their own pet-friendly treats instead.
Indulge in Peppermint Mocha Pie: Easy No-Bake Delight
Ingredients
Equipment
Method
- Preheat your oven to 350°F (175°C). If you're using a pre-made chocolate crust, bake it according to the package instructions for 8-10 minutes. Let it cool completely on a wire rack.
- In a large mixing bowl, pour in the heavy cream and whip on medium speed until soft peaks form, approximately 2-3 minutes. Gradually add the powdered sugar and espresso powder until combined.
- Melt chocolate chips in a microwave-safe bowl in 30-second intervals, stirring between each, until smooth (about 1-2 minutes).
- Pour the melted chocolate into the whipped cream mixture and gently fold it in. Add peppermint extract and stir gently.
- Pour the filling into the cooled chocolate crust, smoothing the top. Cover with plastic wrap and refrigerate for at least 4 hours or overnight.
- Remove from the refrigerator and top with whipped topping and crushed candy canes. Slice and serve.
Leave a Reply