
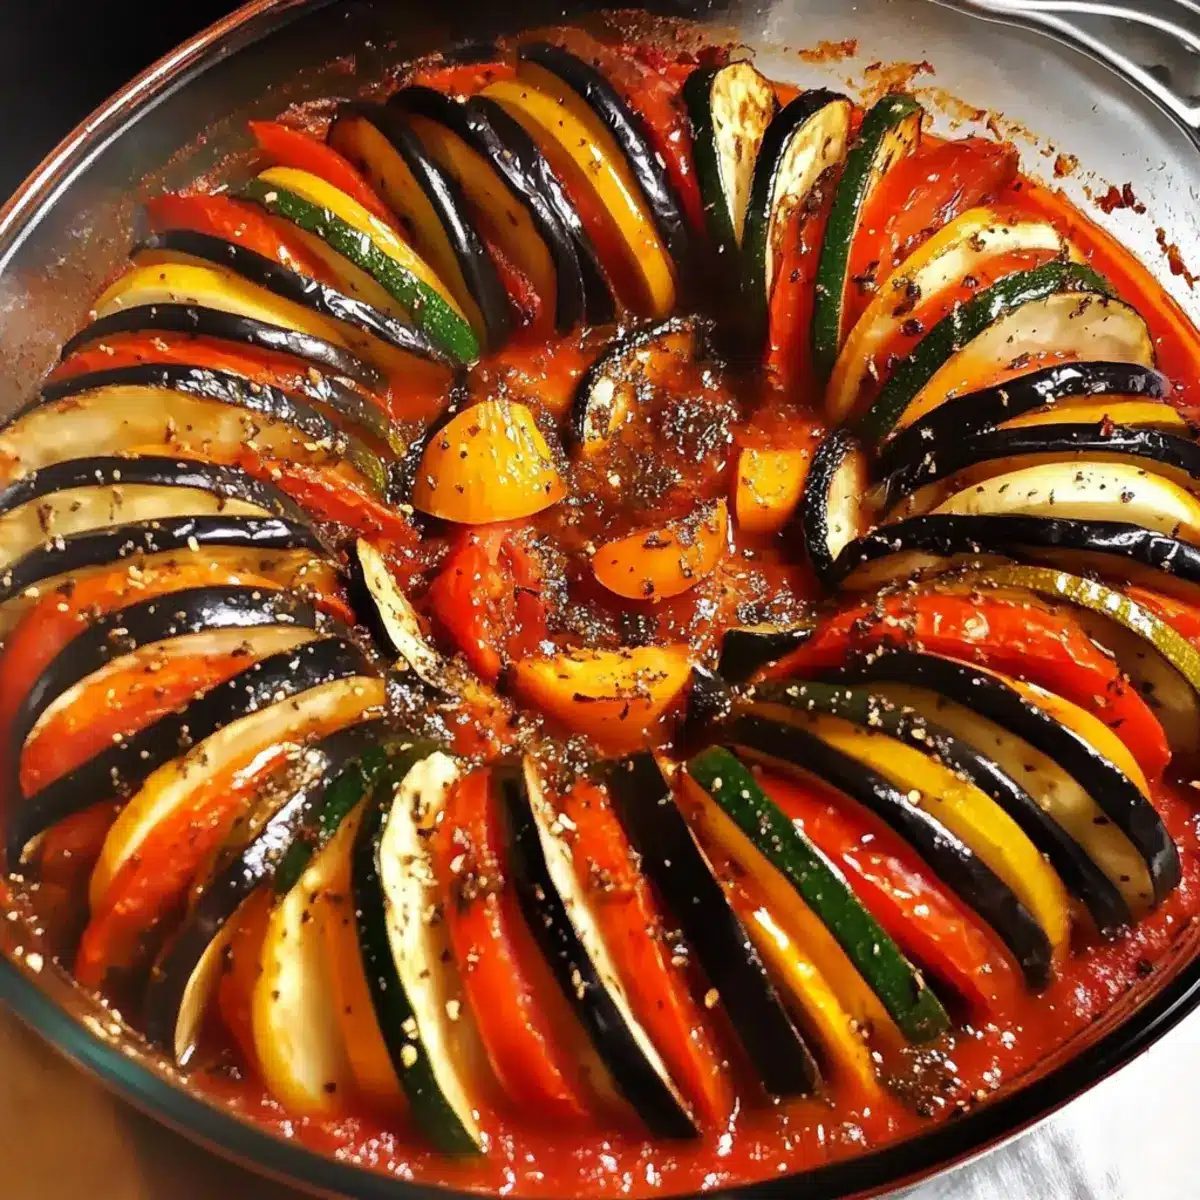
As I lifted the lid of my oven, a wave of warmth and the sweet, earthy aroma of roasted vegetables enveloped me like a cozy blanket. My Oven-Roasted Ratatouille brimming with vibrant colors soon became a meal I couldn’t wait to share. This dish isn’t just a celebration of fresh garden vegetables; it’s a delightful way to turn leftovers into a healthy, low-calorie masterpiece that embodies the heart of French cuisine. Not only is it quick to prepare, but it also shines as a versatile main or side dish, perfect for light dinners or hearty gatherings. Each bite is a testament to how simple ingredients can transform into something truly special. Are you ready to make dinner magic? Let’s dive into this colorful culinary experience!

Why Is Roasted Ratatouille So Amazing?
Vibrant colors dance across your plate, making this dish a feast for the eyes as well as the palate. Health-conscious eaters will appreciate that it’s not only low-calorie but also packed with nutrients from fresh garden veggies. Easy preparation means you can whip this up in no time, making it a perfect choice for busy weeknights. Versatile serving options allow you to enjoy it as a main dish or paired with grilled chicken, crusty bread, or even fresh eggs for breakfast. Finally, waste not, want not—this recipe is a wonderful way to utilize leftover vegetables, turning what might go to waste into a delightful meal. Get ready to savor every delicious bite of this French-inspired masterpiece!
Roasted Ratatouille Ingredients
• Explore the delightful flavors in every bite.
For the Vegetables
- Large Eggplant – Provides rich flavor and texture; substitute with zucchini for a lighter dish.
- Large Zucchini – Adds moisture and a mild flavor; yellow zucchini can bring a sweeter taste.
- Large Yellow Squash – Brings sweetness and vibrant color; use more zucchini or eggplant as a substitute.
- Large Onion – Contributes sweetness and depth; yellow or white onions can work just as well.
- Roma Tomatoes – Offers tanginess and moisture based; you can substitute with other tomato types while keeping the texture by skinning and seeding.
For the Sauce
- 14.5-ounce Can of Tomato Sauce – Forms the base of the dish, adding moisture and flavor; opt for homemade sauce for a fresh taste.
- Italian Seasoning – Infuses the Ratatouille with traditional Mediterranean flavors; fresh herbs like thyme or oregano can be used as a substitute if desired.
- ½ teaspoon Sweet Basil – Provides a hint of sweetness; can be excluded or replaced with dried basil if you don’t have fresh.
- 1 teaspoon Salt – Enhances overall flavors; feel free to adjust to taste based on any dietary needs.
- Black Pepper – Adds a nice hint of spice; use according to your taste preference.
For the Finish
- Olive Oil – Enhances flavor and promotes an even roast; avocado oil can be used for a unique twist.
- Freshly Grated Parmesan – This garnish adds a creamy touch; feel free to omit or substitute with nutritional yeast for a vegan option.
Enjoy crafting your beautiful Roasted Ratatouille!
Step‑by‑Step Instructions for Roasted Ratatouille
Step 1: Preheat the Oven
Start by preheating your oven to 350°F (175°C). This ensures it’s hot enough to roast your vegetables evenly. While the oven heats, gather your baking dish, knife, and cutting board. The warmth that fills your kitchen will inspire you as you prepare to create this vibrant roasted ratatouille.
Step 2: Prepare the Vegetables
Rinse and slice the large eggplant, zucchini, yellow squash, onion, and Roma tomatoes into thin coins, about ⅛ to ¼ inch thick. This uniform thickness will help them cook evenly. As you cut, the colorful array of vegetables will promise a delightful combination of flavors in your ratatouille.
Step 3: Mix the Sauce
In a medium bowl, combine the 14.5-ounce can of tomato sauce with Italian seasoning, sweet basil, and salt. Stir well until the seasonings are fully incorporated into the sauce, creating a fragrant mixture that will enhance the flavors of your roasted vegetables. This mixture will form the flavorful base of your roasted ratatouille.
Step 4: Pour the Sauce into the Dish
Pour the seasoned tomato sauce evenly into the bottom of your prepared baking dish. You should see the rich red sauce coating the bottom, ready to support the flavorful layers above. Make sure the sauce is spread out for even coverage so that all vegetables soak in those wonderful flavors as they roast.
Step 5: Layer the Vegetables
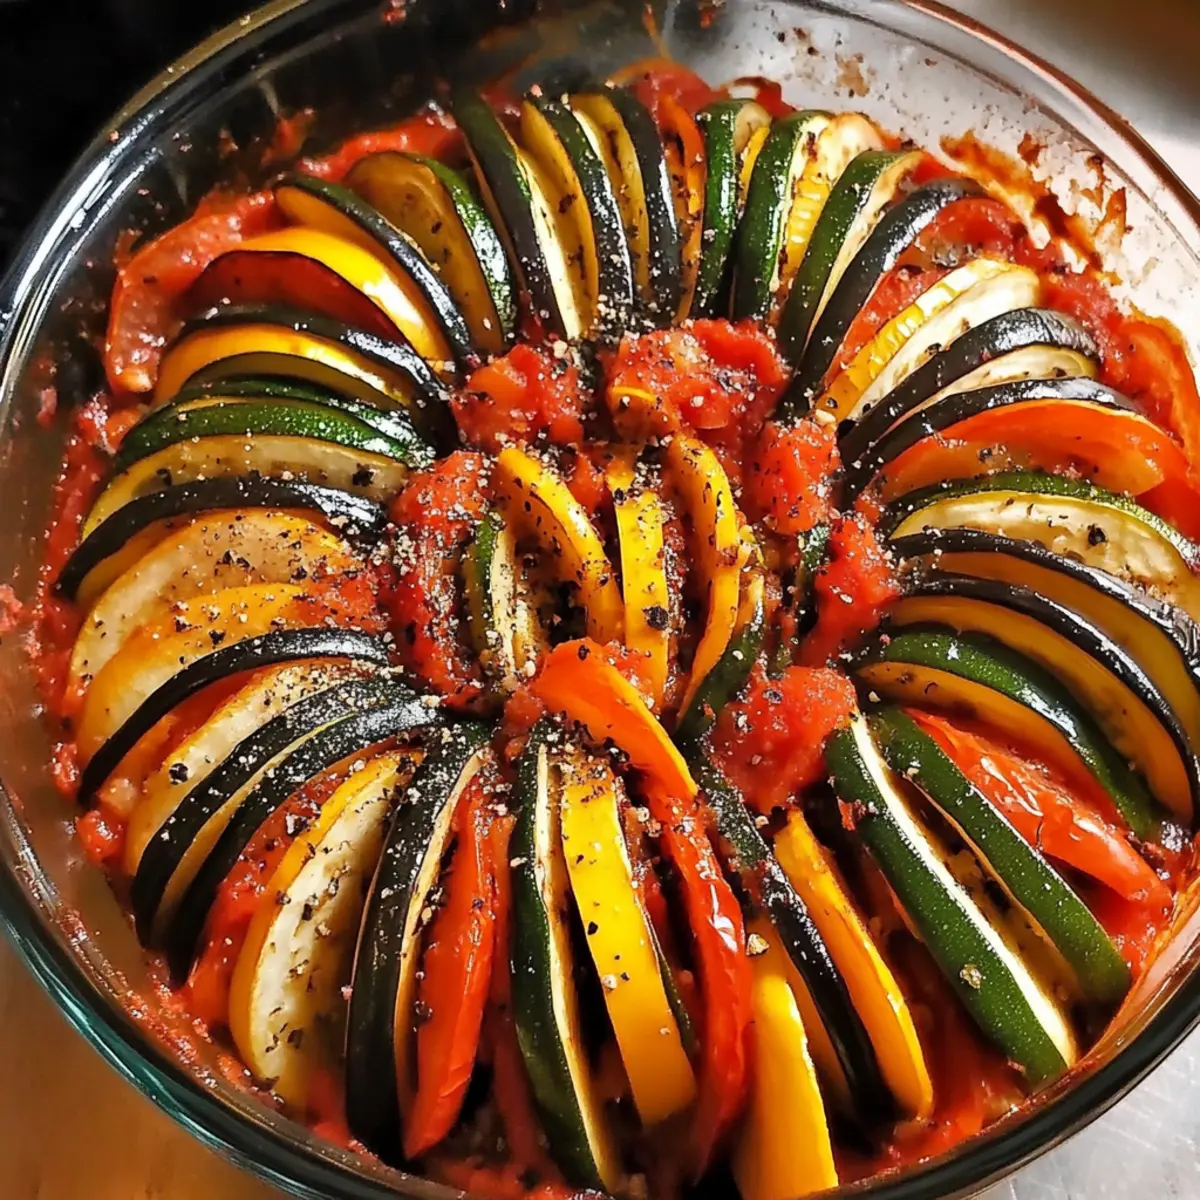
Begin layering the sliced vegetables over the sauce in a circular pattern, alternating colors for a visually striking presentation. Each layer should fit snugly but not be overly packed. This beautiful arrangement not only enhances the dish’s appearance but also ensures each bite is packed with the delightful essence of roasted ratatouille.
Step 6: Drizzle with Olive Oil and Season
Drizzle olive oil generously over the layered vegetables and season with additional salt and black pepper to taste. The olive oil will help the vegetables caramelize beautifully in the oven, giving them that sought-after golden-brown finish. The enticing aroma of roasting vegetables will soon fill your home, making your meal even more inviting.
Step 7: Bake the Ratatouille
Place the baking dish in the preheated oven and bake for 55-60 minutes. Keep an eye on it; the vegetables should become tender and the sauce should bubble around the edges as they roast. When done, they’ll be perfectly cooked through while still retaining a slight bite, creating a comforting medley of textures.
Step 8: Add the Finishing Touch
Remove the ratatouille from the oven and sprinkle freshly grated Parmesan over the top just before serving. The cheese will melt slightly from the residual heat, adding a creamy finish that complements the roasted vegetables beautifully. This final touch elevates your roasted ratatouille, making it a sensational dish ready to impress.
Expert Tips for Roasted Ratatouille
-
Slice Uniformly: Ensure even cooking by slicing your vegetables into ⅛ to ¼ inch thick coins. This prevents undercooked pieces and enhances the overall texture of your roasted ratatouille.
-
Layer for Flavor: Layer the vegetables in a circular pattern to promote visual appeal and even roasting. Alternate colors for a stunning presentation that entices everyone at the table.
-
Marination Idea: Enhance the flavor by marinating sliced vegetables in olive oil and seasonings for a few hours or even overnight. This helps each bite burst with delicious taste!
-
Monitor Baking Time: Every oven is different! Keep an eye on your ratatouille as it bakes, looking for tender vegetables and bubbling sauce. Making small adjustments to baking time can lead to perfection.
-
Storage Tip: Store leftovers in an airtight container for up to 4-5 days. This roasted ratatouille also tastes fantastic reheated, ensuring no deliciousness goes to waste!
What to Serve with Oven-Roasted Ratatouille
Enhance your dining experience by exploring delightful pairings that complement this beautiful, colorful dish.
-
Crusty French Bread: Perfect for sopping up the rich tomato sauce and adds a delightful crunch. A warm, toasted loaf elevates your meal to authentic French bistro fare.
-
Quinoa Salad: Light and nutty, this fresh salad is a fantastic contrast to the hearty ratatouille. Tossed with lemon, herbs, and cucumbers, it introduces a refreshing element to each bite.
-
Grilled Chicken: If you’re craving protein, tender grilled chicken adds succulent flavor to your platter. Its subtle seasoning won’t overpower the comforting taste of the ratatouille.
-
Fresh Garden Salad: A simple mix of greens with a zesty vinaigrette brings brightness to the table, balancing the warmth of the ratatouille with crisp freshness.
-
Sparkling Water with Lemon: Refreshing and palate-cleansing, a bubbly drink enhances the meal without overshadowing the delicious flavors. It elevates even the simplest dinner experience.
-
Chocolate Mousse: Indulge in a light, airy dessert that perfectly wraps up the meal. The richness of the mousse complements the savory notes of the ratatouille, leaving a sweet note to remember.
Enjoy these pairings and take your roasted ratatouille to a blissful culinary adventure!
Roasted Ratatouille Variations & Substitutions
Feel free to let your creativity shine and tailor this ratatouille recipe to your taste buds and dietary needs!
- Dairy-Free: Replace freshly grated Parmesan with nutritional yeast for a cheesy flavor without the dairy.
- Extra Veggies: Add chopped bell peppers or carrots to boost the nutrient content and add vibrant color.
- Pasta Lover’s Delight: Toss the roasted ratatouille with cooked pasta for a delightful, hearty meal that’s sure to satisfy.
- Herbaceous Twist: Incorporate fresh herbs like thyme or rosemary for an aromatic flair that elevates the traditional flavors.
- Low-Carb Option: Serve over cauliflower rice instead of pasta to keep it light and low in carbohydrates.
- Spicy Kick: For those who enjoy heat, sprinkle some crushed red pepper flakes before roasting or add fresh chili peppers to the vegetable mix.
- Zucchini Noodles: Swap out pasta for spiralized zucchini noodles to keep it veggie-focused while adding a fun texture.
- Mediterranean Flair: Drizzle with a tahini sauce or sprinkle feta cheese on top after baking for a Mediterranean twist that’ll tantalize your taste buds.
Feel free to explore the endless possibilities! If you want a little inspiration, consider serving it alongside some crusty bread or a refreshing salad to complete your meal.
Make Ahead Options
These Oven-Roasted Ratatouille components are perfect for busy home cooks looking to save time during the week! You can slice all your vegetables (eggplant, zucchini, yellow squash, onion, and Roma tomatoes) up to 24 hours ahead and store them in an airtight container in the refrigerator to keep them fresh. Additionally, prepare the tomato sauce by mixing it with the Italian seasoning and sweet basil, which can also be made up to 3 days in advance and refrigerated. To maintain quality, drizzle olive oil just before baking, and when you’re ready to enjoy, simply layer the vegetables over the sauce, bake as directed, and savor the comforting flavors of your homemade Roasted Ratatouille!
How to Store and Freeze Roasted Ratatouille
Fridge: Store cooled roasted ratatouille in an airtight container for up to 4-5 days. Simply reheat in the microwave or on the stovetop before serving.
Freezer: For longer storage, freeze the ratatouille in a freezer-safe container for up to 3 months. Allow to cool completely before sealing to prevent ice crystals.
Thawing: When ready to enjoy, thaw overnight in the refrigerator. Reheat slowly on the stovetop or in the oven until heated through, preserving that delightful texture.
Reheating: Gently warm the roasted ratatouille in a skillet over low heat, stirring occasionally. This helps keep the flavors vibrant and ensures an enjoyable eating experience.
Oven-Roasted Ratatouille Recipe FAQs
What should I look for when selecting vegetables for ratatouille?
Absolutely! When choosing vegetables, look for ones that are firm and free from dark spots or blemishes. The eggplant should feel heavy for its size, and the zucchini and yellow squash should be smooth and shiny. Fresh Roma tomatoes should have a vibrant color and a slight give when gently pressed. It’s best to use seasonal, fresh vegetables for the most flavorful ratatouille!
How should I store leftovers of the Oven-Roasted Ratatouille?
Very! Store cooled leftovers in an airtight container in the refrigerator for up to 4-5 days. Make sure the dish is completely cooled before sealing it; this helps prevent moisture buildup inside. Reheating can be done in the microwave or on the stovetop until heated through, ready to enjoy those delicious flavors again!
Can I freeze Oven-Roasted Ratatouille?
Absolutely! To freeze your delicious ratatouille, first allow it to cool completely. Transfer it to a freezer-safe container, leaving some space at the top to allow for expansion. It can be frozen for up to 3 months. When you’re ready to enjoy it, thaw the dish overnight in the refrigerator and reheat gently on the stovetop or in the oven.
What should I do if my vegetables are overcooked or mushy?
No worries! If your vegetables turn out mushy, it could be due to slicing them too thin or baking for too long. Try slicing them thicker next time, about ¼ inch, to maintain some bite. For adjustments, you might also check your oven’s temperature accuracy. Always keep an eye on the ratatouille during baking and use a timer to gauge doneness for perfectly tender veggies.
Is Oven-Roasted Ratatouille safe for pets or those with food allergies?
That’s a great question! While Oven-Roasted Ratatouille contains many healthy ingredients, it’s important to note that some vegetables (like onions) can be harmful to pets. Ensure to keep it away from them! For individuals with food allergies, be cautious with olive oil and grated Parmesan, as dairy can be a common allergen. Always consult with your physician for any dietary restrictions.
Can I add more vegetables or ingredients to the ratatouille?
The more the merrier! Incorporating more vegetables is a fantastic way to add nutrition and flavor. Feel free to add bell peppers, mushrooms, or even carrots for sweetness. Just make sure to adjust the cooking time if you’re adding larger or denser vegetables, as they may require a bit more time in the oven to become tender!

Vibrant Roasted Ratatouille Bursting with Garden Fresh Flavor
Ingredients
Equipment
Method
- Preheat your oven to 350°F (175°C). Gather your baking dish, knife, and cutting board.
- Rinse and slice the eggplant, zucchini, yellow squash, onion, and Roma tomatoes into thin coins, about ⅛ to ¼ inch thick.
- In a medium bowl, combine the tomato sauce with Italian seasoning, sweet basil, and salt; stir well.
- Pour the seasoned tomato sauce evenly into the bottom of your prepared baking dish.
- Layer the sliced vegetables over the sauce in a circular pattern, alternating colors.
- Drizzle olive oil over the layered vegetables and season with additional salt and black pepper to taste.
- Place the baking dish in the preheated oven and bake for 55-60 minutes.
- Remove from the oven and sprinkle freshly grated Parmesan over the top before serving.
Leave a Reply