
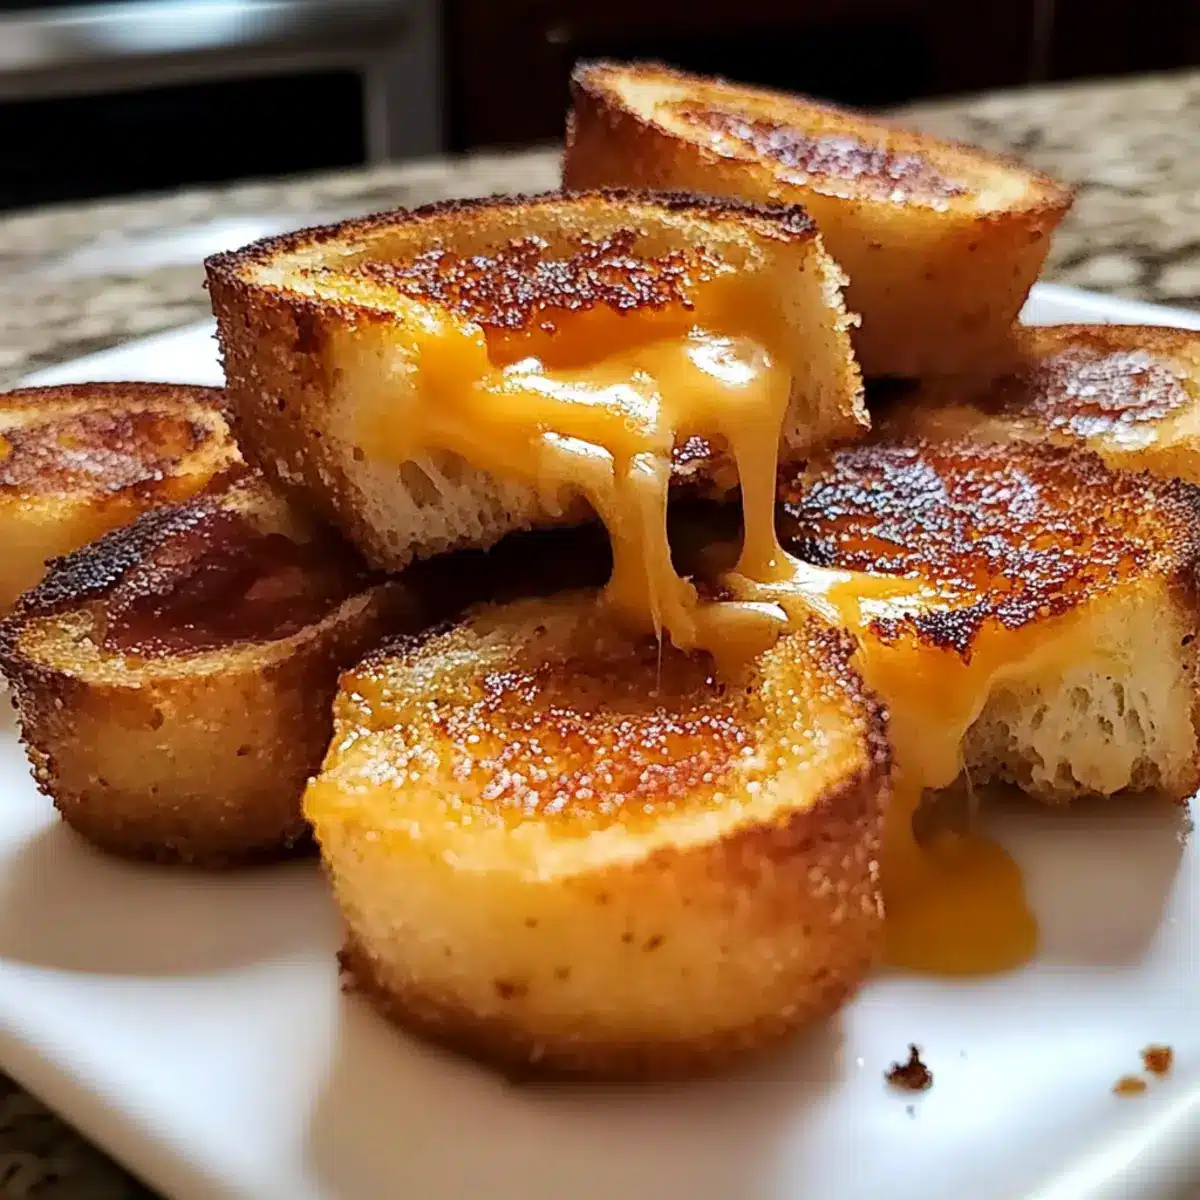
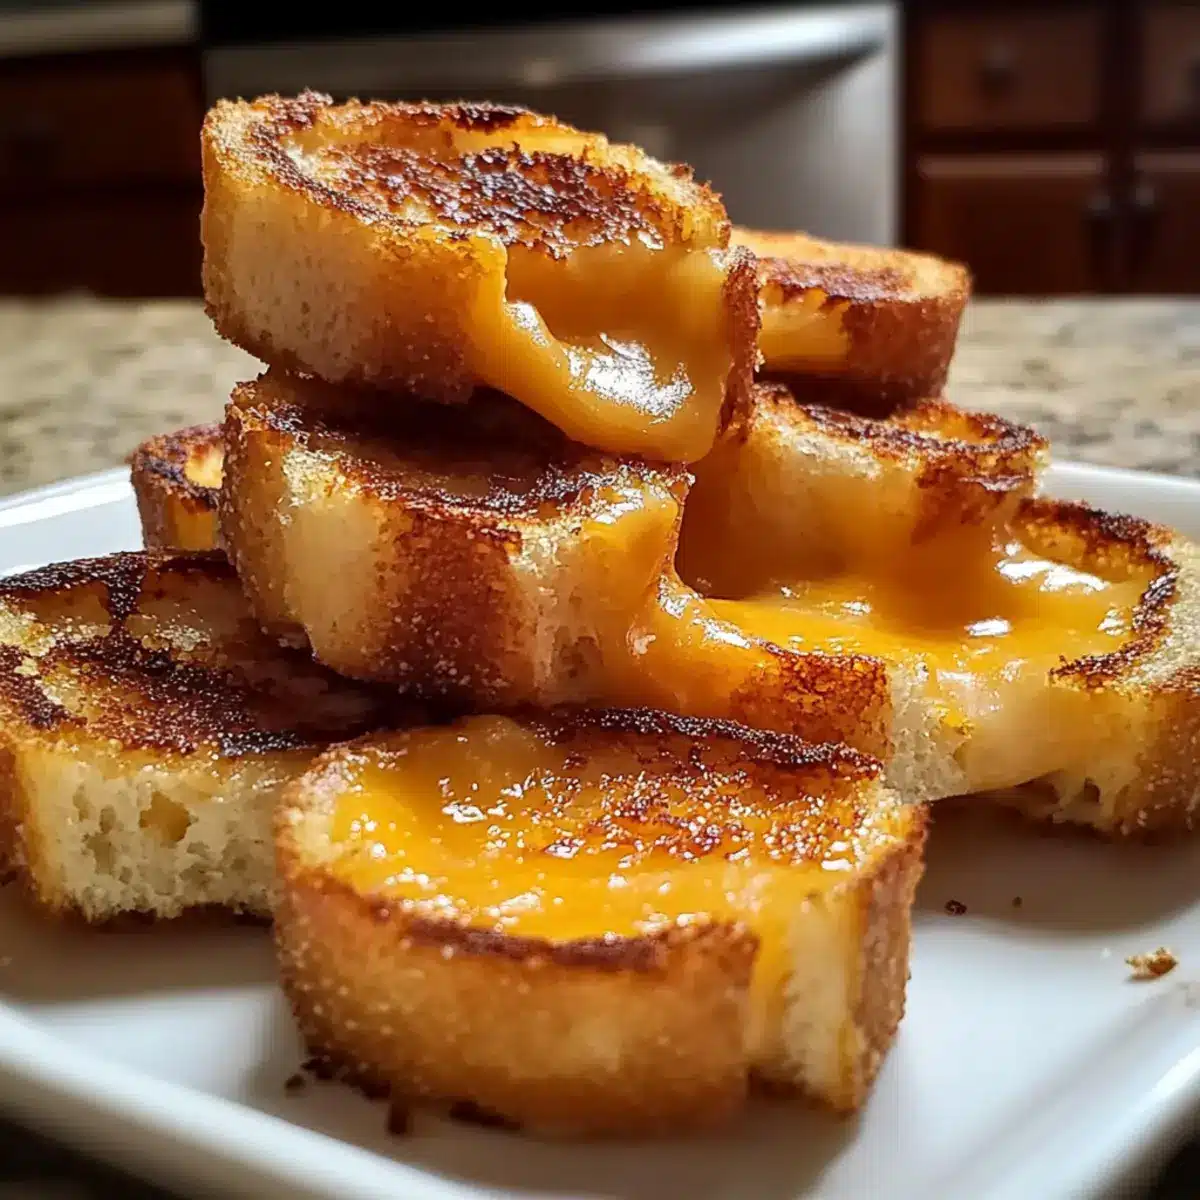
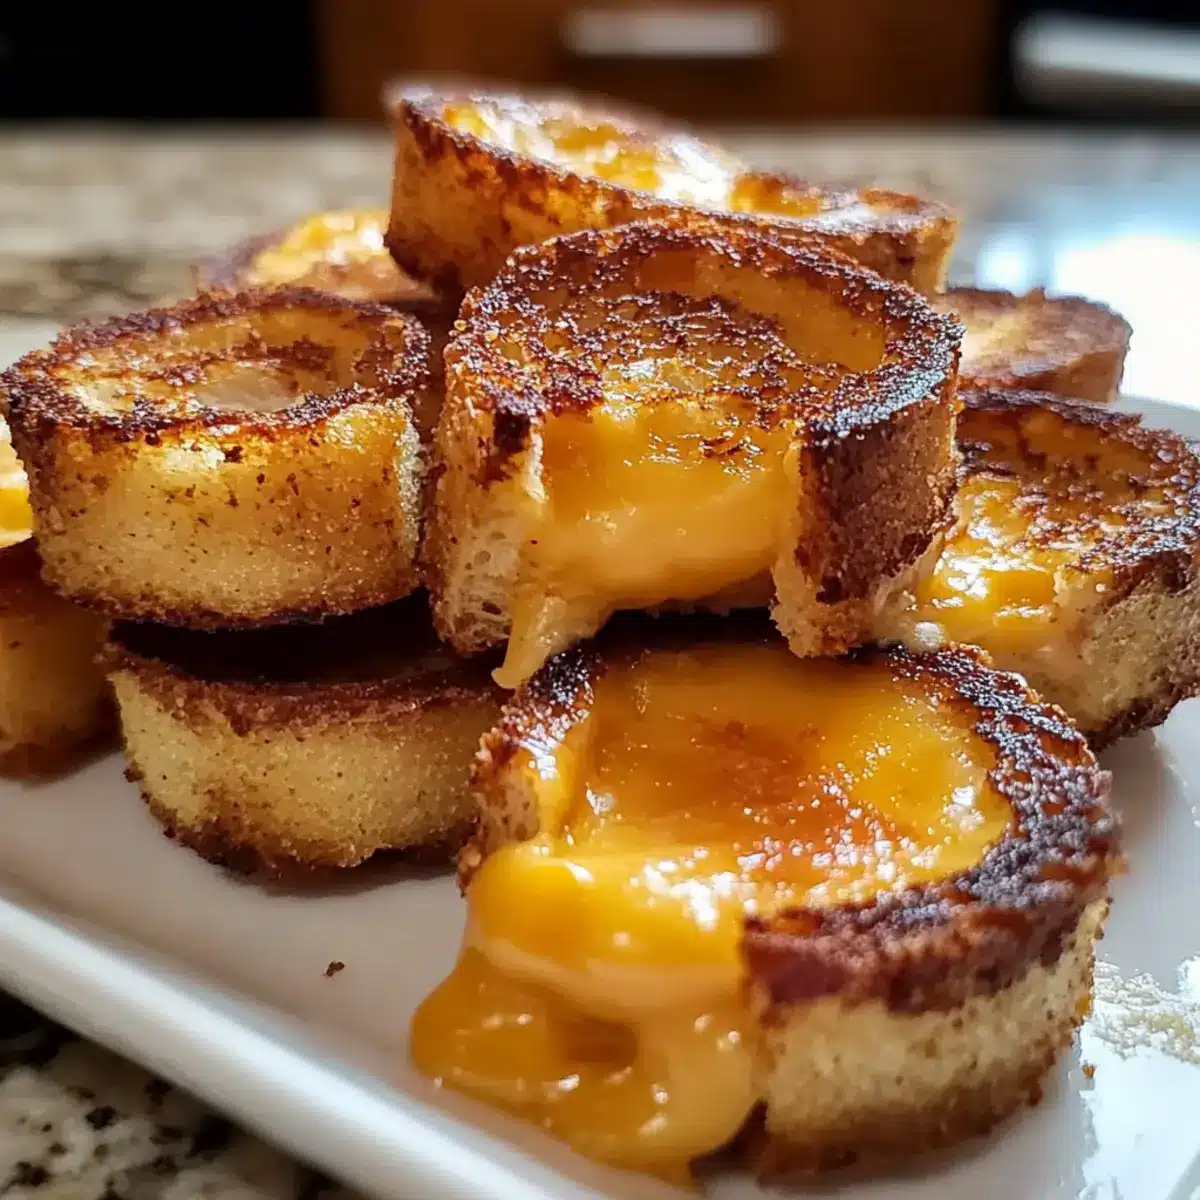
As I stared at my fridge, the familiar tug of nostalgia took over—those cherished grilled cheese sandwiches from childhood, toasty and melty, just waiting to be devoured. I knew it was time for a delicious twist: Mini Grilled Cheese Dippers! These bite-sized delights are not only a whimsical appetizer that appeals to both kids and adults alike, but they are also a breeze to whip up, making them perfect for unexpected guests or cozy family dinners. You can even make a gluten-free version without sacrificing any of that gooey, cheesy perfection. Trust me, once you serve these toasty dippers with your favorite dipping sauce, you’ll find them disappearing faster than you can say, “More, please!” Ready to elevate your snack game and bring back that comforting childhood charm? Let’s dive in!
Why Are You Going to Love These Dippers?
Quick and Easy: This recipe requires minimal effort, making it perfect for busy weeknights or spontaneous gatherings.
Nostalgia in a Bite: The classic combination of crispy bread and gooey cheese brings back childhood memories while being appealingly modern.
Gluten-Free Option: Everyone can join the fun! Easily swap in gluten-free bread to cater to dietary needs without compromising flavor.
Customizable Delight: Add your favorite ingredients like cooked bacon or herbs for endless variations—every batch can be different!
Perfect for Parties: With their bite-sized form, these dippers are an instant crowd-pleaser, great alongside Cranberry Cream Cheese or served with a warm bowl of tomato soup for dipping.
Mini Grilled Cheese Dipper Ingredients
For the Dippers
• Sturdy Bread – Use a good-quality sandwich bread to ensure the dippers hold their shape.
• Flavorful Cheese – Opt for sharp cheddar for great flavor; feel free to mix with Monterey Jack or provolone for a melty delight.
• Fat for Frying – Butter or mayo is ideal to achieve that crispy, golden exterior.
Optional Additions
• Sliced Tomatoes – Adds a fresh burst of flavor; ensure they are thinly sliced not to overwhelm the dippers.
• Cooked Bacon – For those who love a savory kick; crispy bacon bits introduce a delightful crunch.
• Avocado – Creamy texture meets cheese perfection; use thin slices to maintain the dippers’ structure.
These Mini Grilled Cheese Dippers are the ultimate comfort food and can easily be modified to suit everyone’s tastes!
Step‑by‑Step Instructions for Mini Grilled Cheese Dippers
Step 1: Prepare the Bread
Start by slicing sturdy bread into manageable pieces, ideally about 1-2 inches thick. This thickness ensures that your Mini Grilled Cheese Dippers will hold up during grilling and dipping. Aim for uniformity in size for even cooking. Place the slices on a clean cutting board and get ready to build your delicious creations!
Step 2: Assemble the Sandwiches
Layer your choice of flavorful cheese between two slices of the prepared bread. Remember, sharp cheddar pairs wonderfully with other varieties like Monterey Jack or provolone. Make sure to include enough cheese to achieve that gooey melty goodness, but not so much that it oozes out when grilling. Press lightly to seal the sandwiches.
Step 3: Top the Sandwiches
If desired, add sliced tomatoes or crispy bacon to your sandwiches for an extra flavor dimension. Ensure that any additional ingredients are placed evenly between the bread, allowing for easy grilling without compromising the structure of your Mini Grilled Cheese Dippers. This step adds delightful surprises with every bite!
Step 4: Grill the Sandwiches
Heat a non-stick skillet over medium-low heat to prevent burning during grilling. Add a thin layer of butter or mayo to the skillet for a crispy golden-brown exterior. Place the assembled sandwiches into the skillet, working in batches as needed. Grill for about 3-4 minutes until the bottom is golden and the cheese starts to melt.
Step 5: Cook to Golden Perfection
Keep an eye on your Mini Grilled Cheese Dippers as they grill; you want that stunning crispy crust. After approximately 3-4 minutes, check for a lovely golden color on the bottom side. Gently lift the sandwich with a spatula to avoid tearing, ensuring they’re perfectly toasted and ready to flip.
Step 6: Flip and Finish
Carefully flip the sandwiches to cook the other side, applying a bit more butter or mayo if needed. Grill for another 3-4 minutes until the second side is golden and the cheese is fully melted, oozing delightfully. This last grilling step guarantees an equally enticing crunch on both sides.
Step 7: Rest and Slice
Once both sides are grilled to perfection, remove the sandwiches from the skillet and place them on a cutting board. Allow them to rest for a minute; this lets the cheese set slightly, making it easier to cut without making a mess. Enjoy the enticing aroma as they cool!
Step 8: Create the Dippers
Cut each mini sandwich into smaller, dipper-sized pieces, about 1-2 inches each. This size is perfect for dipping into your favorite sauces like marinara or tomato soup. The Mini Grilled Cheese Dippers should now be all set, ready to tantalize your taste buds!
Step 9: Serve Immediately
For the best experience, serve your Mini Grilled Cheese Dippers while they’re still warm and crispy. Present them on a platter alongside dipping sauces for a delightful appetizer that guests of all ages will adore. These dippers will surely bring smiles and a sense of nostalgia to your table!

Mini Grilled Cheese Dippers Variations
Feel free to get creative and make these dippers uniquely yours—there are so many delicious possibilities!
-
Gluten-Free Option: Use gluten-free bread to ensure everyone can enjoy these delightful dippers without worry.
-
Cheese Blend: Experiment with Gruyère or smoked cheese for a distinct flavor twist that elevates every bite to gourmet status.
-
Herbed Delight: Add fresh herbs or spices, such as garlic powder or dried basil, to the cheese for a fragrant flavor uplift. This little change can make a huge difference!
-
Bacon Boost: Incorporate cooked bacon bits for a savory crunch that pairs perfectly with melted cheese; the combination is simply divine.
-
Vegetable Elevation: Layer in thinly sliced zucchini or bell peppers for an added crunch and fresh flavor that complements the cheese beautifully.
-
Spicy Kick: Spice it up by adding jalapeños or a dash of hot sauce to the cheese mixture; this will bring a fun heat that adventurous eaters will love.
-
Smoky Flavor: Try using smoked paprika or liquid smoke in the cheese mixture for a subtle but delightful smokiness. It adds depth that will have everyone coming back for more.
-
Sweet Touch: Serve with apple or pear slices on the side for a delightful sweet contrast that rounds out the savory goodness.
As you explore these options, consider pairing your mini dippers with a comforting bowl of Tomato Soup or making a fun dipping bar with Cranberry Cream Cheese sauce options to let everyone customize their experience! Enjoy the adventure!
Expert Tips for Mini Grilled Cheese Dippers
-
Choose Quality Bread: Use sturdy, high-quality bread for better structure and flavor. Avoid soft bread that can turn soggy when grilled.
-
Cheese Melting Tips: Mix different types of cheese for a unique flavor profile. A combination of cheddar and mozzarella creates a gooey texture that’s irresistible.
-
Watch the Heat: Always grill on medium-low heat; too high can burn the bread before the cheese melts. Patience is key to achieving that perfect golden crust!
-
Batch Cooking: Work in smaller batches for more even cooking. This allows you to focus on each dipper, ensuring they’re all perfectly crispy without crowding the pan.
-
Dipping Sauce Pairings: Serve with classic tomato soup or marinara sauce for dipping. This not only enhances the flavors but also evokes the comforting nostalgia of childhood meals.
-
Better Storage: Store leftovers in an airtight container; they can last up to 2 days. Reheat in a non-stick skillet for maximum crispiness!
Make Ahead Options
These Mini Grilled Cheese Dippers are perfect for meal prep enthusiasts! You can prepare the sandwiches up to 24 hours in advance; simply assemble them as instructed and wrap tightly in plastic wrap or place them in an airtight container to prevent drying out. For best results, refrigerate until you’re ready to grill. When it’s time to enjoy, heat a skillet over medium-low heat, add a bit of butter or mayo, and grill the dippers until golden and the cheese is melted—about 3-4 minutes per side. This approach saves time on busy weeknights and ensures you can still enjoy that warm, gooey goodness with minimal effort!
Storage Tips for Mini Grilled Cheese Dippers
Fridge: Store leftover Mini Grilled Cheese Dippers in an airtight container for up to 2 days to maintain freshness and prevent sogginess.
Freezer: If you’ve made a batch ahead of time, these dippers freeze well! Place them in a single layer on a baking sheet, freeze until solid, then transfer to a freezer bag for up to 1 month.
Reheating: Reheat in a non-stick skillet over medium-low heat for about 3-5 minutes, flipping once, to regain that delightful crispiness.
Room Temperature: Avoid leaving out for more than 2 hours to ensure food safety; serve warm for the best snacking experience!
What to Serve with Mini Grilled Cheese Dippers
Imagine cozying up with warm, savory bites and vibrant sides that elevate your snacking experience to new heights.
- Classic Tomato Soup: This comforting dip pairs beautifully with the dippers, enhancing the cheesy goodness with its rich and tangy flavor. A warm bowl brings the nostalgia to life!
- Crunchy Veggie Sticks: Fresh carrots, celery, or bell pepper strips add a satisfying crunch, offering a refreshing contrast to the richness of the dippers.
- Creamy Ranch Dressing: This tangy dip enhances the flavors of the dippers, providing a zesty twist that kids and adults alike will love. It’s addictively delicious!
- Sweet Honey Mustard: A delightful balance of sweet and tangy, this sauce brings a surprising kick that transforms your dippers into a gourmet experience.
- Savory Spinach and Artichoke Dip: A warm, cheesy dip that complements the Mini Grilled Cheese Dippers while adding a layer of sophistication to your snack spread.
- Bubbly Fruit Smoothie: A refreshing beverage that brightens the palate, this fruity drink is perfect for balancing out the richness of the cheese.
- Spicy Salsa: For a flavor explosion, serve up some zesty salsa that adds a kick to your dippers, perfect for the adventurous taste buds!
- Mini Pickles: These punchy bites add a refreshing tang and crunch, making them a fun and easy-to-eat accompaniment. They pair perfectly with the warm, cheesy flavors!
- Chocolate Fondue: For a unique twist on dessert, offer a chocolate dip after the main snacking; the sweetness creates an enticing contrast to savory bites.
Mini Grilled Cheese Dippers Recipe FAQs
How do I choose the right bread for Mini Grilled Cheese Dippers?
Absolutely! For the best results, opt for a sturdy, high-quality sandwich bread that can hold its shape when grilled. Bread that is too soft may become soggy and fall apart. Look for varieties like sourdough or whole grain that offer good texture and flavor.
What’s the best way to store leftover Mini Grilled Cheese Dippers?
Store any leftover dippers in an airtight container in the fridge for up to 2 days. To keep them crispy, make sure they are completely cooled before sealing. When you’re ready to enjoy them again, reheat in a non-stick skillet over medium-low heat for about 3-5 minutes, flipping them halfway through.
Can I freeze Mini Grilled Cheese Dippers?
Yes, you can freeze them! To do this, lay the dippers on a baking sheet in a single layer and freeze until solid. Once frozen, transfer them to a freezer bag and store for up to 1 month. When you’re ready to eat, you can reheat them straight from the freezer. Just cook them in a skillet or an air fryer at 370°F (185°C) for about 5-7 minutes, flipping halfway for even crispiness.
What should I do if my dippers aren’t getting crispy?
Very! If your dippers aren’t turning crispy, make sure you’re using the right heat. Cook them on medium-low heat to allow the cheese to melt without burning the bread. If you’re using too much butter or mayo, this can cause sogginess too. A thin layer on the skillet is ideal for getting that perfect golden-brown crust.
Are Mini Grilled Cheese Dippers safe for children or people with allergies?
Yes! These dippers can be a fun and safe snack for kids. However, ensure that you consider any potential allergies. For example, if you are substituting gluten-free bread, check that the cheese and any added ingredients meet dietary requirements for your guests. Always keep the kitchen environment safe by avoiding cross-contamination when dealing with allergens.
Can I customize the cheese in my Mini Grilled Cheese Dippers?
Absolutely! The more the merrier! You can mix and match cheeses to suit your taste. For instance, combining sharp cheddar with mozzarella creates a gooey texture, while adding Gruyère gives a nutty flavor. Feel free to experiment with herbs and spices as well; a sprinkle of garlic powder or dried basil can elevate your dippers to new heights!
Mini Grilled Cheese Dippers: Crispy Joy in Every Bite
Ingredients
Equipment
Method
- Prepare the Bread: Slice sturdy bread into manageable pieces, about 1-2 inches thick.
- Assemble the Sandwiches: Layer your choice of flavorful cheese between two slices of prepared bread.
- Top the Sandwiches: If desired, add sliced tomatoes or crispy bacon evenly.
- Grill the Sandwiches: Heat a non-stick skillet over medium-low heat and add butter or mayo.
- Cook to Golden Perfection: Grill for about 3-4 minutes until the bottom is golden.
- Flip and Finish: Carefully flip the sandwiches and grill for another 3-4 minutes.
- Rest and Slice: Remove from skillet and allow to rest for a minute before cutting.
- Create the Dippers: Cut each mini sandwich into smaller dipper-sized pieces.
- Serve Immediately: Serve warm with dipping sauces of choice.
Leave a Reply