
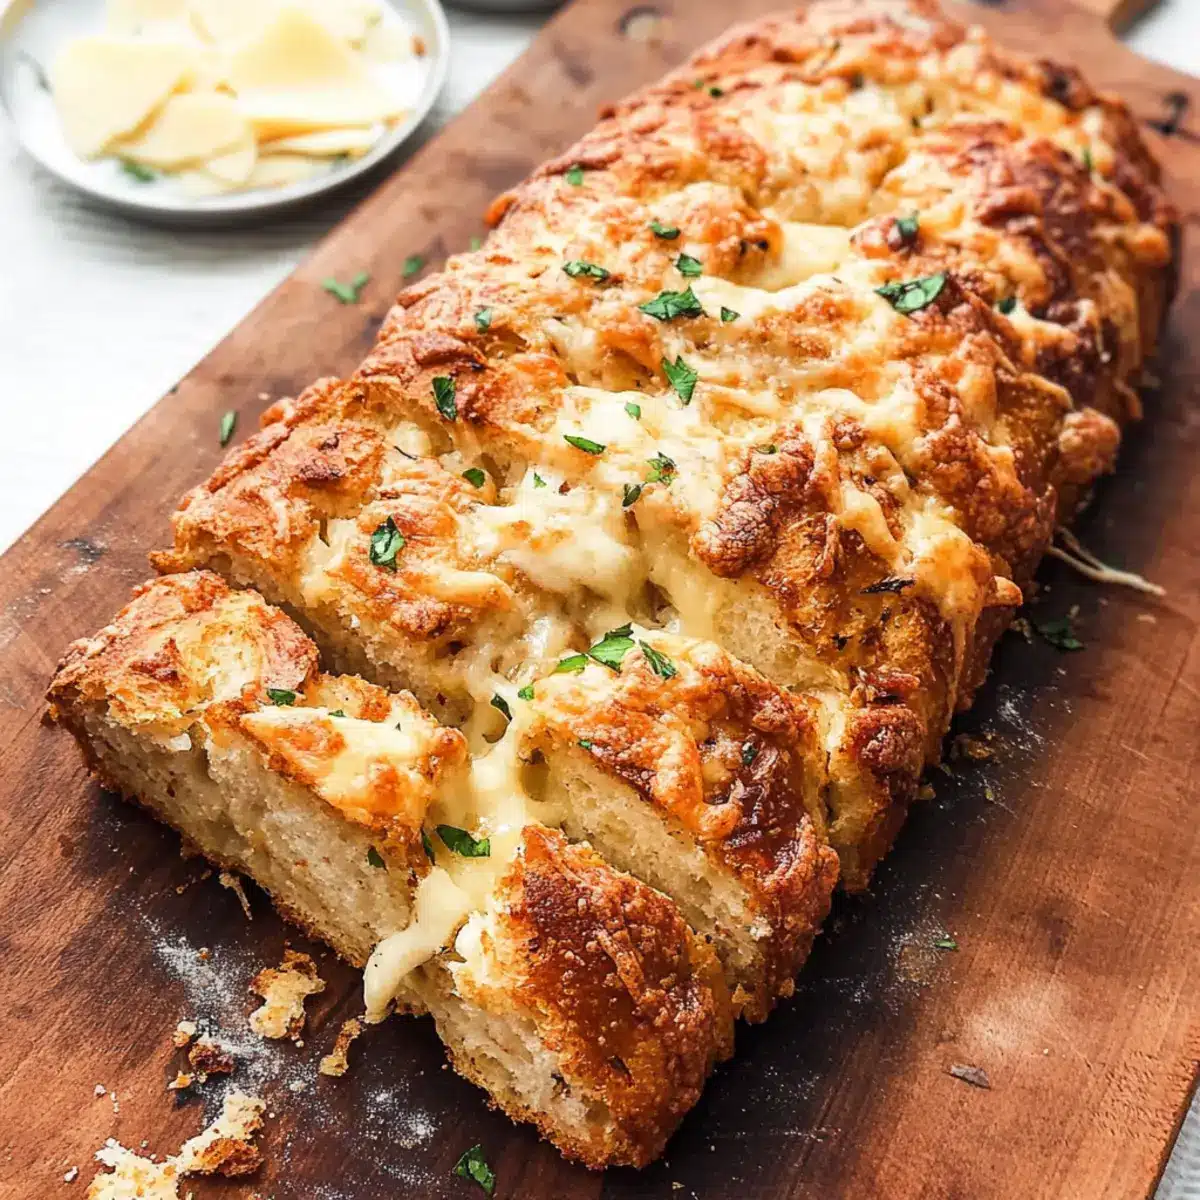
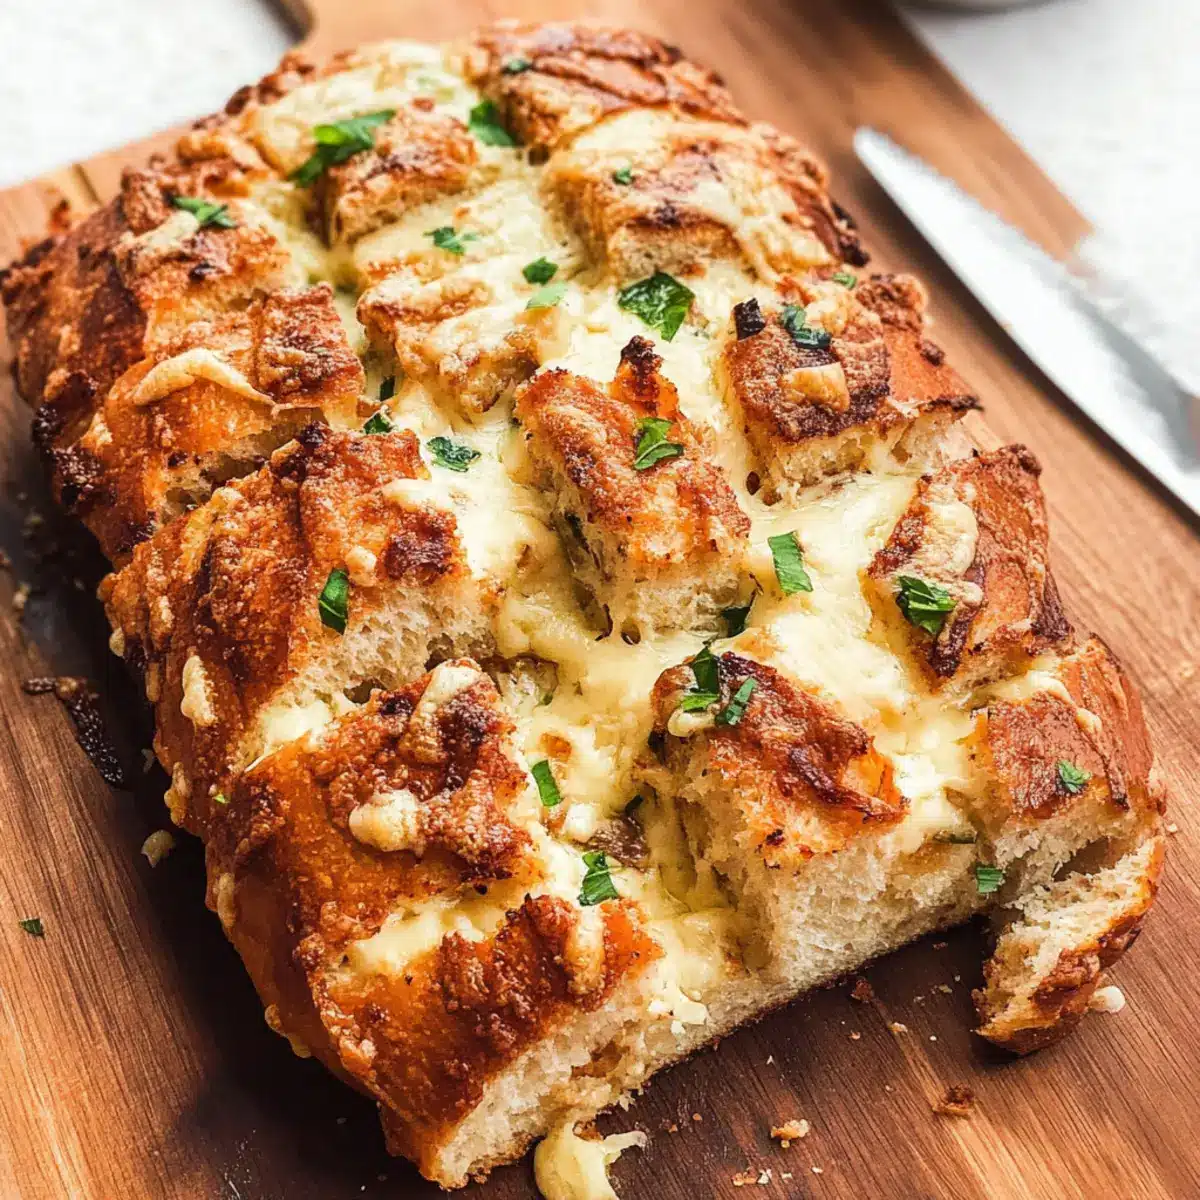
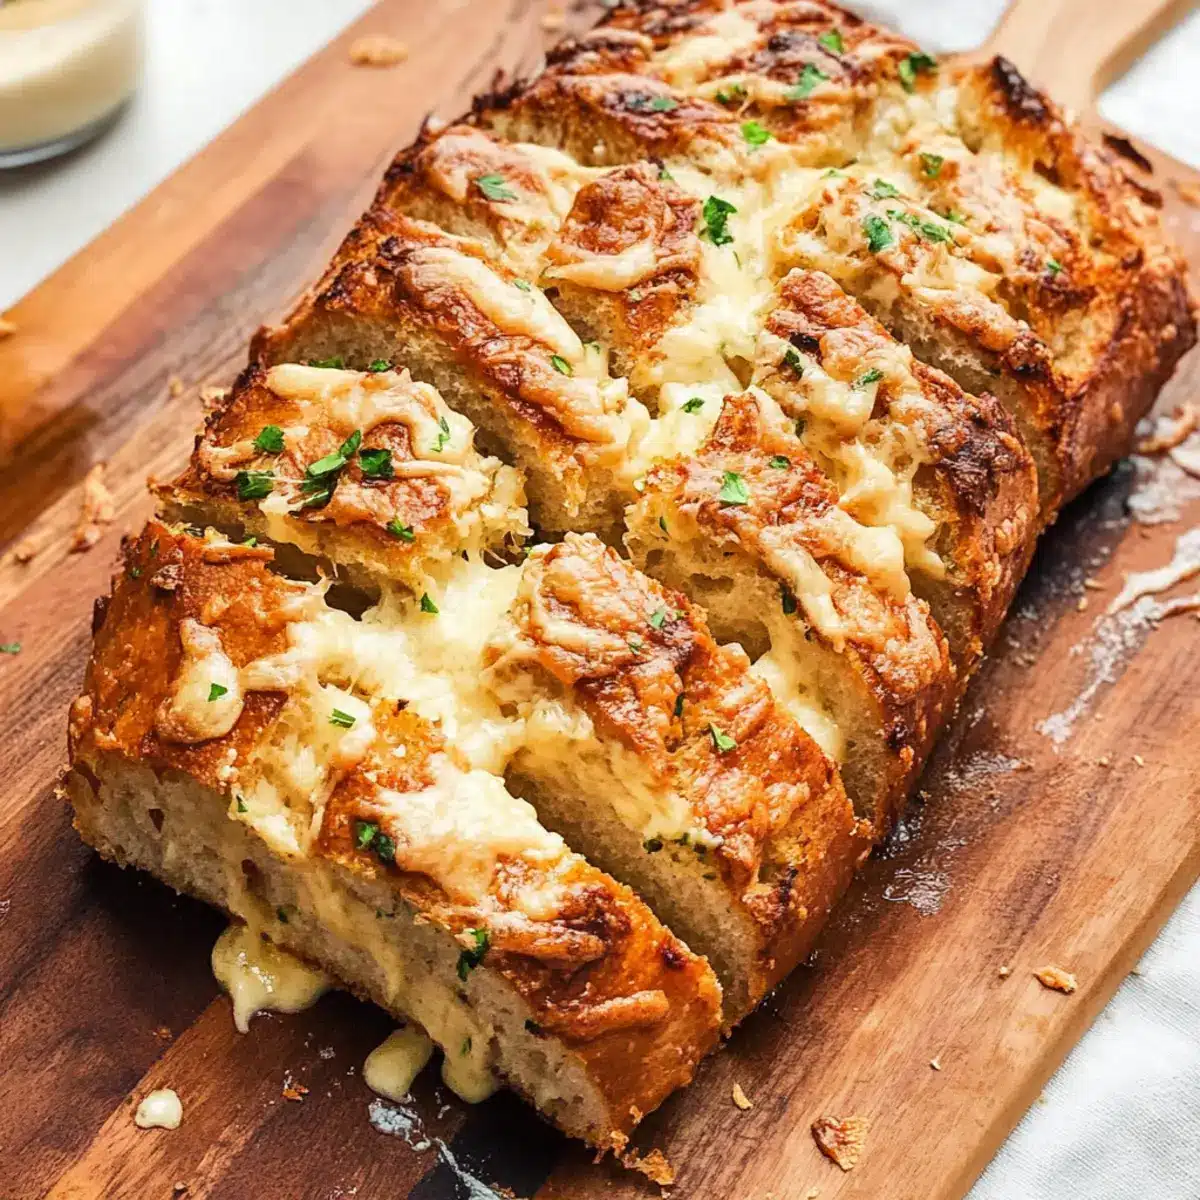
The moment I took a bite of the Gridded Cheesy Garlic Bread, my taste buds sang an anthem of delight. Imagine the crispness of golden crust intertwining with the gooey, melty cheese that’s been infused with rich, aromatic garlic. This isn’t just another bread recipe; it’s a quick and easy appetizer that elevates any meal or gathering. With a prep time of just under 30 minutes, this delightful creation offers flavors that make it a sure crowd-pleaser. Plus, the use of sourdough bread adds a layer of depth that transforms ordinary gatherings into extraordinary ones. So, are you ready to whip up some magic in your kitchen and impress your friends and family?
Why is this garlic bread so special?
Quick, Easy Recipe: This Gridded Cheesy Garlic Bread takes under 30 minutes from start to finish, making it an effortless choice for any occasion.
Irresistible Aroma: The fusion of garlic and melted butter creates a mouthwatering scent that fills your kitchen.
Sourdough Delight: Using sourdough elevates this dish with its unique flavor and texture that perfectly complements the gooey cheese.
Crowd-Pleaser: Perfect as an appetizer or side dish, it’s sure to impress your guests and spark conversations.
Versatile: Feel free to customize your bread with extras like crispy bacon or fresh herbs to cater to your taste.
You can easily pair this delicious creation with some marinara sauce for dipping, just like in my Cheesy Taco Potatoes recipe!
Gridded Cheesy Garlic Bread Ingredients
For the Bread
• Loaf Bread – Sourdough is preferred for its superb flavor and chewiness, but feel free to use any bread you love.
For the Garlic Butter
• Unsalted Butter – Creates a rich garlic base; substitute with olive oil for a lighter option.
• Garlic Cloves – Fresh garlic packs a powerful punch; garlic powder can be a quick alternative in a pinch.
• Chopped Parsley – Brightens up the dish and adds freshness; if fresh isn’t available, you can use dried herbs instead.
For the Filling
• Grated Mozzarella Cheese – Provides that gooey, melty texture; switch it up with cheddar or your favorite melting cheese.
• Salt – It enhances all the flavors; consider using garlic salt for an extra kick of flavor!
With these ingredients ready, you’re just moments away from creating an irresistible Gridded Cheesy Garlic Bread that will leave everyone wanting more!
Step‑by‑Step Instructions for Gridded Cheesy Garlic Bread
Step 1: Preheat the Oven
Begin by preheating your oven to 180°C (350°F) to create the perfect environment for baking your Gridded Cheesy Garlic Bread. This step is crucial as it allows the bread to warm evenly, ensuring a beautifully crispy crust and gooey, melted cheese.
Step 2: Melt the Butter
In a microwave-safe bowl, add your unsalted butter and melt it for about 30-50 seconds. Once melted, allow the butter to cool slightly while you prepare the garlic and parsley. The warm butter will blend beautifully with the garlic, creating a tasty base for your cheesy bread.
Step 3: Prepare the Garlic Butter Mixture
Crush the garlic cloves and finely chop the parsley. Add them both to the slightly cooled melted butter along with a pinch of salt. Stir the mixture well, ensuring each element is evenly distributed—it will infuse your Gridded Cheesy Garlic Bread with rich flavor.
Step 4: Cut the Bread
Take a serrated knife and carefully cut your loaf of sourdough into a diamond pattern, making sure not to cut all the way through. This technique allows for each slice to hold together while creating pockets for the delicious garlic butter and cheese, enhancing the overall flavor.
Step 5: Fill the Cuts
Spoon generous amounts of the garlic butter mixture into each cut of the bread, letting it soak into the deliciously warm sourdough. Next, add a sprinkle of grated mozzarella cheese into each diamond-shaped pocket, ensuring a melty, cheesy center for your Gridded Cheesy Garlic Bread.
Step 6: Wrap and Bake
Now, wrap the filled loaf tightly in aluminum foil, protecting the moisture inside. Place it in your preheated oven and bake for 15 minutes. This wrapping will help the cheese melt while keeping the bread soft and warm, creating the ultimate comfort food experience.
Step 7: Add More Cheese
After 15 minutes, carefully unwrap the bread—taking care not to burn yourself from the steam. Quickly sprinkle more cheese on top of the loaf and return it to the oven for an additional 5-7 minutes. This final baking step will ensure a beautifully golden and crispy top layer.
Step 8: Cool and Serve
Once out of the oven, let your Gridded Cheesy Garlic Bread cool for about 5 minutes before slicing. This brief rest allows the flavors to settle and makes it easier to serve. Present it warm as a mouthwatering appetizer or side dish, and watch your guests dig in with delight!
Expert Tips for Gridded Cheesy Garlic Bread
- Keep Loaf Intact: Ensure not to cut all the way through the loaf. This keeps the structure intact and helps hold the cheesy goodness.
- Customize Garlic Flavor: Adjust the amount of garlic to match your preference. More garlic intensifies flavor, but too much can overpower the dish.
- Watch Baking Time: Be mindful not to overbake; excessive time can dry out the bread. Check for a golden top to ensure it’s just right.
- Fresh Ingredients Matter: Use fresh garlic and parsley for the best flavor. If using substitutes, remember that fresh ingredients elevate the taste of your Gridded Cheesy Garlic Bread.
- Foil Wrapping Tip: Wrapping the bread in foil helps lock in moisture and ensures a soft bread while melting the cheese—don’t skip this step!
Make Ahead Options
These Gridded Cheesy Garlic Bread loaves are perfect for meal prep enthusiasts! You can prepare the garlic butter mixture and fill the bread up to 24 hours in advance. Just follow the instructions until Step 5, then wrap the filled loaf tightly in foil and refrigerate. This helps the flavors meld beautifully while keeping the bread fresh. When you’re ready to serve, simply bake it according to Step 6, adding more cheese for that crispy finish. This way, you can enjoy restaurant-quality Gridded Cheesy Garlic Bread with minimal effort on busy weeknights, saving you precious time!
Gridded Cheesy Garlic Bread Variations
Feel free to get creative and make this Gridded Cheesy Garlic Bread your very own masterpiece!
- Bacon Boost: Add cooked and crumbled bacon to the cheese for a savory twist. The salty crunch will take this dish to new heights.
- Herb Medley: Experiment with fresh herbs like oregano, thyme, or basil instead of parsley for a unique flavor profile. Each herb offers a delightful aroma that enhances the garlic’s richness.
- Mediterannean Flair: Include sun-dried tomatoes or olives in the cuts for a Mediterranean-inspired twist. Their tangy flavors complement the garlic and cheese beautifully.
- Spicy Kick: Sprinkle red pepper flakes onto the garlic butter or cheese for an inviting heat that elevates each bite. Adjust the amount to match your desired spice level.
- Cheese Swap: Try a blend of cheeses, like cheddar, gouda, or even blue cheese, for a melty, flavorful surprise inside your bread. Each cheese brings its unique character to the dish.
- Vegan Version: Substitute the butter with olive oil or vegan butter and use dairy-free cheese alternatives for a delicious plant-based garlic bread. You won’t miss the cheese at all!
- Nutty Crunch: Top with finely chopped walnuts or pine nuts before baking for an added layer of texture and nutty flavor that’s simply irresistible.
For a delightful pairing, dip your Gridded Cheesy Garlic Bread in marinara sauce, just like how I enjoyed it with my Cheesy Taco Potatoes. Enjoy your tasty creations!
How to Store and Freeze Gridded Cheesy Garlic Bread
Fridge: Store leftovers tightly wrapped in foil or an airtight container for up to 2 days. Reheat in the oven to regain its crispy texture.
Freezer: For long-term storage, freeze the unbaked, filled bread wrapped in plastic wrap and then foil for up to 3 months. Bake directly from frozen, adding a few extra minutes to the cooking time.
Reheating: Reheat refrigerated bread in the oven at 180°C (350°F) for about 10-15 minutes to melt the cheese and crisp the exterior. Avoid microwaving, as it can make the bread soggy.
Serving Suggestions: Enjoy the bread warm as an appetizer or side dish, especially paired with a dipping sauce like marinara for an extra burst of flavor!
What to Serve with Gridded Cheesy Garlic Bread
Serving up the warm, irresistible Gridded Cheesy Garlic Bread? Here are some perfect pairings to create a delightful meal everyone will love.
-
Creamy Tomato Soup: The creamy richness of tomato soup beautifully balances the crispy, cheesy garlic bread, making for a classic comfort duo. Dipping the bread into the soup enhances both flavors tremendously.
-
Mixed Green Salad: A fresh salad with crunchy greens adds a refreshing contrast to the cheesy bread. Top with a light vinaigrette to tie the meal together.
-
Marinara Sauce: Serve it alongside a warm marinara sauce for dipping. The tangy tomato sauce amplifies the garlic flavors while providing a delightful burst of acidity.
-
Grilled Veggies: Roasted or grilled vegetables like zucchini, bell peppers, and asparagus add a charred flavor that complements the richness of the bread, creating a balanced plate.
-
Savory Meatballs: Juicy meatballs in a rich sauce bring a hearty element to the meal. Perfect for dunking the cheesy bread after each succulent bite!
-
Garlic Parmesan Fries: For the ultimate indulgence, pair your garlic bread with crispy garlic parmesan fries. The double garlic experience is sure to satisfy!
-
Chilled White Wine: A chilled glass of Sauvignon Blanc or Pinot Grigio offers a crisp, refreshing contrast to the warm, cheesy bread, enhancing the dining experience.
-
Chocolate Fondue: End the meal on a sweet note with a chocolate fondue. Dip strawberries, marshmallows, or even leftover bread into the rich chocolate for a surprising dessert twist!
Gridded Cheesy Garlic Bread Recipe FAQs
What type of bread should I use for this recipe?
Absolutely, while sourdough is highly recommended for its tangy flavor and lovely texture, you can use any bread you love! Just ensure it’s sturdy enough to hold up to the filling.
How should I store leftovers?
Store your leftover Gridded Cheesy Garlic Bread wrapped tightly in foil or in an airtight container. It will stay fresh in the refrigerator for about 2 days. When you’re ready to enjoy it again, simply reheat it in the oven to restore its crispy texture for around 10-15 minutes at 180°C (350°F).
Can I freeze this garlic bread?
Absolutely! To freeze it, wrap the unbaked, filled bread tightly in plastic wrap and then in foil. It can be frozen for up to 3 months. When you’re ready to bake, simply place it in the oven from frozen, adding a few extra minutes to ensure it’s fully cooked and the cheese is nicely melted.
How do I adjust the garlic flavor to my liking?
Great question! If you prefer a milder taste, start with less garlic and gradually add more until you find your sweet spot. Fresh garlic offers a more pronounced flavor compared to garlic powder, so keep that in mind when customizing. You can mix it up based on your family’s preferences!
Can my pets enjoy this garlic bread?
No, it’s not safe for pets! The garlic in this recipe can be toxic to dogs and cats in large quantities. Always keep this savory delight out of reach of your furry friends!
What should I do if my bread feels soggy after reheating?
If your Gridded Cheesy Garlic Bread comes out soggy after reheating, it’s likely due to microwaving. To prevent this, always reheat in the oven rather than the microwave, which can make the crust lose its crunch. If needed, bake it a little longer to achieve that delightful, crispy texture again.

Melt-in-Your-Mouth Gridded Cheesy Bread in Just 30 Minutes
Ingredients
Equipment
Method
- Preheat the oven to 180°C (350°F).
- Melt the unsalted butter in a microwave-safe bowl for about 30-50 seconds.
- Crush the garlic cloves and finely chop the parsley. Combine in the melted butter with salt.
- Cut the loaf of sourdough into a diamond pattern, ensuring not to cut all the way through.
- Spoon the garlic butter mixture into each cut and sprinkle grated mozzarella cheese.
- Wrap the loaf tightly in aluminum foil and bake for 15 minutes.
- Unwrap the bread, sprinkle more cheese on top, and return to the oven for an additional 5-7 minutes.
- Let the bread cool for about 5 minutes before slicing and serving.
Leave a Reply