
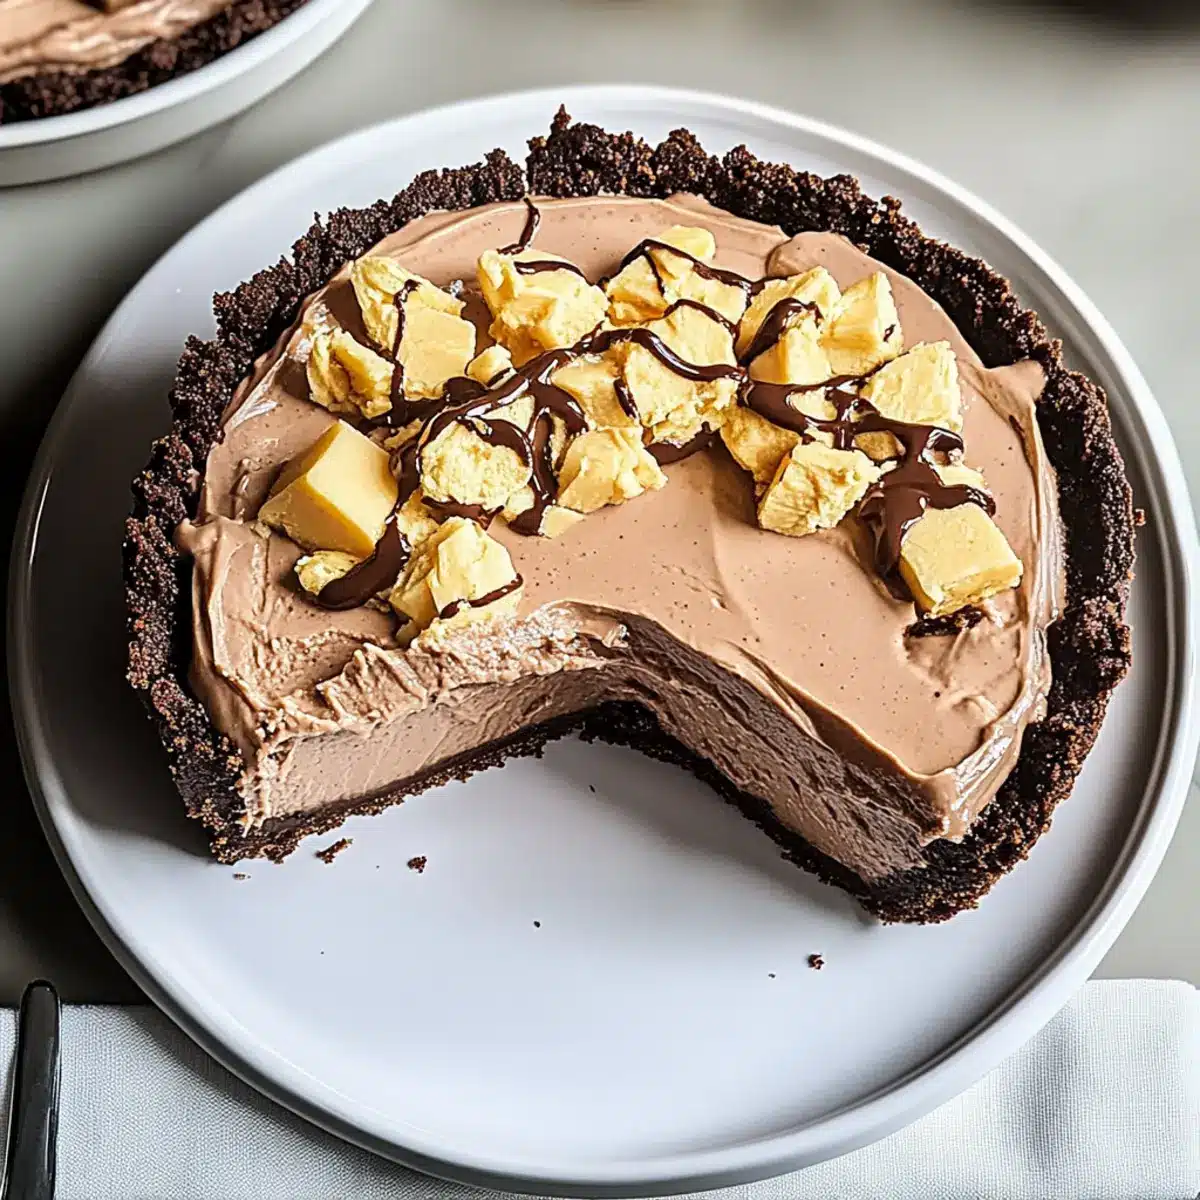
As I was rummaging through my pantry, searching for a sweet fix that wouldn’t make me feel guilty, the answer struck me like a lightning bolt: a No-Bake Peanut Butter Pie with Chocolate Cream. This creamy, dreamy dessert is not just a crowd-pleaser; it’s also a breeze to whip up, making it perfect for those last-minute gatherings or cozy evenings at home. Picture a luscious peanut butter filling, topped with fluffy chocolate whipped cream, all cradled in a crisp graham cracker crust—heaven in every slice! Plus, it’s an indulgent yet simple way to savor a flavor combo that never gets old. Intrigued by the ease and taste of this delectable treat? Let’s dive into the recipe together!
Why is this pie a must-try?
Simplicity: Effortlessly whip up this no-bake delight in less than 30 minutes, perfect for busy days or unexpected guests!
Irresistible Flavor: The creamy peanut butter filling paired with luscious chocolate whipped cream creates a rich yet balanced taste that everyone loves.
Crowd-Pleasing: Whether at a family gathering or cozy night in, this pie guarantees smiles all around, no one can resist a slice!
Customizable: Feel free to switch things up! Try adding a drizzle of chocolate sauce or even a layer of crushed cookies for extra texture, or check out Garlic Butter Beef for a savory pairing!
Time-Saving: This dessert can be made ahead of time—just chill and serve when you’re ready, giving you more time to enjoy the occasion!
No-Bake Peanut Butter Pie Ingredients
Discover how easy it is to create this perfect dessert from home!
For the Filling
- Creamy Peanut Butter – A delicious base that adds rich flavor; try almond butter for a nut-free alternative.
- Cream Cheese – Adds creaminess and structure; make sure it’s softened for easy mixing.
- Powdered Sugar – Sweetener that balances the savory peanut butter; agave syrup can be used for a lower glycemic option.
- Heavy Whipping Cream – Creates a light texture for the filling; chill before whipping for better volume.
For the Topping
- Heavy Whipping Cream – Used for the fluffy topping; whip until stiff peaks form for the best results.
- Chocolate Syrup – Enhances the chocolate flavor; homemade syrup would elevate the taste even more!
For the Crust
- Graham Cracker Crumbs – Forms the crunchy bottom layer; consider using chocolate grahams for extra flavor.
- Butter – Binds the crust together; melted coconut oil can be a great substitute for a dairy-free option.
This delightful No-Bake Peanut Butter Pie with Chocolate Cream is sure to become a family favorite!
Step‑by‑Step Instructions for No-Bake Peanut Butter Pie with Chocolate Cream
Step 1: Prepare the Pie Crust
Start by taking a ready-made graham cracker crust or preparing your own by combining graham cracker crumbs with melted butter. Press the mixture firmly into a 9-inch pie dish, ensuring it’s evenly packed and reaches up the sides. Once done, set it aside in the refrigerator while you work on the filling to help it firm up.
Step 2: Mix the Peanut Butter Filling
In a large mixing bowl, combine softened cream cheese, creamy peanut butter, and powdered sugar. Use an electric mixer on medium speed for about 2-3 minutes until the mixture is smooth and well blended, avoiding any lumps. The filling should be light and creamy, perfect for your No-Bake Peanut Butter Pie with Chocolate Cream.
Step 3: Whip the Heavy Cream
In another mixing bowl, pour in the heavy whipping cream and whip it using a hand mixer or stand mixer on medium-high speed for about 3-5 minutes. Whip until soft peaks form, meaning it should hold its shape but still be light and airy. Be careful not to over-whip, which can lead to a grainy texture, as you incorporate this into your filling.
Step 4: Fold in the Whipped Cream
Gently fold the whipped cream into the peanut butter mixture using a spatula. Start by adding a small amount of whipped cream to lighten the peanut butter mixture, then carefully fold in the remaining whipped cream until just combined. This step is crucial to achieving a fluffy and creamy texture for your No-Bake Peanut Butter Pie filling.
Step 5: Assemble the Pie
Carefully spread the creamy peanut butter filling into your previously prepared pie crust. Use a spatula to smooth the top evenly, ensuring it looks inviting and delightful. Once spread, tap the pie gently on the countertop to remove any air bubbles, and then place it back in the refrigerator to firm up while you prepare the topping.
Step 6: Make the Chocolate Whipped Topping
In a clean mixing bowl, pour the remaining heavy whipping cream and add the chocolate syrup. With your mixer on medium-high speed, whip for about 3-5 minutes until stiff peaks form. The topping should be thick and fluffy, perfect for crowning your No-Bake Peanut Butter Pie.
Step 7: Top the Pie
Once your chocolate whipped cream is ready, gently spread it over the peanut butter filling, creating an even layer. You can use a spatula to smooth it out or get creative with a decorative swirl. This delightful layer adds a beautiful contrast to the creamy peanut butter base.
Step 8: Chill the Pie
Cover the assembled pie with plastic wrap and refrigerate for at least 2 hours to allow it to set properly. This chilling time is important for the flavors to meld together and for the pie to hold its shape when sliced. While it chills, the anticipation of your No-Bake Peanut Butter Pie with Chocolate Cream will surely grow!
Step 9: Serve and Enjoy
When you’re ready to serve, remove the pie from the refrigerator and slice into wedges. You can garnish with additional chocolate drizzle or crushed nuts if desired. Each slice will reveal the beautiful layers of creamy peanut butter and fluffy chocolate, making this pie a delightful treat for any occasion!
Expert Tips for No-Bake Peanut Butter Pie
-
Room Temperature Cream Cheese: Ensure your cream cheese is softened to room temperature for a smoother filling that incorporates easily into the peanut butter.
-
Don’t Over-Whip Cream: Whip heavy cream just until soft peaks form to prevent a grainy texture in your No-Bake Peanut Butter Pie with Chocolate Cream.
-
Chill Your Bowl: For even fluffier whipped cream, chill your mixing bowl and beaters before whipping. This helps maintain a light texture while beating.
-
Cover While Chilling: Protect your pie from absorbing other flavors in the fridge by covering it with plastic wrap as it chills.
-
Check Crust Firmness: Be sure the crust is firm before adding the filling. If using a homemade crust, chill for about 10-15 minutes to set properly.
What to Serve with Irresistible No-Bake Peanut Butter Pie with Chocolate Whipped Cream
Set the stage for a delightful meal by pairing this dessert with complementary flavors and textures that round out your indulgent experience.
-
Vanilla Ice Cream: The creamy vanilla ice cream provides a refreshing contrast to the rich pie, creating a perfect balance of flavors. Serve a scoop on the side to elevate your dessert experience!
-
Fresh Berries: Juicy strawberries, blueberries, or raspberries add a burst of freshness and a beautiful pop of color. Their tartness will cut through the sweetness, enhancing each bite.
-
Chocolate Drizzle: A drizzle of warm chocolate sauce over the pie not only looks enticing, but it also amplifies the chocolate flavor, making it an indulgent treat that chocolate lovers will adore.
-
Whipped Cream: A dollop of light, fluffy whipped cream is a classic companion for dessert. It enhances the creamy texture while introducing an airy element to each slice.
-
Coffee: Pairing this pie with a cup of freshly brewed coffee creates a delightful contrast. The bitterness of the coffee beautifully complements the sweetness of the pie, making it a perfect dessert for after dinner.
-
Crushed Nuts: Sprinkling some crushed peanuts or walnuts on top adds a delightful crunch that complements the pie’s creamy texture. It introduces an additional layer of flavor while enhancing the nutty essence of the peanut butter.
-
Chocolate Mint Tea: For a refreshing drink option, a warm cup of chocolate mint tea adds a soothing herbal contrast, blending perfectly with the flavors of the pie. It’s an unexpected yet delightful choice that guests will love.
These pairings will make your dining experience memorable, ensuring that each moment is filled with joy and satisfaction!
No-Bake Peanut Butter Pie Variations
Feel free to explore and personalize this delightful pie recipe, transforming flavors and textures to suit your taste!
-
Nut-Free: Use sunbutter instead of peanut butter for a tasty, nut-free version that still brings that creamy richness.
-
Vegan Delight: Substitute the cream cheese with vegan cream cheese and use coconut whipped cream to create a plant-based treat that everyone can enjoy.
-
Chocolate Lovers: Add a layer of melted chocolate over the peanut butter filling before topping with whipped cream for an extra-chocolatey indulgence.
-
Crunchy Twist: Fold in crushed pretzels or toffee bits into the filling for a fun, crunchy texture that pairs beautifully with the creamy layers.
-
Fruity Surprise: Layer sliced bananas or strawberries between the peanut butter filling and chocolate topping for a fruity contrast that brightens every bite.
-
Spicy Kick: Add a pinch of cayenne pepper or chili powder to the chocolate whipped cream for a surprising sweet heat that’ll intrigue your guests.
-
Flavor Infusion: A splash of vanilla or almond extract in the filling will elevate the flavor profile, adding a delightful depth.
-
Dessert Pairing: Serve with a refreshing side of Tortellini Tomatoes for a light meal that balances the richness of the pie perfectly!
Make Ahead Options
These No-Bake Peanut Butter Pie with Chocolate Cream are perfect for meal prep enthusiasts looking to save time! You can prepare the creamy peanut butter filling up to 24 hours in advance and store it in the refrigerator. Simply mix together the peanut butter, cream cheese, and powdered sugar, then cover it tightly to maintain its quality. The graham cracker crust can also be made ahead of time, ensuring it’s ready when you assemble the pie. Just whip the heavy cream for the chocolate topping just before serving for optimal freshness. When you’re ready to impress your guests, spread the filling into the crust, top with chocolate whipped cream, and enjoy a flawless dessert with minimal effort!
Storage Tips for No-Bake Peanut Butter Pie with Chocolate Cream
Fridge: Store leftovers in the refrigerator for up to 5 days. Make sure to cover the pie with plastic wrap to keep it fresh and prevent it from absorbing any odors.
Freezer: This delicious no-bake peanut butter pie can be frozen for up to 1 month. Wrap it tightly in plastic wrap, then place it in an airtight container for maximum freshness.
Thawing: When you’re ready to enjoy your pie again, thaw it in the refrigerator overnight before serving. This helps retain its creamy texture and delightful flavors.
Reheating: No need to reheat this dessert; simply slice and serve chilled for the best taste experience!
No-Bake Peanut Butter Pie with Chocolate Cream Recipe FAQs
How should I select the creamy peanut butter?
Absolutely! When choosing creamy peanut butter, look for a product with minimal ingredients—just peanuts and salt is best. Avoid brands with added sugars and oils, as they may compromise the flavor. Whole Foods or organic options are excellent choices, as they tend to provide a richer, more authentic taste.
What’s the best way to store leftover No-Bake Peanut Butter Pie?
Store the pie in the refrigerator, tightly covered with plastic wrap or in an airtight container, to keep it fresh for up to 5 days. If you notice it’s absorbing flavors from your fridge, definitely make sure it’s well-wrapped!
Can I freeze No-Bake Peanut Butter Pie with Chocolate Cream?
Yes, you can! Wrap the pie tightly in plastic wrap and place it inside an airtight container. This helps preserve its texture and flavor for up to 1 month. Thaw it in the refrigerator overnight before serving, ensuring it maintains that creamy goodness!
What if my whipped cream doesn’t whip up properly?
Very! If the cream isn’t whipping, check whether it’s cold enough—chilled heavy cream whips up best. You can also chill your mixing bowl and beaters beforehand. If you’ve accidentally over-whipped and it’s grainy, don’t despair! Gently fold in a bit more unwhipped cream to smooth it out.
Is this pie suitable for people with nut allergies?
Not quite! Since this pie contains peanut butter, it is not suitable for individuals with nut allergies. However, you can substitute with a nut-free alternative like sunbutter and use a dairy-free cream cheese for a similar texture and taste that accommodates dietary restrictions.
How long does it take to prepare the filling?
The filling comes together quickly, usually in about 5-7 minutes. Start by mixing the cream cheese, peanut butter, and sugar until smooth, then whip your cream. Keep everything chilled, and you’ll have a fluffy, dreamy filling ready to go in no time!
Creamy No-Bake Peanut Butter Pie with Chocolate Cream Delight
Ingredients
Equipment
Method
- Start by taking a ready-made graham cracker crust or preparing your own by combining graham cracker crumbs with melted butter. Press the mixture firmly into a 9-inch pie dish, ensuring it’s evenly packed and reaches up the sides. Once done, set it aside in the refrigerator while you work on the filling.
- In a large mixing bowl, combine softened cream cheese, creamy peanut butter, and powdered sugar. Use an electric mixer on medium speed for about 2-3 minutes until the mixture is smooth and well blended, avoiding any lumps.
- In another mixing bowl, pour in the heavy whipping cream and whip it using a hand mixer or stand mixer on medium-high speed for about 3-5 minutes until soft peaks form.
- Gently fold the whipped cream into the peanut butter mixture using a spatula.
- Carefully spread the creamy peanut butter filling into your previously prepared pie crust. Once spread, tap the pie gently on the countertop to remove any air bubbles.
- In a clean mixing bowl, pour the remaining heavy whipping cream and add the chocolate syrup. Whip for about 3-5 minutes until stiff peaks form.
- Gently spread the chocolate whipped cream over the peanut butter filling, creating an even layer.
- Cover the assembled pie with plastic wrap and refrigerate for at least 2 hours to allow it to set properly.
- When you're ready to serve, remove the pie from the refrigerator and slice into wedges.
Leave a Reply