
As I stood in the kitchen, the aroma of melting cheese and savory pepperoni wafted through the air, instantly transporting me to a cozy pizzeria. Today, I’m excited to share my quick and easy low-carb Cheesy Pepperoni Pizza Roll-Ups, a delightful snack that satisfies those pizza cravings without the guilt! Perfect for game nights, movie marathons, or just because you want a tasty treat, these roll-ups are not only keto-friendly, but they come together in under 20 minutes—ideal for any busy night. With the crispy tortilla encasing gooey cheese and zesty marinara, they’re a fun project the whole family can join in on. Ready to roll with an irresistible twist on a classic favorite? Let’s get started!
Why Are These Roll-Ups So Irresistible?
Quick and Easy: With just a few simple ingredients and ready in under 20 minutes, you can whip up these delicious roll-ups anytime!
Family-Friendly: A fun kitchen activity for kids, they love rolling their own snacks while learning the joy of cooking.
Versatile Options: Feel free to customize with your favorite toppings! Try adding fresh basil or even swapping out pepperoni for veggies for a nutritious kick.
Low-Carb Delight: Enjoy the satisfying taste of pizza without the carbs, making them perfect for those on a keto diet or anyone looking to eat healthier.
Crowd-Pleaser: Whether it’s game night or a simple family dinner, these Cheesy Pepperoni Pizza Roll-Ups will be a hit with everyone. Pair them with a delicious Spring Roll Salad for a complete meal!
Cheesy Pepperoni Pizza Roll-Ups Ingredients
For the Roll-Ups
• Low-Carb Tortillas – The perfect wrap to keep your roll-ups low-carb; consider almond flour tortillas for a tasty twist.
• Marinara Sauce – Adds a burst of flavor; use about 2 tablespoons per tortilla to keep everything from getting soggy.
• Shredded Mozzarella Cheese – Melts beautifully, giving these roll-ups that gooey texture; other cheese blends can be used, but make sure they’re high quality.
• Pepperoni Slices – The star of the dish, providing flavorful protein; feel free to use spicy or vegetarian options based on your preference.
• Olive Oil – Brushed on for a crispy texture; you can use cooking spray if you’re looking for a lighter alternative.
Step‑by‑Step Instructions for Cheesy Pepperoni Pizza Roll Ups
Step 1: Preheat the Oven
Begin by preheating your oven to 375°F (190°C). This step ensures that when you place your Cheesy Pepperoni Pizza Roll Ups inside, they’ll bake evenly and develop a perfectly golden, crispy exterior. While the oven warms up, gather your ingredients and prepare your work area for easy access.
Step 2: Prepare the Tortillas
Lay the low-carb tortillas flat on a clean, dry surface. Use a spatula or the back of a spoon to evenly spread about 2 tablespoons of marinara sauce over each tortilla, leaving a half-inch border around the edges. This will prevent the sauce from oozing out during baking while adding a delicious base flavor to your roll-ups.
Step 3: Add Cheese and Pepperoni
Next, sprinkle a generous amount of shredded mozzarella cheese over the marinara sauce, ensuring an even layer for optimal melting. Top this with pepperoni slices, arranging them closely but not overlapping to allow for even crispiness. This combination will create a gooey, savory flavor that makes these roll-ups irresistible.
Step 4: Roll the Tortillas
Now it’s time to roll each tortilla into a tight cylinder, starting from one end and rolling towards the opposite side. As you roll, be gentle yet firm, and make sure the filling stays inside. Once rolled, brush the outside lightly with olive oil; this will help achieve a beautifully golden crust as they bake.
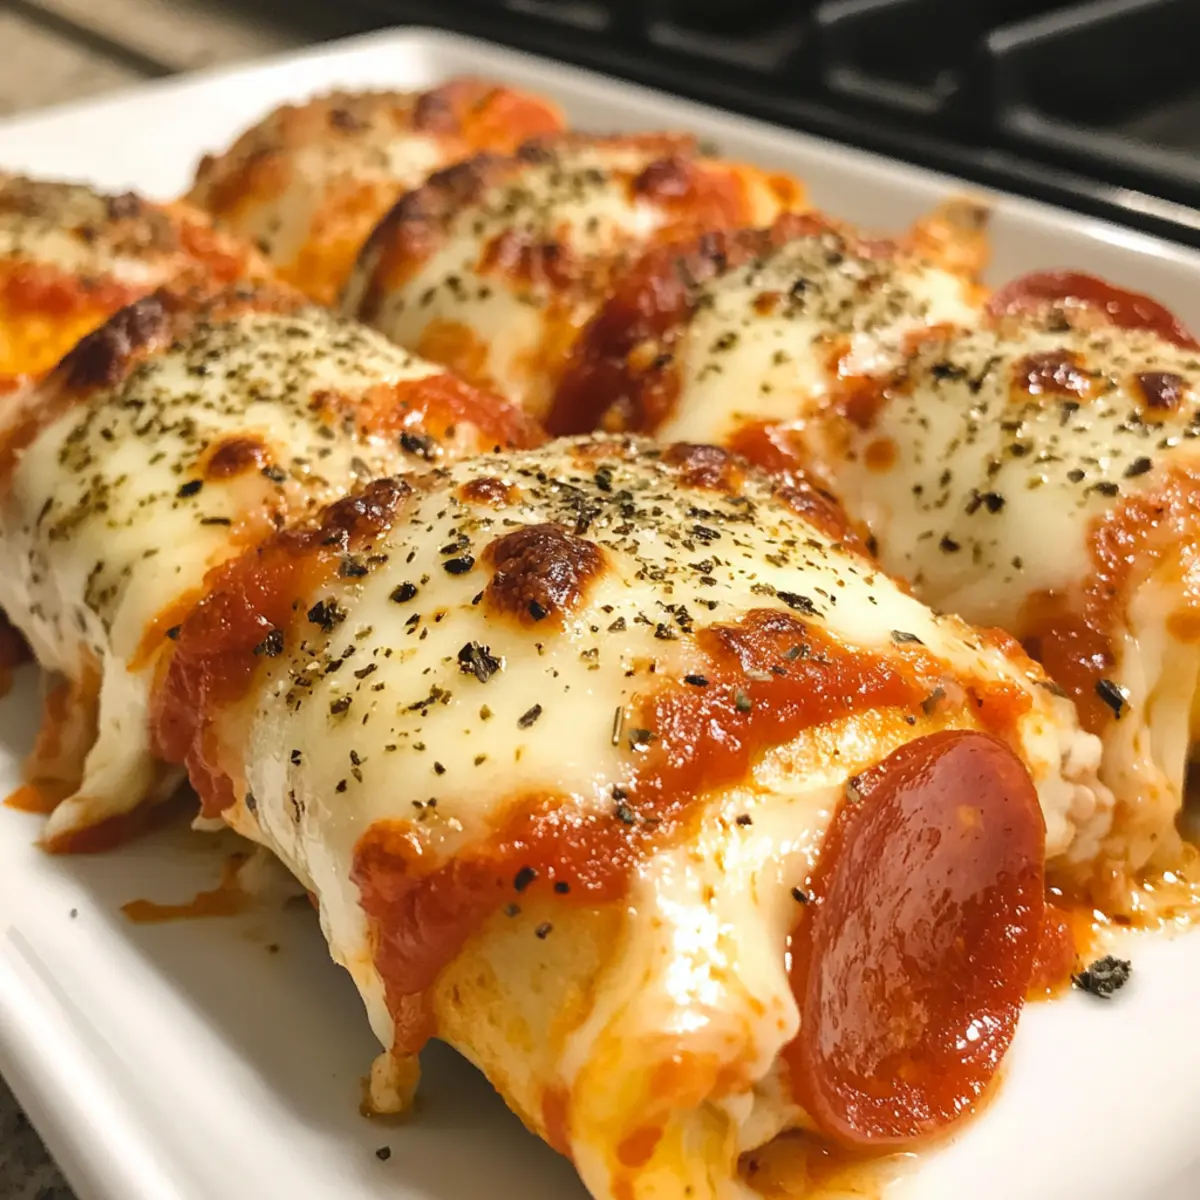
Step 5: Bake the Roll Ups
Place the rolled tortillas seam-side down on a baking sheet lined with parchment paper. Slide the baking sheet into your preheated oven and bake for 10-12 minutes, or until the roll-ups turn golden brown and the cheese inside is bubbling. Keep a close eye on them to prevent over-browning.
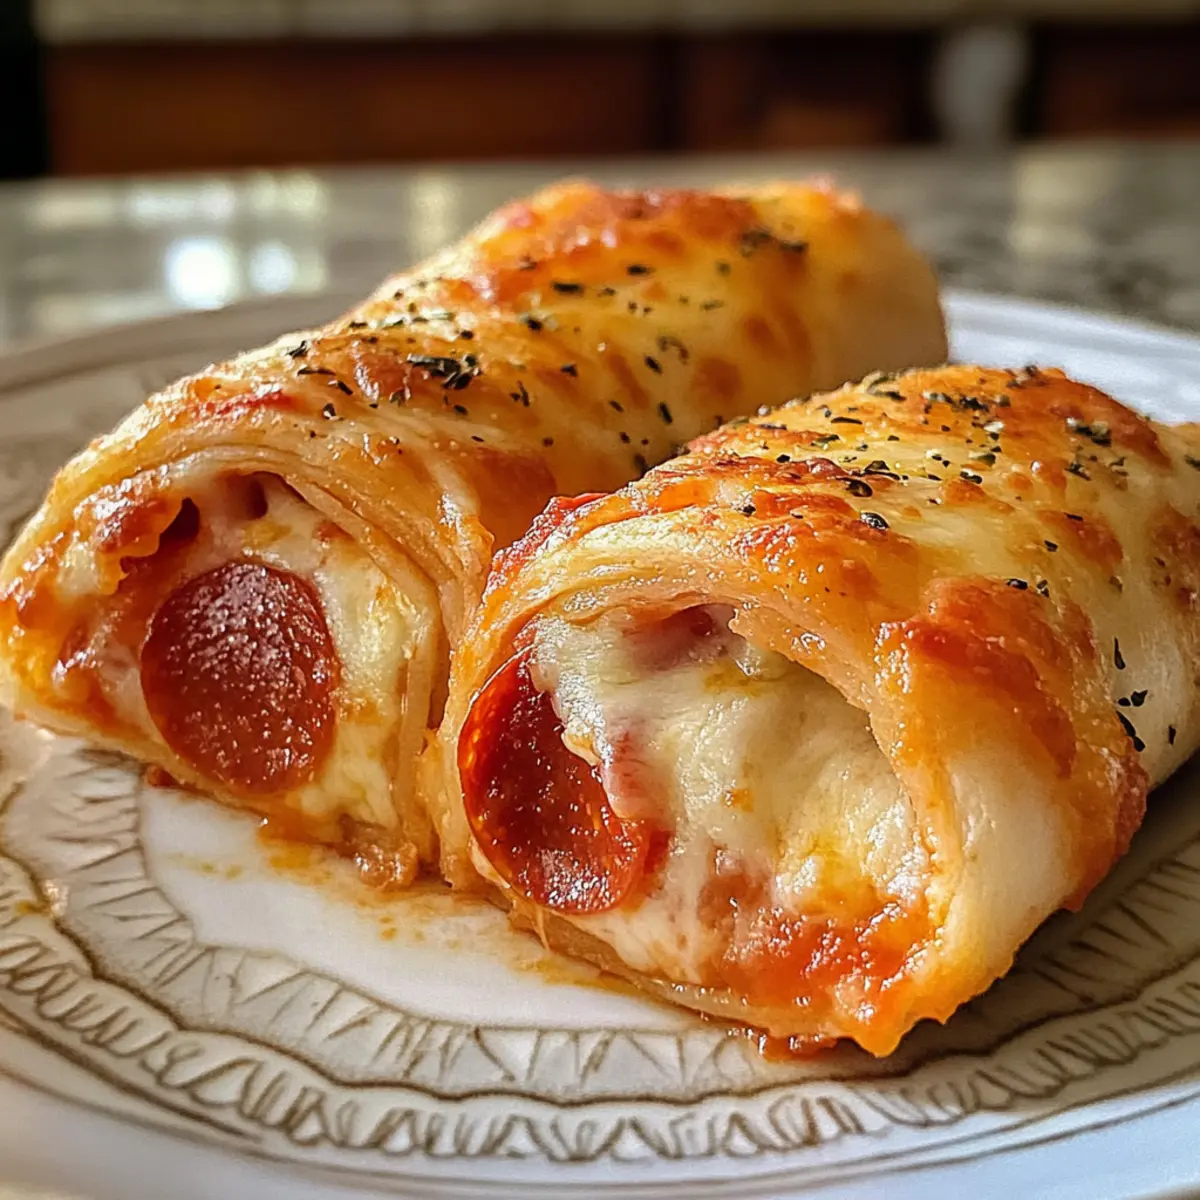
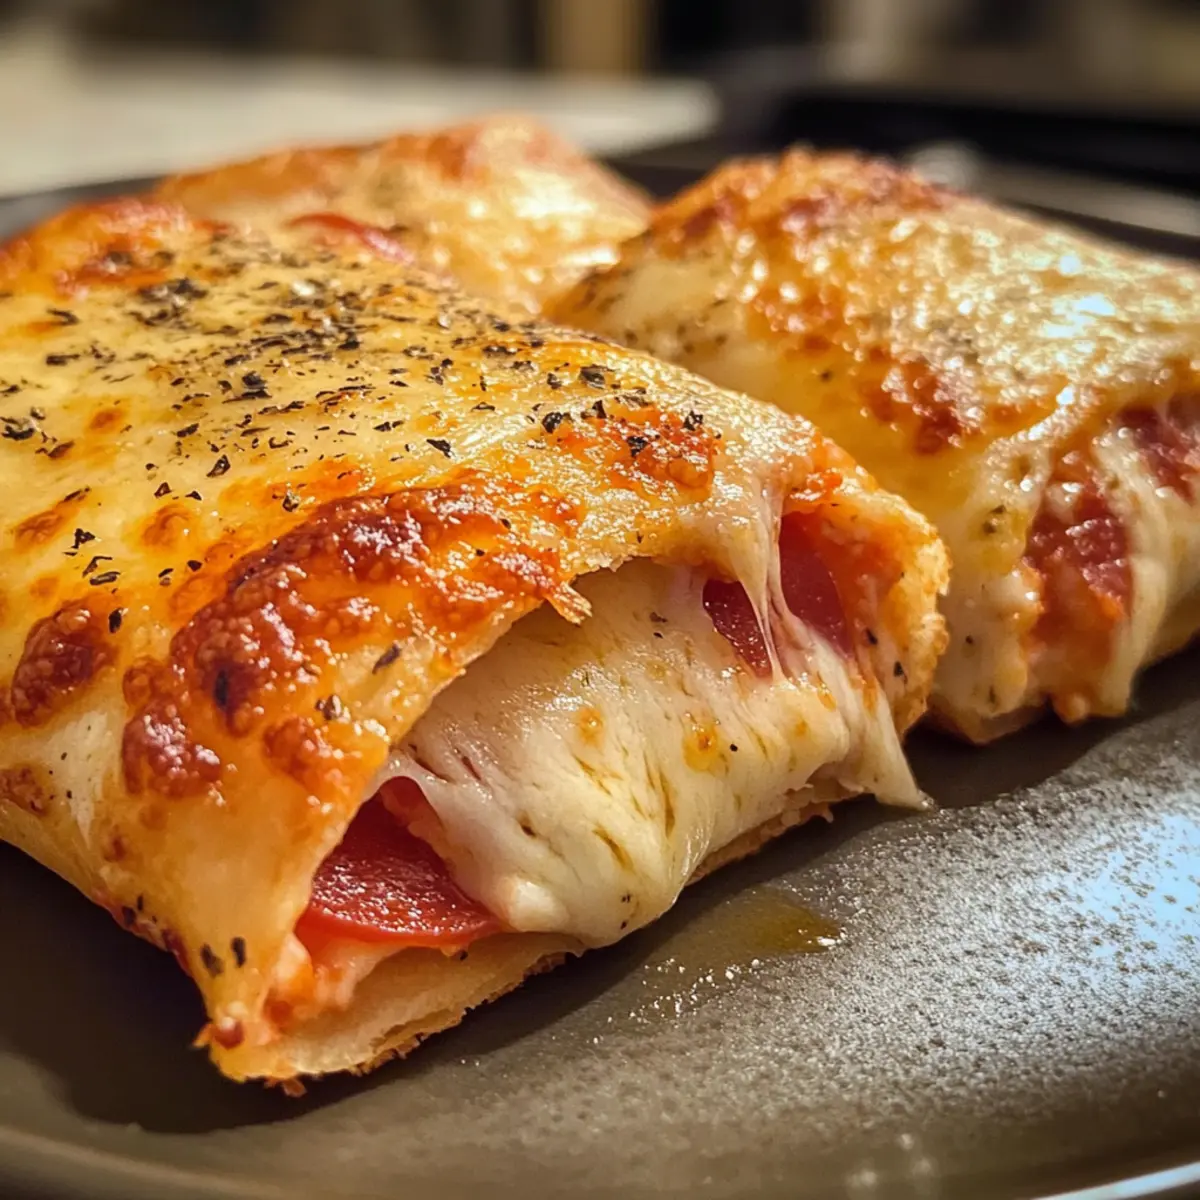
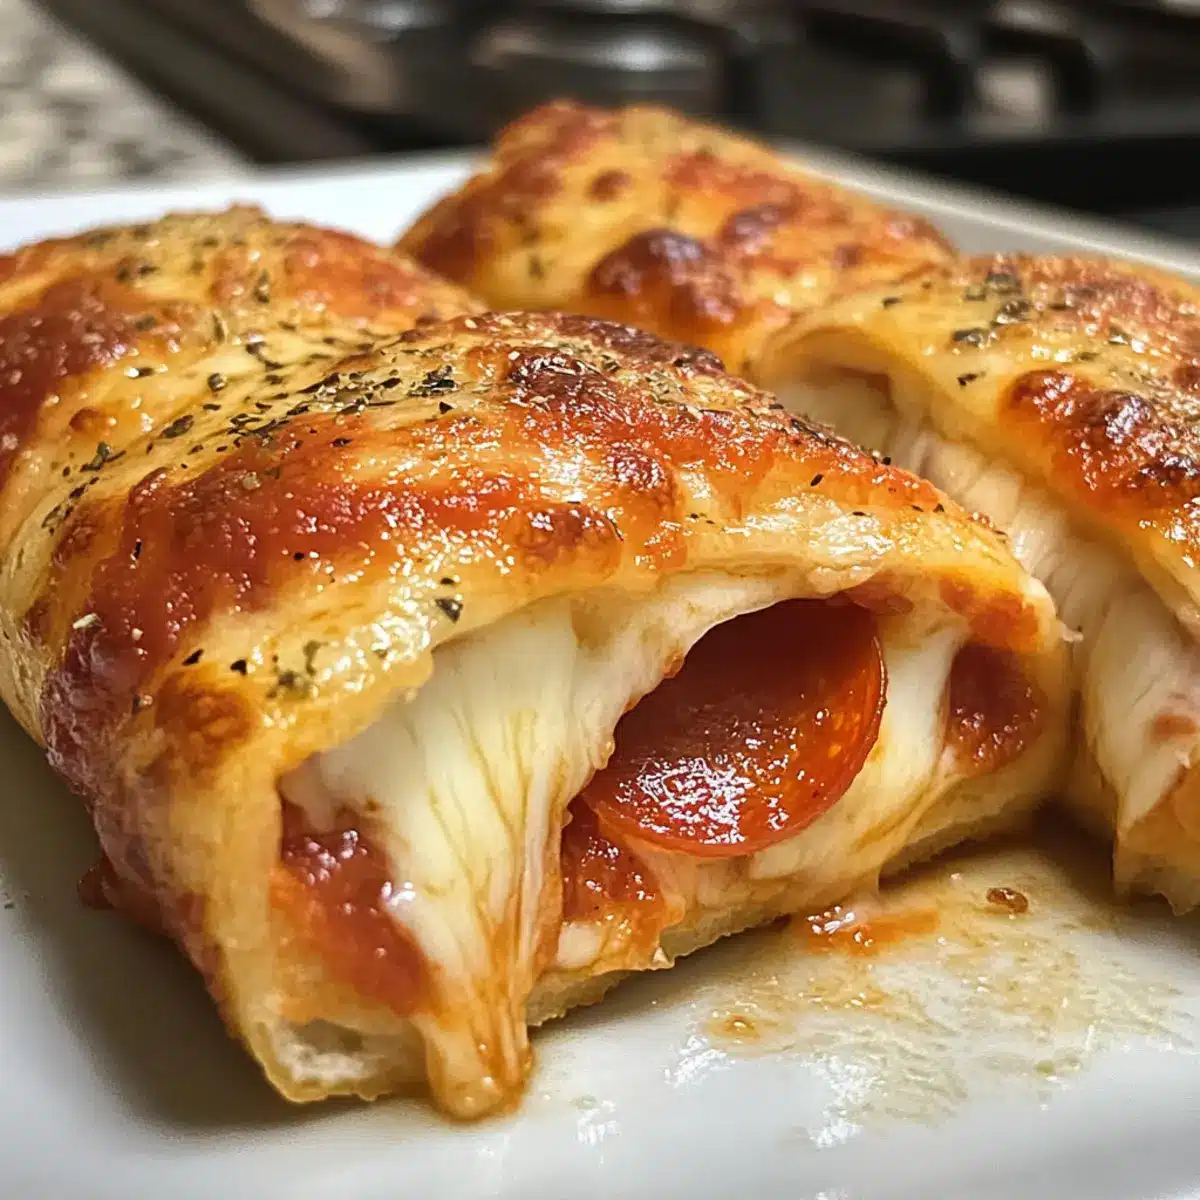
Step 6: Cool and Slice
When the Cheesy Pepperoni Pizza Roll Ups are out of the oven, let them cool for a few minutes. This will make them easier to handle and help the cheese set slightly. Once cooled, slice them into bite-sized pieces, ready for serving. Enjoy these delightful snacks warm, accompanied by extra marinara sauce for dipping!
How to Store and Freeze Cheesy Pepperoni Pizza Roll-Ups
Fridge: Keep your Cheesy Pepperoni Pizza Roll-Ups in an airtight container for up to 3 days. This will help maintain their delicious flavor and texture as you enjoy them throughout the week.
Freezer: If you’d like to save some for later, freeze the roll-ups before baking. Wrap each tightly in plastic wrap and store them in a freezer bag for up to 2 months.
Reheating: To restore the crispiness, reheat the roll-ups in a 350°F oven for about 5 minutes. This will make them warm and delightfully crunchy again, ready for your snacking pleasure!
Make-Ahead: Consider preparing a batch in advance and storing for quick snacks or meals. Just remember to cool them completely before refrigerating or freezing to preserve their best qualities.
Expert Tips for Cheesy Pepperoni Pizza Roll-Ups
-
Avoid Sogginess: Use a measured amount of marinara sauce—about 2 tablespoons per tortilla. This prevents the roll-ups from becoming too wet.
-
Crispy Texture: Bake the roll-ups on a wire rack for improved airflow, achieving an extra crispy outer layer.
-
Air Fryer Option: If you’re short on time, air fry at 375°F for 6-8 minutes. Just remember not to overcrowd the basket for even cooking.
-
Cheese Choices: While mozzarella is classic, experimenting with other quality cheese blends can enhance flavor. Just ensure they melt well!
-
Customization: Don’t hesitate to switch out pepperoni for veggies or spicy alternatives to tailor the flavors to your liking in these Cheesy Pepperoni Pizza Roll-Ups.
Cheesy Pepperoni Pizza Roll-Ups Variations
Feel the excitement of personalizing your Cheesy Pepperoni Pizza Roll-Ups to suit your cravings and preferences!
-
Veggie Boost: Add thinly sliced bell peppers or black olives for a flavorful crunch. These veggies not only enhance the taste but also provide extra nutrients for you and your family.
-
Spicy Kick: Swap traditional pepperoni for spicy varieties or sprinkle crushed red pepper flakes before rolling. It will deliver an exciting heat with every bite!
-
Cheesy Twist: Experiment with different cheese blends, like a spicy pepper jack or creamy provolone, to enhance the cheesy goodness. This twist can elevate the flavor profile while keeping everything delightfully melty.
-
Herb Infusion: Add fresh basil leaves or spinach right before rolling for an aromatic twist. They bring both color and fresh flavor, giving your roll-ups a garden-fresh vibe!
-
Crunchy Texture: Try using a crispy tortilla with a cornmeal coating for an extra crunchy finish. This provides a delightful contrast to the gooey filling that everyone will appreciate!
-
Dairy-Free: Substitute mozzarella with a dairy-free cheese alternative, ensuring a dairy-free delight for those with lactose intolerance. This allows everyone to join in on the deliciousness!
-
Sweet Touch: For a unique flavor combo, try a drizzle of honey or a sprinkle of balsamic glaze before rolling. It adds a sweet and savory element that will surprise your taste buds delightfully.
No matter how you choose to customize, these Cheesy Pepperoni Pizza Roll-Ups are a versatile and fun way to indulge. Pair them with a side of Cheesy Ranch Potatoes for an unforgettable meal!
Make Ahead Options
These Cheesy Pepperoni Pizza Roll-Ups are perfect for meal prep enthusiasts! You can prepare the roll-ups by assembling them up to 24 hours in advance. Simply follow the recipe steps until before baking, then store them tightly wrapped in plastic wrap or in an airtight container to maintain freshness. Refrigerate until you’re ready to bake for a quick snack or meal. To bake, remove from the fridge, and place them directly on a baking sheet—there’s no need to thaw! Just add an extra minute or two to the baking time if they’re chilled. This way, you’ll enjoy delicious, crispy roll-ups with minimal effort on busy weeknights!
What to Serve with Cheesy Pepperoni Pizza Roll-Ups?
There’s nothing like pairing your warm, cheesy roll-ups with delightful sides and refreshing drinks to elevate your snack game.
-
Fresh Garden Salad: A crisp salad with mixed greens and a zesty vinaigrette complements the rich flavors of the roll-ups beautifully. The freshness balances the cheesy indulgence, making each bite satisfying.
-
Garlic Breadsticks: These soft, buttery treats add a delightful crunch and a heavenly garlic aroma that pairs perfectly with marinara sauce. They create a comforting, family-friendly experience reminiscent of pizzerias.
-
Coleslaw: The crunchy, tangy slaw brings a refreshing contrast to the warm, cheesy roll-ups. Its vibrant flavors and textures provide a delightful balance to your meal.
-
Vegetable Platter with Dip: Fresh veggies like carrots, cucumbers, and bell peppers served with hummus or ranch dressing create a vibrant, healthy side option. This light addition offers a crunchy contrast to indulgent roll-ups.
-
Zesty Marinara Sauce: Serve extra warm marinara on the side for dipping. It enhances the flavor of each bite, taking your roll-ups to the next level of deliciousness.
-
Sparkling Water with Lemon: A refreshing drink option that cleanses the palate. The bubbles and zesty lemon add a bright touch to your meal, complementing the richness wonderfully.
-
Chocolate Chip Cookies: End your meal on a sweet note with warm cookies. They provide a comforting finish, satisfying dessert cravings after savory roll-ups.
Enjoy your roll-ups with these delightful pairings, and watch family and friends savor every bite!
Cheesy Pepperoni Pizza Roll-Ups Recipe FAQs
What kind of tortillas should I use for the roll-ups?
Absolutely! Low-carb tortillas are ideal for these Cheesy Pepperoni Pizza Roll-Ups. You can also opt for almond flour tortillas, which add a nutty flavor. Make sure to warm them slightly to ensure they’re pliable enough to roll without cracking.
How should I store leftover pizza roll-ups?
Once cooled, store your Cheesy Pepperoni Pizza Roll-Ups in an airtight container. They will keep fresh in the refrigerator for up to 3 days. To enjoy them again, simply reheat in a 350°F oven for about 5 minutes to get that crispy texture back!
Can I freeze the roll-ups for later?
Yes, you can! I recommend freezing the unbaked roll-ups. Wrap each one tightly in plastic wrap and store them in a freezer bag. They can stay good for up to 2 months. When you’re ready to bake, there’s no need to thaw; just add a few extra minutes to the baking time.
What if my roll-ups come out soggy?
No worries! Sogginess can often be prevented by using the right amount of marinara sauce—around 2 tablespoons per tortilla. Additionally, ensure that your pepperoni isn’t too greasy. If you find they become soggy after baking, try placing them on a wire rack to allow airflow around them for a crisper finish.
Are these roll-ups suitable for kids?
Very much so! These Cheesy Pepperoni Pizza Roll-Ups are not only kid-friendly but also fun to make together. Involve your little ones in the rolling process, and let them customize their own with favorite ingredients. Just keep an eye on the oven to help them learn safe cooking practices!
Can these roll-ups accommodate dietary restrictions?
Absolutely! For a vegetarian option, you can substitute pepperoni with your favorite veggies or even a meatless sausage. Just ensure that all your ingredients fit into your dietary needs, like using gluten-free tortillas if necessary. The beauty of these roll-ups is their versatility—experiment with what works best for you!
Cheesy Pepperoni Pizza Roll-Ups: Easy Low-Carb Snack Bliss
Ingredients
Equipment
Method
- Preheat your oven to 375°F (190°C).
- Lay the low-carb tortillas flat and spread about 2 tablespoons of marinara sauce on each.
- Sprinkle shredded mozzarella cheese over the sauce, then add pepperoni slices.
- Roll each tortilla tightly and brush the outside with olive oil.
- Place seam-side down on a baking sheet and bake for 10-12 minutes until golden brown.
- Cool for a few minutes, then slice into bite-sized pieces for serving.
Leave a Reply