
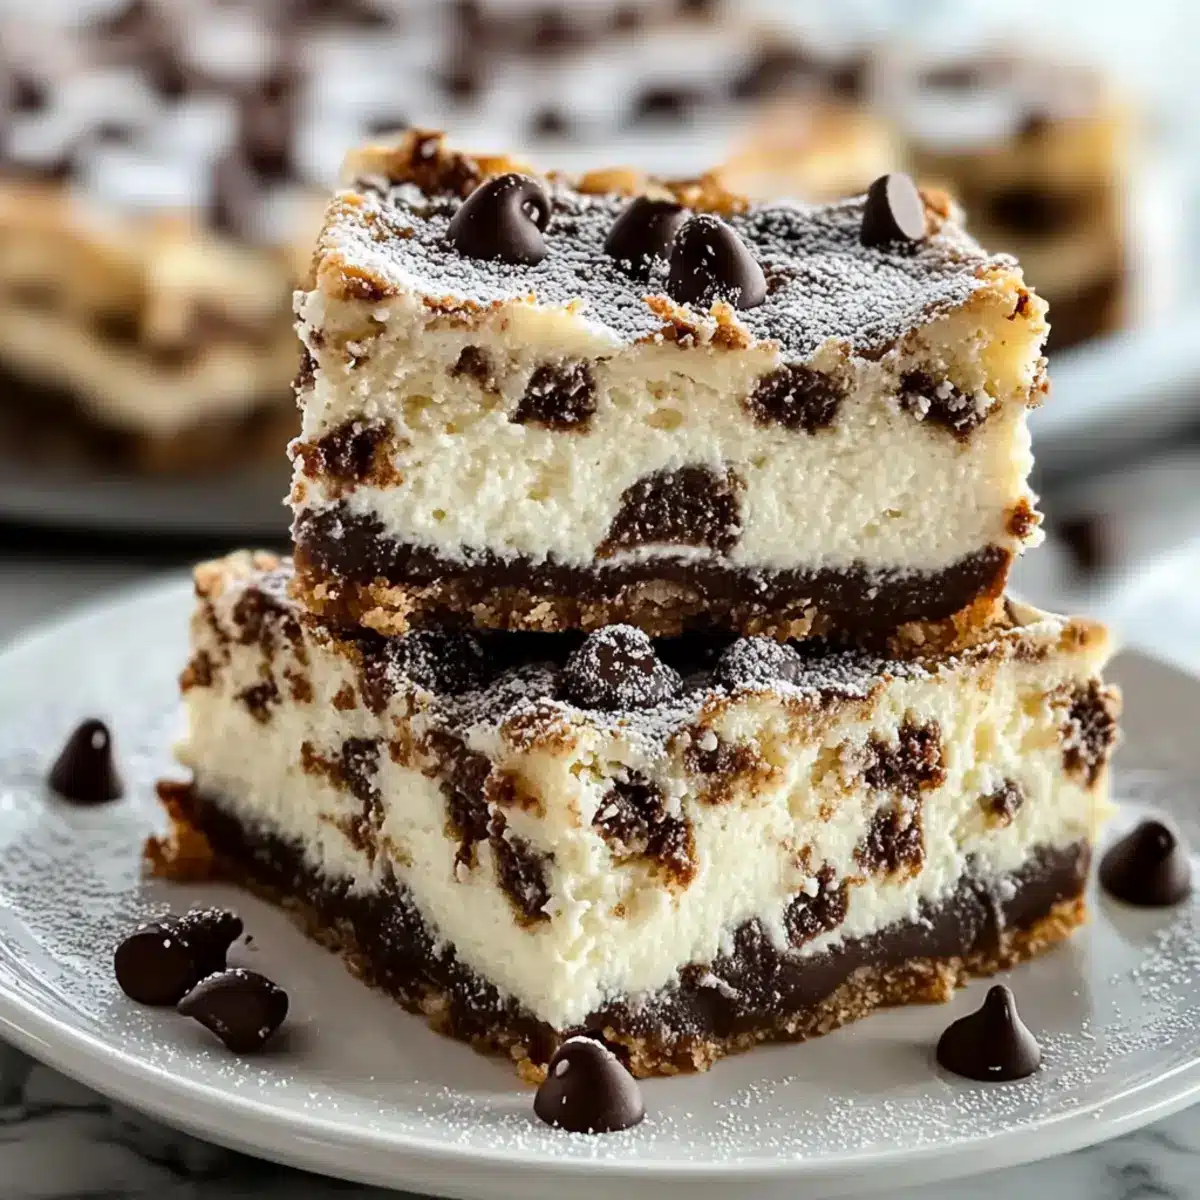
As I rummaged through my pantry one afternoon, a thought crossed my mind: what if I could merge the traditional flavors of Italian cannoli with the smooth indulgence of cheesecake? Enter the Cannoli Cheesecake Bars—a delightful dessert that brings together creamy ricotta and rich cream cheese, all nestled in a buttery graham cracker crust. This easy-to-make treat is perfect for any occasion, whether you’re hosting a dinner party or simply craving a sweet night cap. One of the best perks? You can whip these up ahead of time and let them chill, allowing those flavors to mingle beautifully. Plus, with endless variations to explore—from a chocolate lovers’ version to festive holiday twists—your creativity knows no bounds! So, are you ready to dive into this heavenly fusion of flavors? Let’s get baking!
Why Choose Cannoli Cheesecake Bars?
Indulgent Flavor: Each bite offers a luscious blend of creamy ricotta and velvety cream cheese, perfectly complemented by zesty citrus and sweet chocolate chips.
Easy Preparation: With simple steps and minimal ingredients, even novice bakers can master these delicious bars.
Make-Ahead Convenience: Ideal for busy schedules, you can prepare them a day in advance, allowing the flavors to fully develop.
Customizable Options: Feel free to get creative! Try the Chocolate Lovers’ Cannoli Bars or skip the chocolate for a nutty delight.
Crowd-Pleaser: Whether it’s a party or a family dinner, everyone can appreciate the unique twist on a classic Italian dessert.
Inviting Presentation: Dust with powdered sugar and crushed pistachios for an eye-catching dessert that’s as beautiful as it is delicious!
Cannoli Cheesecake Bars Ingredients
For the Crust
• Graham Cracker Crumbs – Structure and crunch for the crust; If desired, substitute with biscotti or vanilla wafers for a unique twist.
• Unsalted Butter – Binds the crust together; Ensure it’s melted to mix well.
• Granulated Sugar – Adds sweetness to the crust.
For the Filling
• Cream Cheese – Creates a rich texture in the filling; Make sure it’s softened for easy blending.
• Ricotta Cheese – The main component for creaminess; Tip: Drain ricotta in cheesecloth for 30 minutes before use.
• Powdered Sugar – Sweetens the cheesecake filling.
• Large Eggs – Provides structure and richness.
• Vanilla Extract – Adds depth of flavor.
• Orange or Lemon Zest – Brightens the filling; Use lemon zest for a more tart flavor if preferred.
• Cinnamon – Adds warmth and spices to the dessert.
• Mini Chocolate Chips – Distributes indulgent sweetness in the filling.
Optional Garnishes
• Powdered Sugar – For dusting the bars before serving.
• Crushed Pistachios – Adds flavor and texture, enhancing the presentation.
Let the ingredient list guide you as you create these delightful Cannoli Cheesecake Bars, a dessert that promises to impress with every bite!
Step‑by‑Step Instructions for Cannoli Cheesecake Bars
Step 1: Preheat the Oven
Begin by preheating your oven to 350°F (175°C). This critical step ensures that your Cannoli Cheesecake Bars bake evenly. While the oven warms up, gather your ingredients, and prepare your 9×13 inch pan by greasing it with cooking spray or butter for easy removal later.
Step 2: Prepare the Crust
In a mixing bowl, combine the graham cracker crumbs, melted unsalted butter, and granulated sugar until thoroughly mixed. The mixture should resemble wet sand. Transfer this combination into the greased pan, pressing it firmly into an even layer. Bake the crust for 8 minutes until it’s lightly golden, filling your kitchen with a delightful aroma.
Step 3: Mix the Filling
In a large mixing bowl, beat the softened cream cheese using an electric mixer until it achieves a smooth and fluffy consistency. Gradually add the well-drained ricotta cheese, powdered sugar, eggs, vanilla extract, citrus zest, and cinnamon to the bowl. Mix until everything is seamlessly blended and creamy for your Cannoli Cheesecake Bars filling.
Step 4: Incorporate Chocolate Chips
Gently fold in the mini chocolate chips with a spatula until they are evenly distributed throughout the luscious filling. This addition not only enhances the flavor but also adds a delightful touch of sweetness. Your filling should look rich and inviting, ready to be poured over the baked crust.
Step 5: Bake the Bars
Pour the creamy filling over the cooled crust, spreading it evenly with a spatula. Bake in the preheated oven for approximately 35 to 40 minutes. Keep an eye on them—you’re looking for a set filling that still has a slight jiggle in the center, signaling delicious creaminess.
Step 6: Cool and Chill
Once baked, remove the Cannoli Cheesecake Bars from the oven and allow them to cool completely on a wire rack. This cooling process typically takes at least an hour. After they’ve cooled down, cover the pan with plastic wrap or foil and refrigerate for at least 4 hours, or ideally overnight, to let the flavors meld beautifully.
Step 7: Slice and Serve
After chilling, it’s time to slice your delightful Cannoli Cheesecake Bars! Use a sharp knife to cut them into squares or rectangles. For a beautiful presentation, dust the tops with powdered sugar and sprinkle crushed pistachios if desired. Your decadent dessert is now ready to impress family and friends!
How to Store and Freeze Cannoli Cheesecake Bars
Fridge: Keep your Cannoli Cheesecake Bars refrigerated in an airtight container for up to one week. This preservation ensures each bite remains creamy and delightful.
Freezer: Wrap individual bars tightly in plastic wrap and then foil, placing them in the freezer for up to three months. This is perfect for enjoying a slice of indulgence later!
Thawing: To enjoy frozen bars, transfer them to the fridge and allow them to thaw overnight. This gentle process helps retain their rich texture and flavors.
Reheating: If desired, gently warm individual slices in the microwave for a few seconds. Enjoy them slightly warm, enhancing the rich filling experience!
What to Serve with Cannoli Cheesecake Bars
Indulging in these creamy and dreamy treats is even better when paired with delightful accompaniments that elevate the experience.
-
Rich Espresso: The bold flavors of espresso contrast beautifully with the sweet, creamy texture of the bars, creating a match made in dessert heaven.
-
Fresh Berries: Juicy strawberries or raspberries add a burst of freshness, balancing the richness of the Cannoli Cheesecake Bars while offering a pop of color on your plate.
-
Chocolate Sauce: A drizzle of warm chocolate sauce enhances the dessert’s indulgence, bringing an extra layer of decadence that chocolate lovers will appreciate.
-
Candied Citrus Peels: Bright and zesty, these peels mirror the citrus notes in the filling, adding a sweet, chewy element that complements every bite with a vibrant touch.
-
Vanilla Ice Cream: Serve a scoop of creamy vanilla ice cream on the side for a delightful contrast in temperature and texture, making your dessert experience truly memorable.
-
Raspberry Sauce: A tangy raspberry sauce drizzled over the bars provides a refreshing tartness, beautifully cutting through the sweetness while adding a stunning visual appeal.
Cannoli Cheesecake Bars Variations
Feel free to get creative and tailor these delightful bars to your taste and occasion!
-
Chocolate Lovers’: Incorporate cocoa powder into the crust and drizzle melted chocolate on top for an extra indulgent twist.
A rich chocolate flavor can elevate these bars into a true dessert experience! -
Nutty Delight: Top the baked bars with toasted nuts, like pistachios or almonds, for added texture and crunch.
The nutty flavors beautifully complement the creamy filling while giving an irresistible crunch. -
Mini Version: Bake the filling in muffin tins for delightful individual servings that are perfect for parties.
These bite-sized treats allow everyone to enjoy their own Cannoli Cheesecake experience! -
Holiday Twist: Enhance the filling with a splash of amaretto or rum extract for a festive flavor.
This seasonal variation can bring warmth and a touch of celebration to your dessert table! -
Fruit Infusion: Fold in some crushed berries or chopped fruits like strawberries or peaches to the filling.
The fruity addition introduces a burst of freshness that pairs wonderfully with the creamy texture. -
Gluten-Free Option: Use gluten-free graham cracker crumbs or almond flour for the crust to accommodate dietary needs.
This makes it accessible for friends and family who are on gluten-free diets without compromising on taste. -
Spicy Surprise: Add a pinch of cayenne pepper or ginger to the filling for a surprising kick of flavor.
The hint of spice can create a unique balance with the sweet and creamy notes of the cheesecake. -
Dairy-Free Version: Swap the cream cheese and ricotta for a dairy-free alternative like cashew cream or coconut yogurt.
This allows those with lactose intolerance to enjoy these sweet treats without any worries; everyone gets a taste!
Be sure to explore these variations, and don’t hesitate to try out your own exciting twists. With Cannoli Cheesecake Bars, the possibilities are endless!
Expert Tips for Cannoli Cheesecake Bars
-
Well-Drained Ricotta: Ensure your ricotta is thoroughly drained to prevent a watery filling that can affect the texture of your Cannoli Cheesecake Bars.
-
Mind the Bake Time: Avoid overbaking; the center should retain a slight jiggle when you take it out. This guarantees a creamy result!
-
Chill for Flavor: Allowing the bars to chill overnight deepens the flavors and improves texture. Don’t rush this step if you want the best experience!
-
Personalize Your Crust: Experiment with different crust bases, like crushed biscotti or vanilla wafers, for an exciting twist on your Cannoli Cheesecake Bars.
-
Decorative Touch: Sprinkling powdered sugar and crushed pistachios on top not only enhances flavor but also makes for a stunning presentation!
Make Ahead Options
These Cannoli Cheesecake Bars are an excellent choice for meal prep enthusiasts! You can prepare the crust up to 24 hours in advance and store it covered at room temperature. The filling can also be made a day ahead—simply mix it as directed, cover it tightly, and refrigerate for optimal freshness. For the best results, allow the bars to chill for at least 4 hours (or overnight) to enhance flavor and texture. When you’re ready to serve, bake the bars as instructed, then cool completely before slicing and dusting with powdered sugar. This option not only saves time but ensures your dessert is just as delicious on serving day!
Cannoli Cheesecake Bars Recipe FAQs
How can I choose the right ricotta cheese for my Cannoli Cheesecake Bars?
Absolutely! For the best results, use whole milk ricotta, as it delivers a rich and creamy texture that’s essential for these bars. Be sure to drain it thoroughly in cheesecloth for at least 30 minutes to avoid excess moisture, which can lead to a watery filling.
What’s the best way to store leftover Cannoli Cheesecake Bars?
Very simple! Store your Cannoli Cheesecake Bars in an airtight container in the refrigerator for up to 1 week. This keeps them fresh and maintains that creamy texture. For longer storage, consider freezing them.
Can I freeze Cannoli Cheesecake Bars?
Absolutely! To freeze them, wrap each sliced bar tightly in plastic wrap, then in foil, and place them in a freezer-safe bag or container. They can be kept frozen for up to 3 months. Just remember to label with the date for easy tracking!
What should I do if my cheesecake bars are too soft after baking?
If you find your Cannoli Cheesecake Bars are too soft, it might be due to underbaking or insufficient chilling time. To troubleshoot, ensure you bake them until the center has a slight jiggle but is set. After baking, let them cool completely and refrigerate for at least 4 hours (overnight is ideal) to fully set.
Are Cannoli Cheesecake Bars suitable for those with gluten allergies?
Great question! To make gluten-free Cannoli Cheesecake Bars, simply substitute the graham cracker crumbs with gluten-free cookie crumbs, such as those made from almond flour or gluten-free digestive biscuits. Ensure all ingredients, especially baking powder and any powdered sugar, are certified gluten-free to meet dietary restrictions.
Decadent Cannoli Cheesecake Bars That Wow Every Bite
Ingredients
Equipment
Method
- Preheat your oven to 350°F (175°C) and prepare your 9x13 inch pan by greasing it.
- In a mixing bowl, combine graham cracker crumbs, melted unsalted butter, and granulated sugar until mixed. Transfer to the greased pan and press firmly. Bake for 8 minutes until golden.
- In a large mixing bowl, beat softened cream cheese until smooth. Gradually add ricotta, powdered sugar, eggs, vanilla, citrus zest, and cinnamon. Mix until creamy.
- Gently fold in mini chocolate chips until evenly distributed. Pour filling over the cooled crust.
- Bake in the preheated oven for 35 to 40 minutes, until the center has a slight jiggle.
- Remove from oven and cool completely on a wire rack for at least an hour. Cover and refrigerate for a minimum of 4 hours or overnight.
- Slice into squares or rectangles and dust with powdered sugar and crushed pistachios before serving.
Leave a Reply