
The aroma of freshly baked cookies fills the air, transporting me back to my childhood kitchen where my family gathered, waiting eagerly for that first warm bite. Classic Chocolate Chip Cookies have always held a special place in my heart, and now, I’m excited to share this delightful homemade recipe with you. With a perfect balance of chewy goodness and a hint of crispness, this cookie is not just a treat; it’s a comforting hug in edible form. What I love most is how quick and easy it is to whip up a batch—making it a stress-free option when it’s time to satisfy that sweet tooth. Plus, the variations, like adding dark chocolate chunks or a nutty crunch, are a fun twist that allows for personalization. Curious about how to create this cherished classic? Let’s start baking together!
Why is this recipe a family favorite?
Nostalgic Comfort: Classic chocolate chip cookies evoke warm memories of childhood, making them a beloved treat for all ages.
Quick and Easy: With straightforward steps, even beginner bakers can master this recipe in no time.
Customizable Delight: Add dark chocolate chunks or nuts to suit your taste or dietary preferences.
Irresistibly Gooey: Fresh out of the oven, enjoy soft, warm bites filled with melting chocolate that bring smiles to every face.
Perfect Anytime: Whether it’s a cozy evening at home or a get-together, these cookies are the ultimate crowd-pleaser; just like Caramelised Soy Chicken satisfies savory cravings, these cookies hit the sweet spot!
Classic Chocolate Chip Cookie Ingredients
For the Dough
• All-Purpose Flour – Provides structure for the cookies; consider a gluten-free blend for a gluten-free version.
• Unsalted Butter – Adds richness and moisture; for dairy-free, substitute with coconut oil.
• Granulated Sugar – Sweetens and creates crispness; brown sugar can be used for a richer flavor.
• Brown Sugar – Ensures moisture and chewiness; feel free to choose light or dark brown sugar based on your preference.
• Large Eggs – Binds ingredients and helps with leavening; for a vegan version, replace with flax eggs (1 tbsp flaxseed meal + 2.5 tbsp water per egg).
• Vanilla Extract – Enhances overall flavor; pure vanilla will give the best result.
• Baking Soda – Helps cookies to rise; omit for flatter cookies.
• Salt – Balances the sweetness; a touch of sea salt elevates the flavors.
For the Chocolate Filling
• Chocolate Chips – The star ingredient for flavor and gooey texture; choose semisweet or dark chocolate for a more intense taste.
These ingredients together create a classic chocolate chip cookie that not only delights the senses but also holds a special place in the hearts of many. Enjoy baking this homemade family recipe and watch it become a cherished favorite in your home, just like it has always been!
Step‑by‑Step Instructions for Classic Homemade Chocolate Chip Cookies
Step 1: Preheat the Oven
Begin by preheating your oven to 350°F (175°C). This crucial step ensures that your Classic Homemade Chocolate Chip Cookies will bake evenly and achieve that perfect golden-brown finish. While your oven is heating, you can prepare the other ingredients to streamline your baking process.
Step 2: Mix the Dry Ingredients
In a medium-sized bowl, whisk together 2 ¼ cups of all-purpose flour, 1 teaspoon of baking soda, and ½ teaspoon of salt. This step creates a harmonious blend of dry ingredients, ensuring that the baking soda is evenly distributed, and prevents any unwanted clumps. Once mixed, set this bowl aside for later use as you focus on the wet ingredients.
Step 3: Cream Butter and Sugars
In a large mixing bowl, combine 1 cup of melted unsalted butter with ¾ cup of granulated sugar and ¾ cup of brown sugar. Using a hand mixer or stand mixer, beat these together on medium speed until the mixture becomes light, fluffy, and creamy, which takes about 2-3 minutes. This creaming process is vital for incorporating air into the cookies, leading to a delightful chewy texture.
Step 4: Incorporate Eggs and Vanilla
Next, add in 2 large eggs, one at a time, mixing well after each addition to ensure everything is combined smoothly. Then, pour in 1 teaspoon of vanilla extract and continue to beat the mixture for another 30 seconds. The eggs and vanilla enhance the flavor and moisture, which is essential for the success of your Classic Chocolate Chip Cookies.
Step 5: Combine Mixtures
Gradually add the dry ingredients from your earlier bowl into the wet butter mixture using a spatula or wooden spoon. Mix gently until just combined—be careful not to overmix, as this could lead to tough cookies. The result should be a thick, creamy dough that holds together beautifully, just waiting for those scrumptious chocolate chips.
Step 6: Fold in Chocolate Chips
Now it’s time to fold in 2 cups of chocolate chips, gently incorporating them into your dough with a spatula. This step is where the magic happens; the chocolate chips add that irresistible gooey goodness that makes your Classic Homemade Chocolate Chip Cookies so delightful. Aim for an even distribution throughout the dough for a consistently chocolatey experience in every bite.
Step 7: Scoop the Dough
Using a cookie scoop or tablespoon, portion out the dough onto ungreased baking sheets, ensuring there’s about 2 inches of space between each scoop. This allows room for spreading as they bake. You should be able to fit about 12 cookies per standard baking sheet, so feel free to bake in batches as needed.
Step 8: Bake
Slide the baking sheets into your preheated oven and bake for 10-12 minutes, or until the edges are lightly golden and the centers look slightly underbaked. This visual cue is essential; the cookies will continue to firm up as they cool, achieving the perfect chewy consistency.
Step 9: Cool
Once baked, remove the cookie sheets from the oven and let them cool on the sheets for 5 minutes. This allows the cookies to set and prevents them from falling apart when transferring. After cooling slightly, move the cookies to a wire rack to cool completely, where they will develop a delicious texture that is simply irresistible.
Expert Tips for Classic Chocolate Chip Cookies
-
Soften Butter: Ensure your butter is softened but not melted; this is crucial for achieving the right texture in your cookie dough.
-
Avoid Overbaking: Keep an eye on your cookies while they bake; removing them when they look slightly underbaked will result in that deliciously chewy consistency.
-
Chill the Dough: For even better flavor and texture, chill your dough for at least 30 minutes before baking; this helps to develop the flavors beautifully.
-
Even Chocolate Distribution: When folding in chocolate chips, make sure to distribute them evenly within the dough, creating that irresistible chocolatey goodness in every bite.
-
Use Quality Ingredients: Opt for high-quality chocolate chips and pure vanilla extract to elevate the taste of your homemade cookies, making them truly exceptional.
-
Experiment with Variations: Don’t hesitate to customize your cookies with add-ins like nuts or dried fruit to create a unique twist on this classic chocolate chip cookie recipe.
How to Store and Freeze Classic Chocolate Chip Cookies
Room Temperature: Store cookies in an airtight container at room temperature for up to one week to maintain freshness and softness.
Fridge: If you prefer them chilled, keep the cookies in the fridge for up to two weeks in a sealed container, but bring them to room temperature before serving.
Freezer: For longer storage, freeze cookies in a single layer on a baking sheet, then transfer to a ziplock bag for up to three months. Allow them to thaw at room temperature or heat in the microwave for a few seconds.
Reheating: To enjoy warm cookies again, reheat individual cookies in the microwave for about 10-15 seconds or in an oven at 300°F (150°C) for a few minutes. They’ll taste just like fresh-baked Classic Chocolate Chip Cookies!
Make Ahead Options
These Classic Chocolate Chip Cookies are perfect for meal prep! You can prepare the cookie dough up to 24 hours in advance, allowing the flavors to meld beautifully in the refrigerator. Simply scoop the dough onto baking sheets, cover them tightly with plastic wrap, and refrigerate. For the best quality, let the dough sit at room temperature for about 10-15 minutes before baking to ensure they spread properly. Alternatively, you can freeze the scooped dough for up to 3 months; just pop the frozen dough balls directly into the oven without thawing, adding an extra minute or two to the baking time. This way, you’ll have fresh, warm cookies at a moment’s notice—just like a bakery treat made at home!
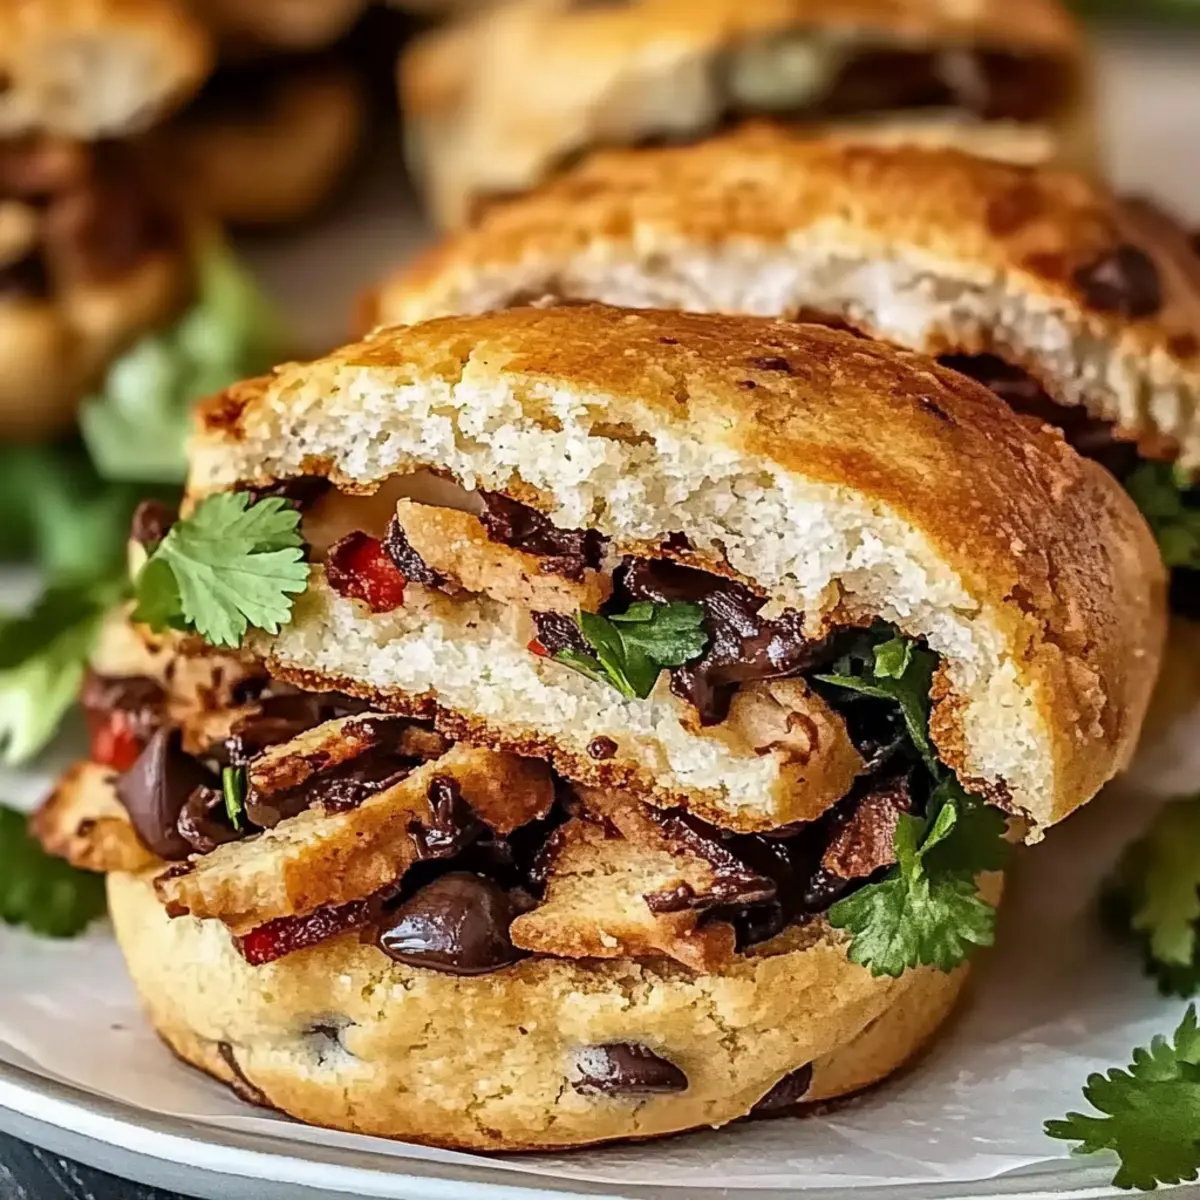
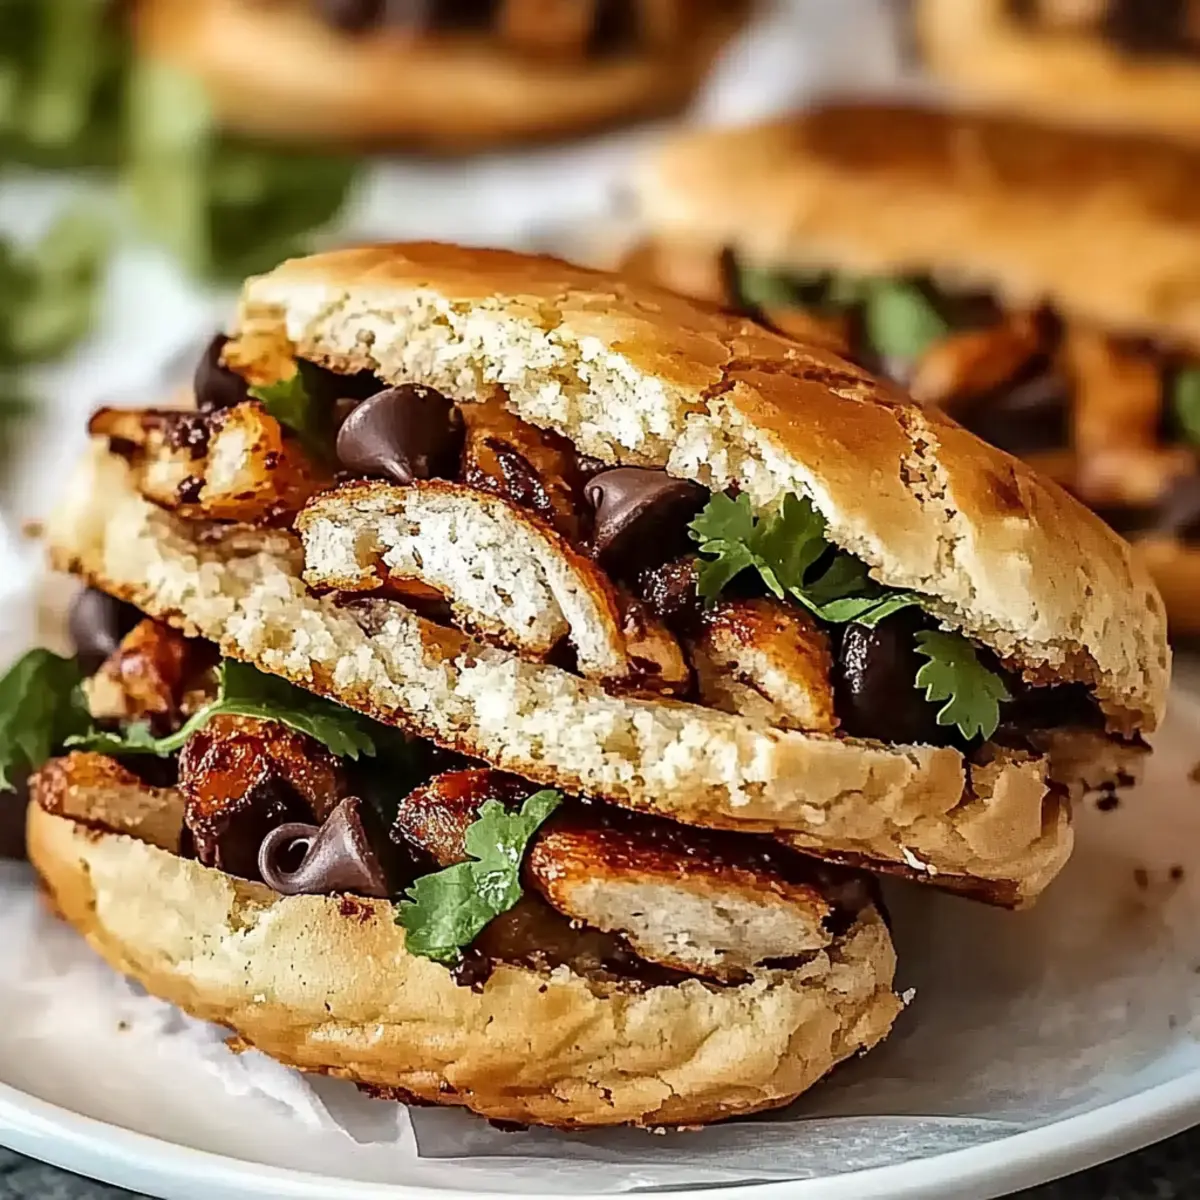
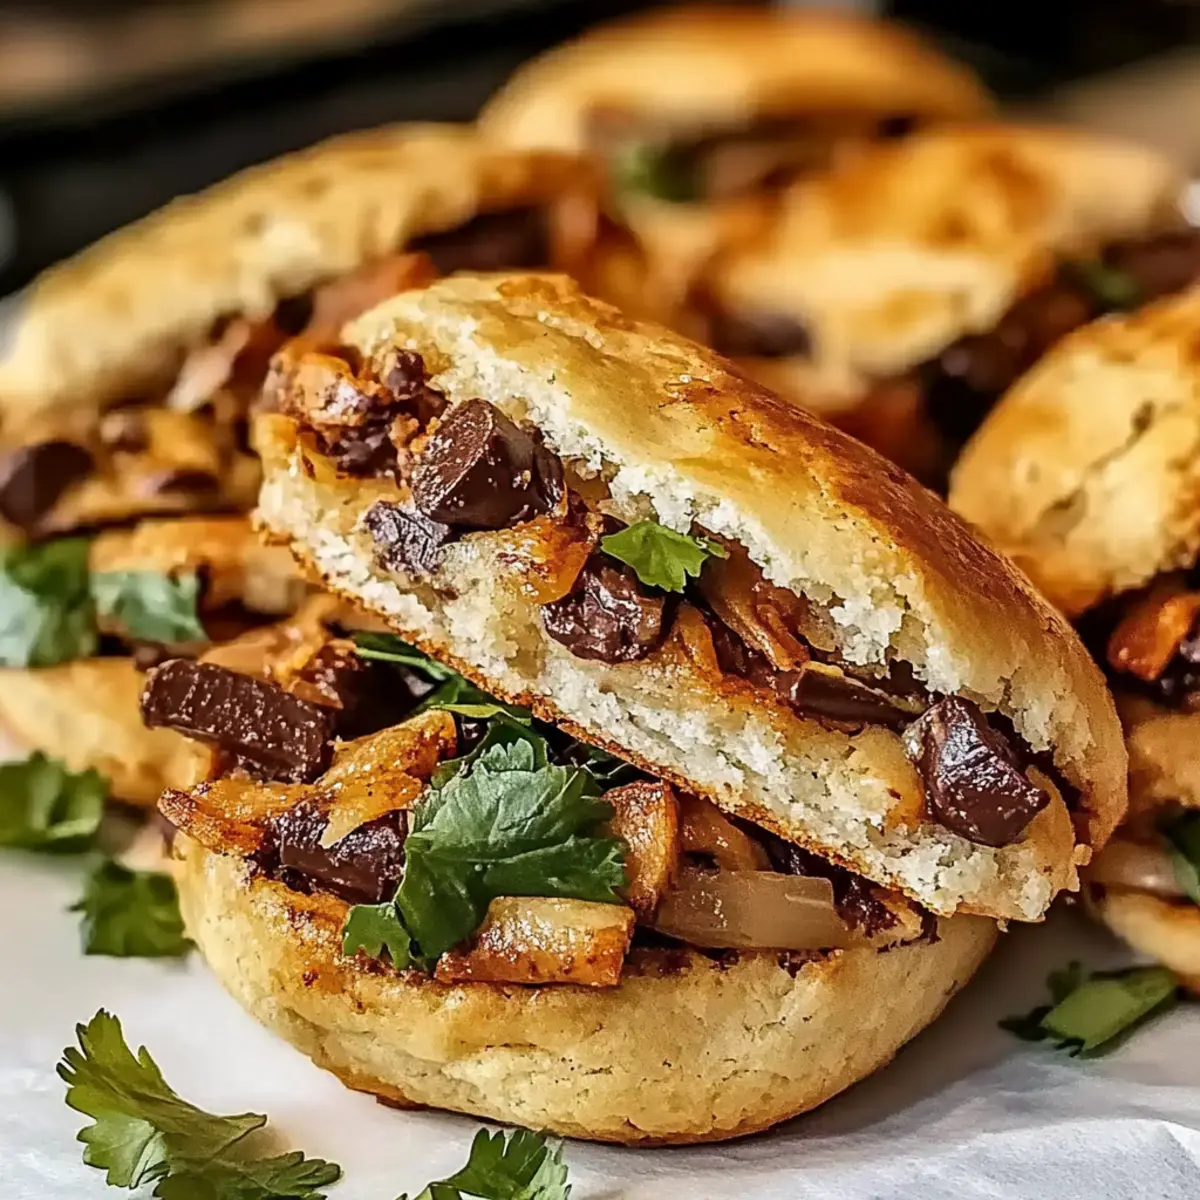
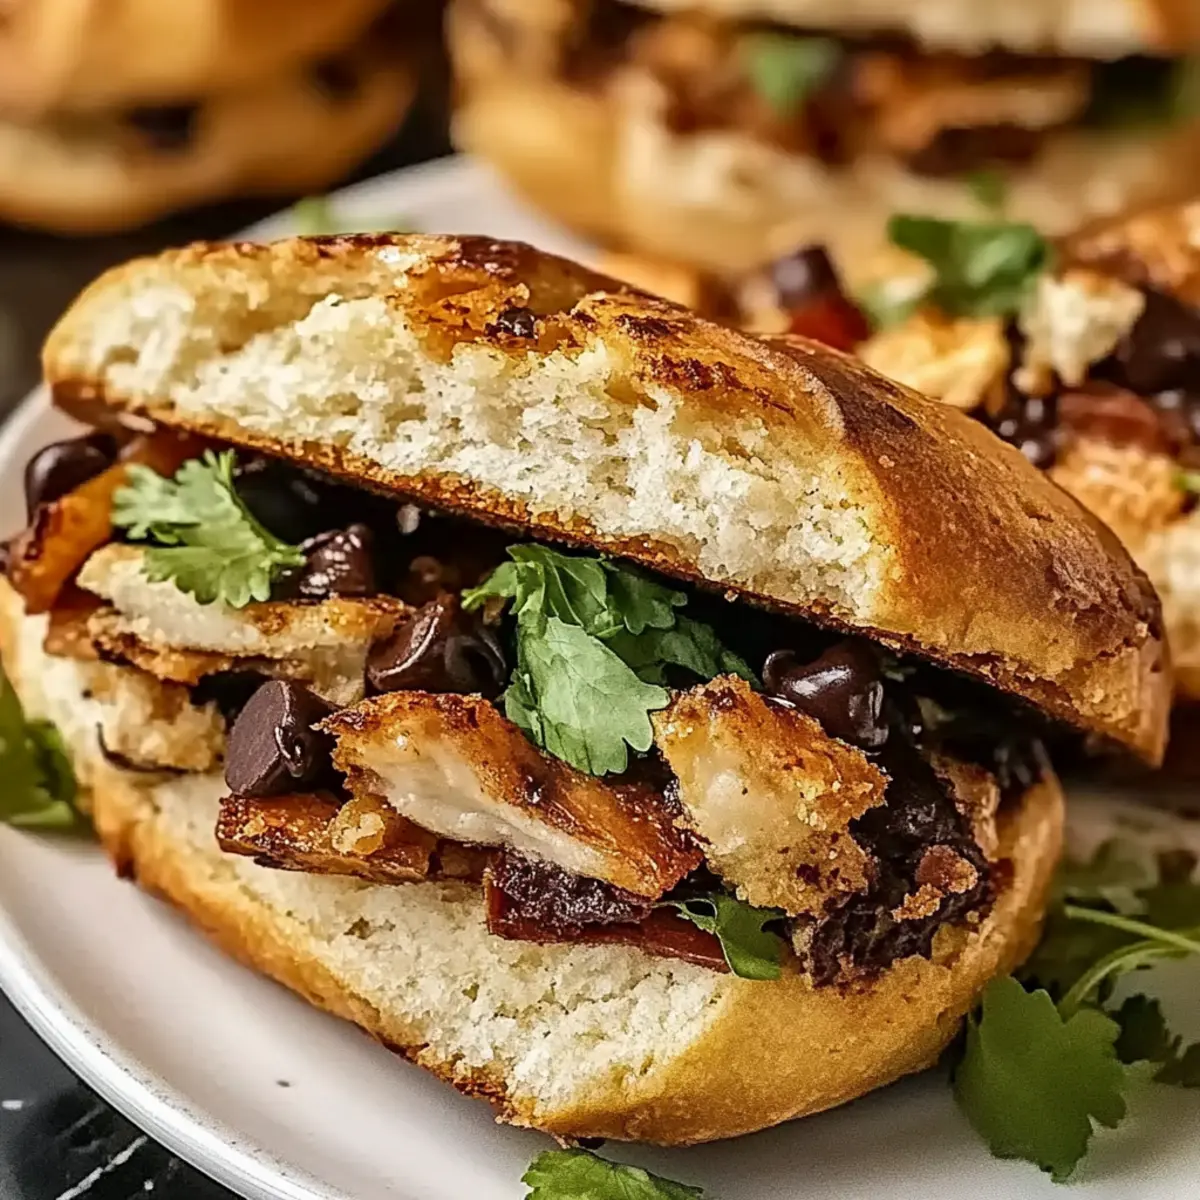
Chicken Torta Sandwich Variations
Feel free to get creative with the Chicken Torta Sandwich, allowing you to explore delightful combinations and flavors!
- Spicy Kick: Add sliced jalapeños or chipotle sauce for a fiery flavor burst that will please any heat lover.
- Cheesy Delight: Layer on pepper jack or queso fresco for an extra creamy texture; the melted cheese adds a lovely richness.
- Avocado Twist: Spread mashed avocado or guacamole on your sandwich for creaminess and a fresh taste that complements the chicken beautifully.
- Veggie Boost: Include roasted red peppers, lettuce, or pickled onions to add a crunchy contrast; these veggies bring brightness and texture to each bite.
- Zesty Sauce: Drizzle a citrus-infused mayo with lime juice for a refreshing zing, enhancing the overall flavor profile of your torta.
- Bread Variety: Try different bread types like bolillo, ciabatta, or sourdough for interesting textures and flavors, making each sandwich unique!
- Meat Alternatives: Swap chicken for grilled shrimp or shredded beef for a delicious twist; both options can elevate your torta experience.
- Refreshing Side: Serve with a side of Asian Chicken Cranberry salad for a light and fruity contrast to the savory sandwich.
These variations offer a delicious canvas for customization, ensuring your Chicken Torta Sandwich is always a satisfying culinary adventure!
What to Serve with Classic Chocolate Chip Cookies
The sweet, buttery aroma of freshly baked cookies sets the stage for delightful pairings that elevate your homemade treats to a full dessert experience.
- Vanilla Ice Cream: A scoop of creamy vanilla ice cream melts beautifully atop warm cookies, creating an indulgent dessert you won’t forget.
- Milk: The classic pairing! Cold or warm, a glass of milk enhances the chocolate flavor, creating a nostalgic combination of tastes.
- Coffee: The rich, robust taste of coffee perfectly offsets the sweetness of your cookies, creating a harmonious flavor balance.
- Chocolate Sauce: Drizzle warm chocolate sauce over cookies for an extra sweet touch that satisfies any chocolate lover’s cravings.
- Fresh Berries: Juicy strawberries or raspberries add a refreshing burst of flavor that contrasts lovely with the sweetness of the cookies.
- Fruit Salad: A vibrant mix of fruit provides a healthy balance, cutting through the richness of cookie dough while adding vibrancy to the plate.
- Caramel Sauce: Pour over your warm cookies for an enticing combination of flavors that makes every bite purely decadent.
- Hot Cocoa: A steaming cup of hot cocoa feels like a warm hug, making it a cozy companion for your chocolate chip cookies on chilly evenings.
Classic Chocolate Chip Cookies Recipe FAQs
What type of chocolate chips should I use for the best flavor?
I recommend using semisweet or dark chocolate chips for a richer taste. The choice depends on your preference; semisweet chips give you that classic sweet chocolate flavor, while dark chocolate offers a more intense experience.
How can I tell if my cookies are underbaked?
Look for lightly golden edges and slightly soft centers. If they appear puffy and underbaked, that’s a good sign! Remember, they will continue to firm up as they cool outside the oven, leading to that chewy texture we all adore.
What’s the best way to store leftover cookies?
Store your classic chocolate chip cookies in an airtight container at room temperature for up to one week. If you want to keep them fresh longer, you can refrigerate them in a sealed container for up to two weeks—but be sure to let them warm to room temperature before enjoying!
Can I freeze my cookie dough?
Absolutely! To freeze the dough, scoop cookie portions onto a baking sheet lined with parchment paper and freeze until solid. Once hardened, transfer them to a ziplock bag and store in the freezer for up to three months. When you’re ready to bake, simply preheat your oven and add a couple of extra minutes to the baking time.
What can I do if my cookies spread too much while baking?
If your cookies spread too much, it may be due to melted butter or over-mixing the dough. Next time, ensure your butter is softened (not melted) and mix until just combined without overworking the dough. Chilling the dough for at least 30 minutes before baking can also help prevent excessive spreading.
What can I substitute for an egg in this recipe?
For a vegan option, use flax eggs instead! To create one flax egg, mix 1 tablespoon of flaxseed meal with 2.5 tablespoons of water. Let it sit for 5 minutes until it’s gelatinous. This will provide the binding needed to maintain the texture of your cookies!
Ultimate Chicken Torta Sandwich: Flavorful and Satisfying Delight
Ingredients
Equipment
Method
- Preheat your oven to 350°F (175°C).
- In a medium-sized bowl, whisk together the flour, baking soda, and salt.
- In a large mixing bowl, combine melted butter with granulated sugar and brown sugar. Beat until light and fluffy.
- Add in eggs one at a time, mixing well after each addition. Pour in vanilla extract and beat for another 30 seconds.
- Gradually add the dry ingredients into the wet mixture and mix gently until just combined.
- Fold in chocolate chips gently into the dough.
- Scoop the dough onto ungreased baking sheets, ensuring 2 inches between each.
- Bake for 10-12 minutes or until edges are lightly golden.
- Let cookies cool on sheets for 5 minutes before transferring to a wire rack.
Leave a Reply