
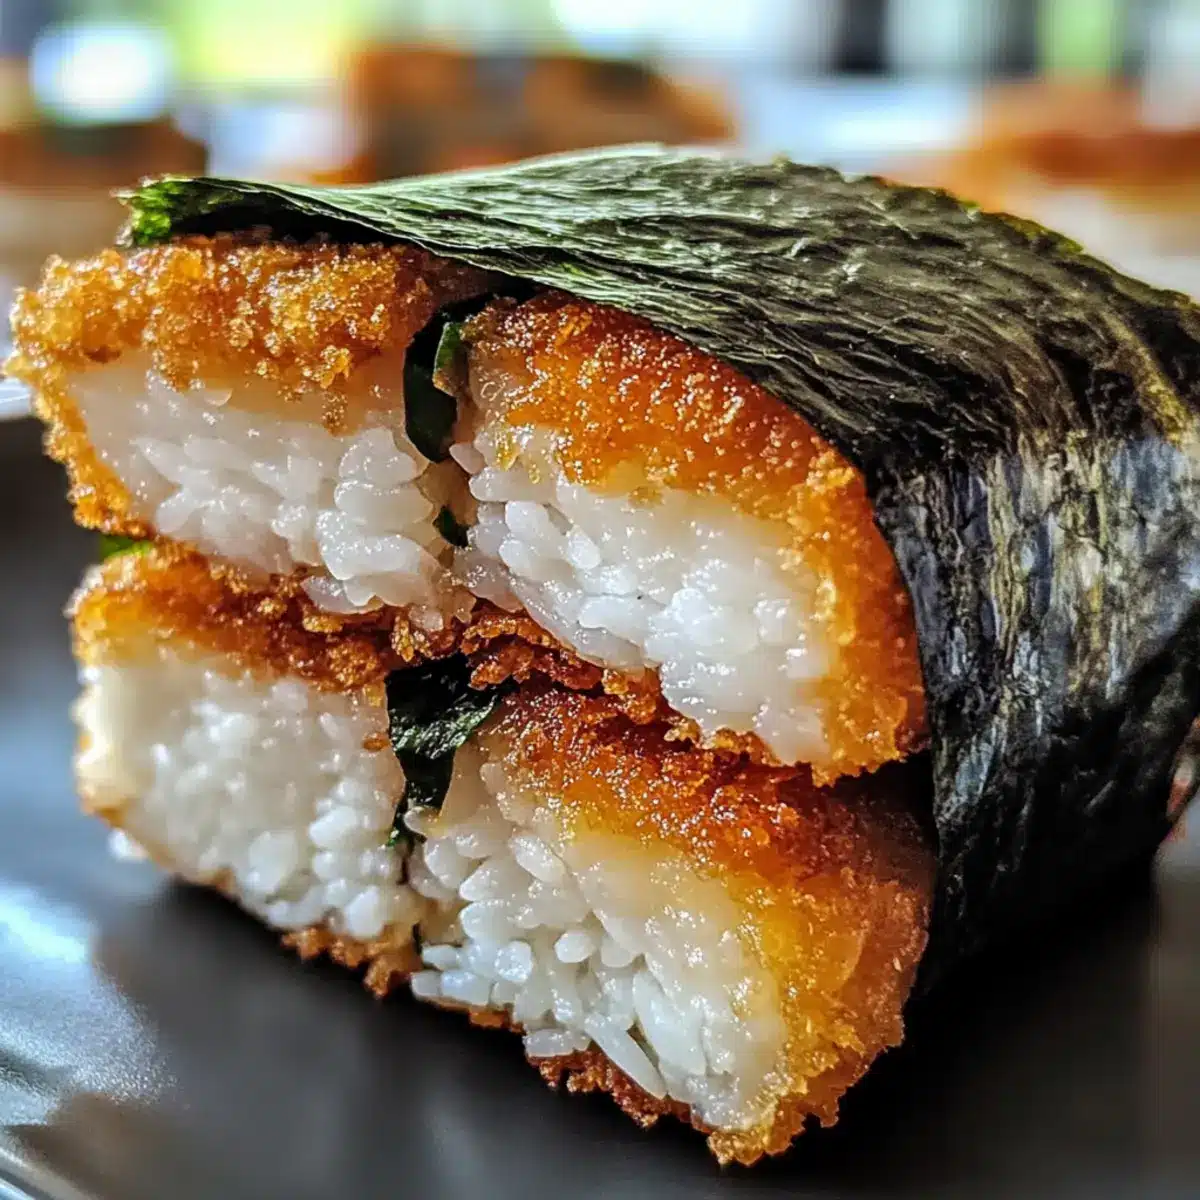
As I strolled through my favorite food market, the vibrant colors and enticing aromas whisked me away to a culinary paradise. That’s where I discovered the inspiration for my Crispy Chicken Katsu Musubi—a fusion creation that beautifully combines crunchy fried chicken, seasoned sushi rice, and savory nori. What captivates me about this snack is not just its irresistible crunch, but also its versatility; it makes for an ideal quick recipe, perfect for lunch breaks or picnics! Plus, it’s a comforting dish that can be prepped ahead of time to brighten up your busy weekdays. Have you ever tasted the delightful fusion of flavors in each bite? Let’s bring this tasty twist into your kitchen today!
Why is Chicken Katsu Musubi so special?
Comforting Bliss: This crispy Chicken Katsu Musubi isn’t just a snack; it’s a comforting bite of home-cooked goodness. Quick to Make: With simple ingredients, it comes together swiftly, making it perfect for busy weeknights. Versatile Delight: Feel free to customize it—experiment with tofu or your favorite sauces like sriracha for a spicy kick! Crowd-Pleasing: Serve it at your next picnic or potluck, and watch as it disappears—everyone loves this unique twist on classic flavors. Plus, you can prepare the components ahead of time, ensuring just-fried perfection at serving.
Crispy Chicken Katsu Musubi Ingredients
For the Chicken
• Boneless Skinless Chicken Thighs – Juicy star of the dish providing rich flavor; chicken breasts can be used for a leaner option.
• Large Eggs – Essential for binding the coating to the chicken, ensuring a crispy texture; a vegan egg alternative may also be used.
• All-Purpose Flour – Creates a wet batter for dredging the chicken; gluten-free flour can work as a substitute.
• Salt – Enhances overall flavor; adjust to dietary preferences.
• Ground Black Pepper – Adds warmth and depth; optional based on taste preference.
• Panko Breadcrumbs – Provides a light and crispy crust; regular breadcrumbs can be used for a different texture.
• Neutral Oil (for frying) – Essential for frying the chicken; canola or vegetable oil are excellent options. Ensure enough for proper frying.
For the Musubi Assembly
• Nori Sheets (cut into thirds) – Wraps the musubi and imparts umami flavor; soy paper can be a gluten-free alternative.
• Cooked Sushi Rice – Hearty base offering substance; brown rice can be swapped for a healthier option.
• Tonkatsu Sauce – Adds sweetness and tang; barbecue sauce can be substituted in a pinch for a unique twist on crispy Chicken Katsu Musubi.
Feel free to gather these ingredients and embark on your culinary adventure! The irresistible combination is sure to become a beloved staple in your home.
Step‑by‑Step Instructions for Crispy Chicken Katsu Musubi
Step 1: Pound the Chicken
Begin by placing boneless skinless chicken thighs between two sheets of plastic wrap. Use a meat mallet to pound the chicken to an even ½-inch thickness, which ensures uniform cooking and a tender result. Take your time and apply gentle pressure to avoid tearing the meat.
Step 2: Prepare the Batter
In a shallow dish, whisk together large eggs, all-purpose flour, salt, and black pepper until you achieve a smooth batter similar to pancake consistency. This mixture is crucial for helping the panko breadcrumbs adhere to the chicken, creating that delightful crispy coating you’re aiming for in your Crispy Chicken Katsu Musubi.
Step 3: Coat the Chicken
Dip each pounded chicken thigh into the batter, ensuring it’s coated evenly. Allow any excess batter to drip off before rolling the chicken in panko breadcrumbs, pressing down lightly to adhere the crumbs well. The chicken should be fully covered for maximum crunch once fried—this step is essential for achieving that perfect texture.
Step 4: Fry the Chicken
Heat a generous amount of neutral oil, like canola or vegetable oil, in a skillet over medium heat, ensuring it reaches 350°F. Carefully add the coated chicken thighs to the hot oil, frying them for 4-6 minutes per side until they turn a golden brown and are cooked through. Keep an eye on the color for that delightful crunch.
Step 5: Shape the Rice
While the chicken is frying, prepare your cooked sushi rice in a separate bowl. Use a moistened musubi mold to shape the rice into compact layers, pressing firmly to achieve a nice structure. This step is vital for assembling your Crispy Chicken Katsu Musubi later on—ensuring it holds well together.
Step 6: Assemble the Musubi
Once your chicken is fried and your rice is shaped, it’s time to put everything together! Spread a layer of tonkatsu sauce over the shaped rice and gently place a piece of the crispy chicken on top. Finally, wrap the assembled musubi with nori, ensuring it is secure yet not too tight to allow the rice to hold its shape.
Storage Tips for Crispy Chicken Katsu Musubi
-
Fridge: Store leftovers in an airtight container for up to 3 days. This keeps your crispy Chicken Katsu Musubi fresh, ensuring you can savor the flavors later.
-
Freezer: For longer storage, wrap individual musubi tightly in plastic wrap and then in aluminum foil. They can be frozen for up to 1 month, maintaining taste and texture.
-
Reheating: To enjoy your frozen musubi, reheat in a toaster oven at 350°F until warmed through. This method helps retain its crispy exterior while the chicken stays juicy.
Crispy Chicken Katsu Musubi Variations
Customize your crispy delight with these fun and flavorful twists that will ignite your culinary creativity!
- Vegetarian Option: Substitute chicken with firm tofu, marinated in soy sauce for extra flavor. It’s a delightful alternative for herbivores; the texture is still satisfying!
- Furikake Flavor Boost: Stir in some furikake or sesame seeds into the sushi rice for an umami explosion. This adds a savory, crunchy element that elevates every bite.
- Spicy Kick: Drizzle sriracha or spicy mayo over the chicken before assembling for a fiery twist. Spice lovers will adore this robust layer of heat!
- Crunchy Panko Twists: Blend tempura flakes with panko breadcrumbs for an irresistible crunch. It adds an exciting texture that makes each bite that much more fun!
- Sweet and Spicy Swap: Try sweet chili sauce instead of tonkatsu for a vibrant sweet-and-spicy flavor profile. It pairs beautifully with the crispy chicken and chewy rice.
- Fresh Toppings: Top your musubi with quick-pickled veggies or creamy avocado slices for a refreshing contrast. The creaminess of avocado pairs beautifully with the crunch of fried chicken.
- Rice Variation: Use seasoned brown rice instead of white sushi rice for a healthier alternative that still satisfies. It’s a small change with a big impact on nutritional value.
- Herb Infusion: Mix fresh herbs like cilantro or green onions into the rice for a burst of freshness. This lightens the overall dish, giving it a garden-fresh flavor!
Feel free to let your imagination run wild as you craft your Crispy Chicken Katsu Musubi! For even more delicious inspiration, try making Bang Bang Chicken or switch up the style with Creamy Mushroom and Asparagus Chicken Penne.
Expert Tips for Crispy Chicken Katsu Musubi
-
Oil Temperature: Make sure your oil is at 350°F before frying. This prevents greasy chicken and ensures a perfectly crispy texture for your crispy Chicken Katsu Musubi.
-
Rice Pressure: When packing sushi rice into the mold, be sure to press firmly, but not excessively. This will help the musubi hold its shape without becoming too dense.
-
Clean Cuts: Use a wet knife to slice your assembled musubi for clean, neat cuts. This helps prevent the nori from tearing and keeps everything beautifully intact.
-
Avoid Overcrowding: Fry the chicken thighs in batches if needed. Overcrowding the pan can lead to uneven cooking and less crispy results.
-
Season to Taste: Adjust salt and pepper levels in your batter based on personal preferences. A well-seasoned crispy Chicken Katsu Musubi is key to delightful flavor in every bite!
What to Serve with Crispy Chicken Katsu Musubi?
Imagine the perfect spread to accompany your delightful snack, creating a full meal that’s bursting with flavor and texture.
-
Pickled Vegetables: A vibrant mix of homemade pickles adds a tangy crunch that brightens up each bite of your musubi. Their acidity balances the richness of the fried chicken beautifully.
-
Miso Soup: Warm, savory miso soup serves as a comforting side, enriching your meal with umami and warmth. This classic pairing complements the musubi’s flavors splendidly, creating a homestyle experience.
-
Edamame: Simple steamed edamame sprinkled with sea salt introduces a delightful pop of freshness and protein. The chewy, bright green beans contrast nicely with the crispy texture of the musubi.
-
Japanese Potato Salad: Creamy and slightly sweet, this hearty salad adds a comforting touch. Its soft texture and mild flavor help round out the crunchy delight of the Katsu musubi.
-
Green Tea: A steaming cup of green tea cleanses the palate and enhances the meal’s flavors. Its earthy notes create a harmonious balance with the savory elements on your plate.
-
Fruit Salad: A colorful mix of seasonal fruits brings a refreshing sweetness to your meal. The natural juices contrast wonderfully with the savory musubi, providing a light, refreshing finish.
Make Ahead Options
These Crispy Chicken Katsu Musubi are a fantastic choice for meal prep, saving you precious time on busy weeknights! You can prepare the fried chicken and sushi rice up to 24 hours in advance. To do this, simply fry the chicken, let it cool completely, and store it in an airtight container in the refrigerator. The rice can also be cooked and refrigerated, just make sure to keep it covered to maintain moisture. When you’re ready to serve, reheat the chicken in the oven or an air fryer for that delightful crispiness before assembling the musubi. This way, your chicken katsu will still be just as delicious, allowing you to enjoy this comforting snack with minimal effort!
Crispy Chicken Katsu Musubi Recipe FAQs
How do I choose the best chicken thighs?
Absolutely! Look for boneless skinless chicken thighs that are plump and have a nice pink color. Avoid those with dark spots or a slimy texture, as these can indicate spoilage. Fresh chicken should have little to no odor, giving you the best flavor for your crispy Chicken Katsu Musubi.
What is the best way to store leftovers?
To keep your leftovers fresh, store them in an airtight container in the refrigerator for up to 3 days. This will help maintain the delicious flavors and texture of your crispy Chicken Katsu Musubi. Just pop them in the microwave or reheat in a toaster oven for a quick bite!
Can I freeze Chicken Katsu Musubi?
Absolutely! If you’d like to store your musubi for later, wrap each individual piece tightly in plastic wrap and then in aluminum foil to protect against freezer burn. You can freeze them for up to 1 month. When you’re ready to enjoy, simply reheat in a toaster oven at 350°F until warmed through, preserving that wonderful crunch!
What should I do if my chicken isn’t crispy?
Very! If your chicken isn’t turning out as crispy as you’d like, make sure your oil is hot enough before frying—around 350°F. Also, ensure you’re not overcrowding the pan, as this can reduce the oil’s temperature and lead to soggy chicken. Less is more in this case; frying in batches allows for even cooking and texture.
Are there any dietary considerations I should be aware of?
Definitely! For gluten-free options, use gluten-free flour and panko breadcrumbs. If you’re serving to someone with an egg allergy, a vegan egg substitute (like aquafaba or a commercial vegan egg replacer) can work well in your batter for coating the chicken. Always check your sauces like tonkatsu for hidden allergens, particularly soy sauce, which can contain gluten.
How can I make the rice stick together better?
Of course! To ensure your sushi rice holds together nicely, always rinse the rice before cooking to remove excess starch. This helps achieve that delightful sticky texture. After cooking, let the rice cool slightly but while it is still warm, pack it firmly into your musubi mold to shape it. The warmth will aid in binding.
Crispy Chicken Katsu Musubi: Your New Favorite Snack Delight
Ingredients
Equipment
Method
- Pound the chicken to an even ½-inch thickness between two sheets of plastic wrap.
- Whisk together eggs, flour, salt, and pepper until you achieve a smooth batter.
- Dip each chicken thigh into the batter, then coat with panko breadcrumbs.
- Heat oil in a skillet and fry the chicken for 4-6 minutes per side until golden brown.
- Shape the rice into compact layers using a moistened musubi mold.
- Assemble by spreading tonkatsu sauce over the rice and placing fried chicken on top, then wrap with nori.
Leave a Reply