
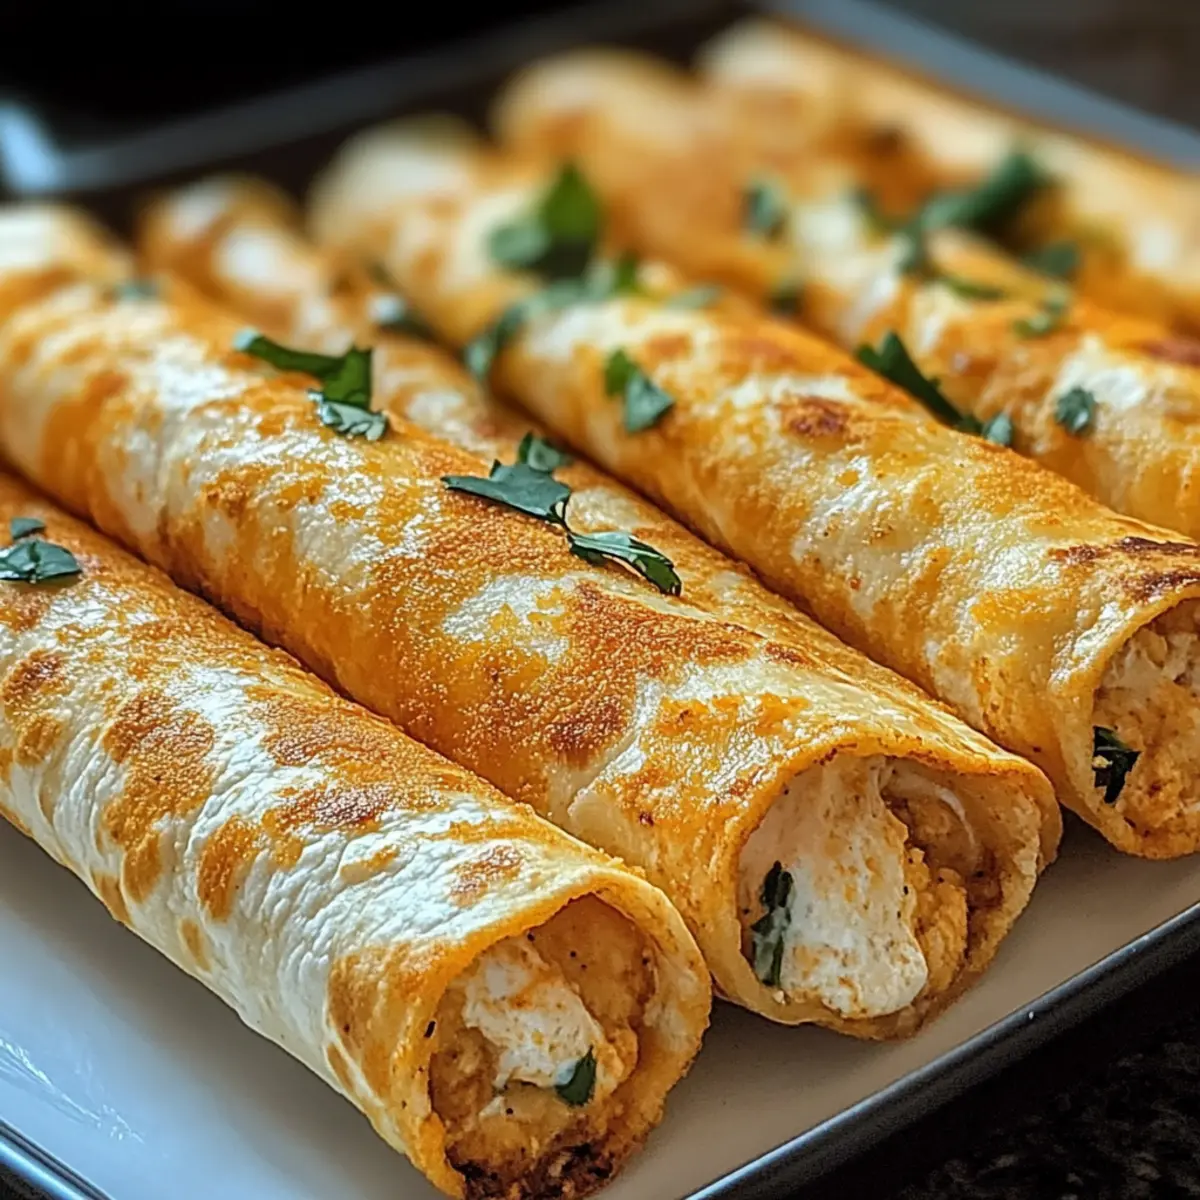
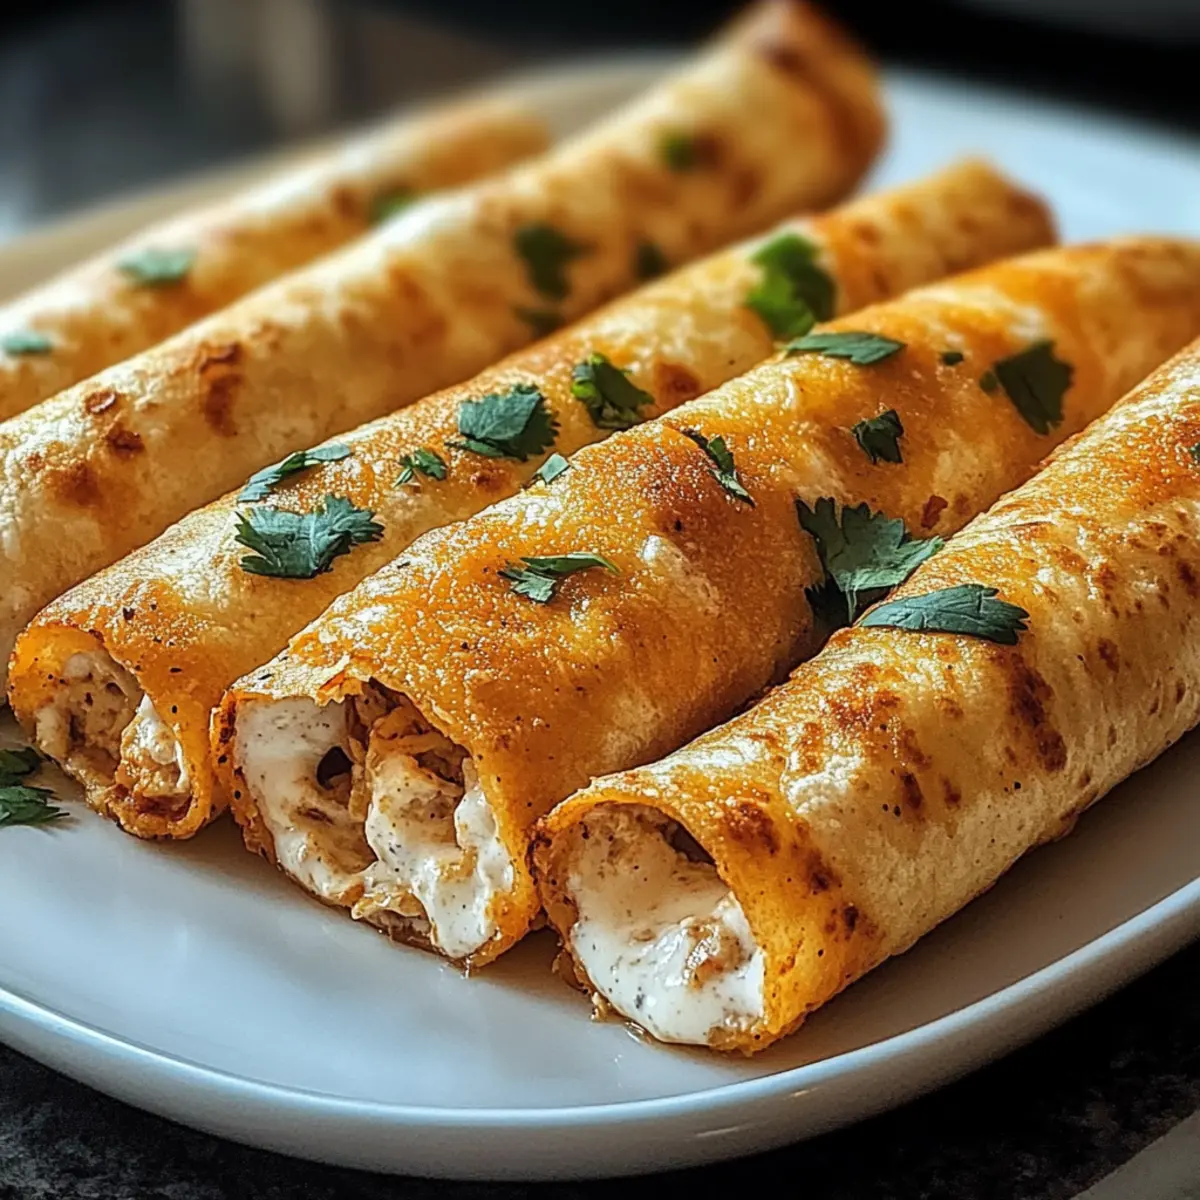
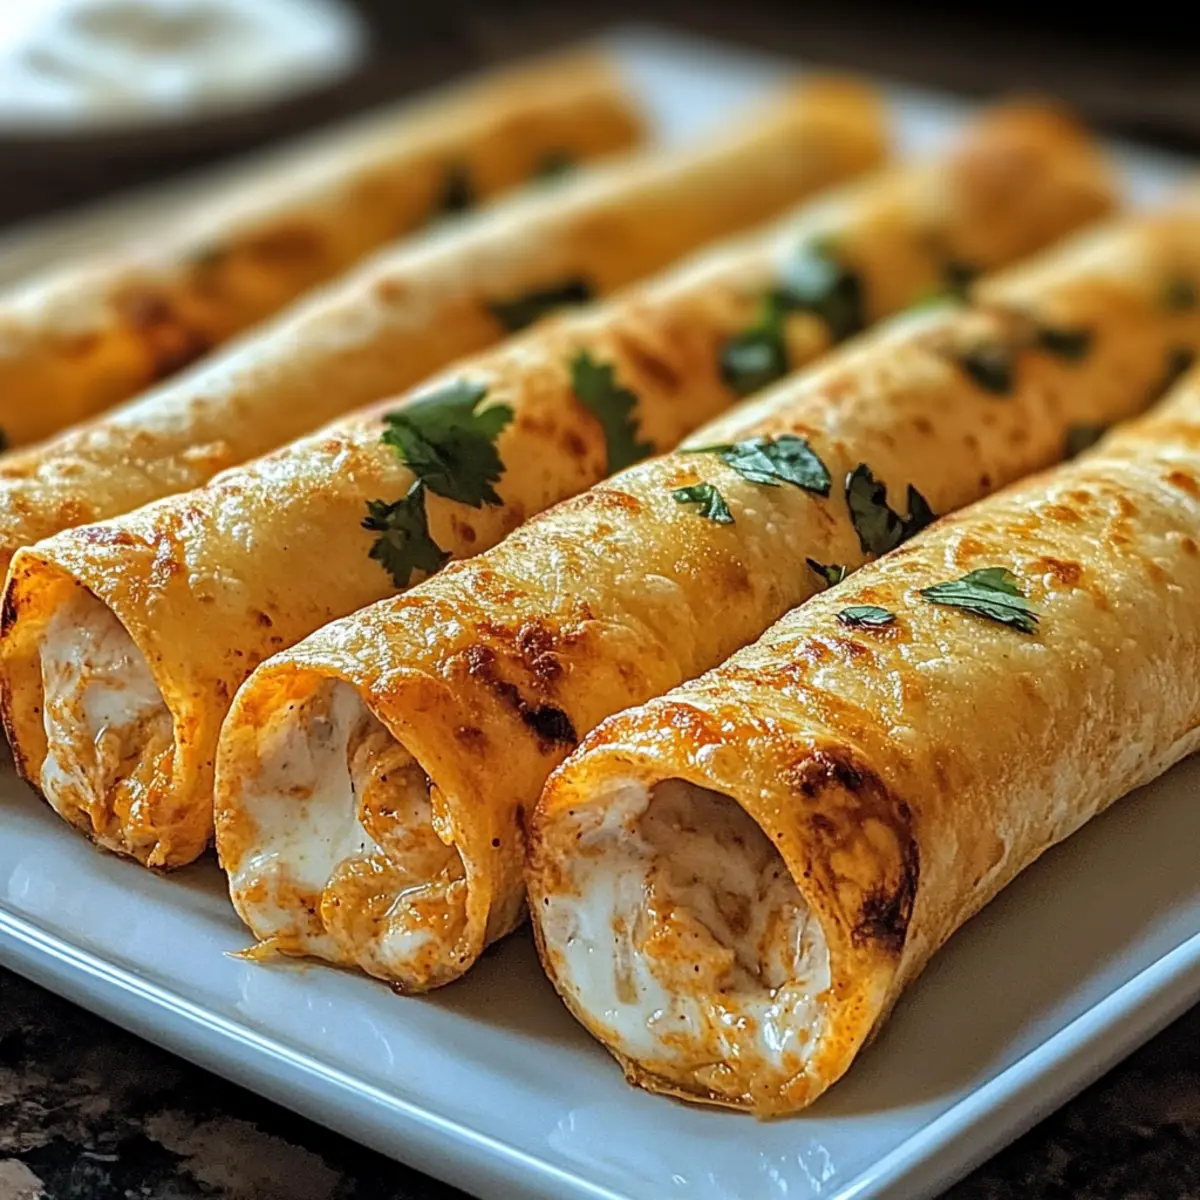
As I scrolled through my favorite food blogs, a little voice whispered that it was time to embrace the crispy crunch of homemade delights. Enter Crispy Chicken Taquitos—the ultimate snack that whispers “let’s celebrate!” with every bite. These golden treasures are stuffed with a delightful mixture of creamy, spiced chicken and melty cheese, making them perfect for quick weeknight dinners or weekend gatherings. You won’t believe how easy they are to whip up, and the best part? They’re entirely customizable! Whether you prefer a mild kick or an explosion of flavors, these taquitos have your back. And with options for baking or air-frying, they fit perfectly within any healthy eating plan. Ready to unlock the secrets of this crowd-pleaser? Let’s dive into the deliciousness!
Why Are Crispy Chicken Taquitos So Irresistible?
Effortless Preparation: Whipping up these taquitos is a breeze, requiring minimal cooking skills and just a few ingredients.
Customizable Flavors: Tailor your filling to suit any taste—add black beans, jalapeños, or a dash of your favorite hot sauce for that extra kick!
Baked to Perfection: These taquitos come out crispy, delivering that satisfying crunch without the need for frying.
Family-Friendly Appeal: Whether you’re serving them at game night or a cozy family dinner, these crispy delights are always a hit with both kids and adults alike.
Make-Ahead Convenience: Prepare them in advance and simply pop them in the oven when you’re ready to serve. For more easy meal ideas, check out Bang Bang Chicken or Mushroom Asparagus Chicken.
Crispy Chicken Taquitos Ingredients
For the Filling
• Cooked Shredded Chicken – Adds protein and substance; substitute with rotisserie chicken for a quicker meal.
• Cream Cheese – Provides creaminess and richness; ensure it’s softened for easy mixing.
• Shredded Cheddar or Mexican Blend Cheese – Adds savory flavor and helps bind the filling; substitute with your favorite melty cheese.
• Salsa – Adds moisture and seasoning; choose mild or spicy to match your taste.
• Garlic Powder – Enhances flavor depth; fresh minced garlic can be used for a stronger taste.
• Chili Powder – Adds warmth and spice; adjust according to your desired heat level.
• Cumin – Contributes earthy notes typical in Mexican cuisine.
• Salt and Black Pepper – Essential for flavor enhancement; adjust to taste.
For the Taquitos
• Flour or Corn Tortillas – The base for taquitos; choose corn for a gluten-free option, ensuring they are warmed before rolling.
• Cooking Spray or Oil – Used to brush the taquitos for a crispy finish when baking.
These Crispy Chicken Taquitos are a delicious way to bring some flavor into your kitchen—get ready to create a homemade masterpiece!
Step‑by‑Step Instructions for Crispy Chicken Taquitos
Step 1: Preheat the Oven
Begin by preheating your oven to 425°F (220°C), ensuring it’s hot enough for those Crispy Chicken Taquitos to develop a beautiful golden crust. While the oven heats up, line a baking sheet with parchment paper to prevent sticking and make cleanup a breeze.
Step 2: Prepare the Filling
In a large mixing bowl, combine the shredded chicken, softened cream cheese, shredded cheese, salsa, garlic powder, chili powder, cumin, salt, and pepper. Stir the mixture until it is well-blended and creamy, creating a flavorful filling that showcases the deliciousness of your Crispy Chicken Taquitos.
Step 3: Warm the Tortillas
To make rolling easier, warm your flour or corn tortillas in the microwave for about 20 seconds. This quick heating allows the tortillas to become pliable, preventing them from cracking when you start to fill and roll them.
Step 4: Fill and Roll the Tortillas
On one side of each warm tortilla, spoon 2-3 tablespoons of your flavorful filling, ensuring it’s evenly spread. Carefully roll the tortilla tightly around the filling, securing it seam-side down to keep the contents from spilling out—a well-rolled taquito is key to a satisfying bite!
Step 5: Arrange on the Baking Sheet
Place your rolled taquitos seam-side down onto the prepared baking sheet, making sure they are spaced apart to allow heat circulation. This step is crucial for those Crispy Chicken Taquitos to bake evenly and achieve the ideal crunch.
Step 6: Apply Oil for Crispiness
Lightly brush or spray the taquitos with cooking spray or oil of your choice. This adds a delightful crispness to the exterior, ensuring each taquito has that satisfying crunch as they come out of the oven, enhancing your homemade experience.
Step 7: Bake to Perfection
Place the baking sheet in the preheated oven and bake the taquitos for 15-20 minutes. Keep an eye on them, and look for a beautifully golden brown color and a crispy exterior, signaling that they are ready to delight your taste buds.
Step 8: Broil for Extra Crispness
If you desire an extra crispy texture, switch the oven to broil for an additional 1-2 minutes after baking. Watch closely as the taquitos brown quickly under the broiler, transforming them into irresistible Crispy Chicken Taquitos ready for serving.
Step 9: Serve and Enjoy
Once baked to perfection, remove your taquitos from the oven and let them cool slightly before serving. Pair them with your favorite toppings, such as sour cream, guacamole, or fresh salsa, to complement the rich flavors of your Crispy Chicken Taquitos and enjoy!

What to Serve with Crispy Chicken Taquitos
Imagine an evening filled with laughter, delicious scents wafting through the air, and your family eager for a delightful feast.
- Creamy Guacamole: This rich, buttery dip provides a fresh contrast to the crispy taquitos while enhancing their savory flavors.
- Fresh Salsa: A bright, zesty salsa adds a burst of fresh ingredients, bringing a vibrant kick that perfectly balances the crunchy texture.
- Mexican Street Corn Salad: The creamy, tangy flavors of this salad enhance the meal with a delightful sweetness that complements the savory taquitos.
- Zesty Lime Rice: Fluffy rice with a hint of lime adds a refreshing element to your plate, making every bite of taquitos even more enjoyable.
- Spicy Jalapeño Poppers: Add an extra layer of excitement to your meal with these crispy treats, providing a delightful spice that harmonizes beautifully with chicken.
- Crisp Lettuce Wraps: Light and fresh, these wraps can serve as a refreshing counterpoint to the rich filling of the taquitos, creating an enticing texture contrast.
- Fizzy Margaritas: Sipping on these refreshing drinks while enjoying your crispy chicken taquitos adds a festive touch that’s perfect for gatherings or celebrations.
- Churros with Chocolate Sauce: For dessert, these warm, cinnamon-sugar treats offer a sweet finish, leaving everyone satisfied and delighted after a fun meal.
Storage Tips for Crispy Chicken Taquitos
Fridge: Store any leftover Crispy Chicken Taquitos in an airtight container for up to 3 days. This helps maintain their flavor and texture while keeping them fresh.
Freezer: If you want to keep them longer, these taquitos can be frozen. Wrap them individually in plastic wrap and then place them in a freezer-safe container for up to 3 months.
Reheating: When ready to enjoy, reheat frozen taquitos in the oven at 425°F (220°C) for 20-25 minutes or until heated through and crispy. For refrigerated taquitos, bake for 15-20 minutes.
Make-Ahead Tip: Assemble your Crispy Chicken Taquitos ahead of time and refrigerate for up to 24 hours before baking, making it easy to serve a quick snack or meal when you need it.
Crispy Chicken Taquito Variations
Feel free to unleash your creativity and customize these Crispy Chicken Taquitos to suit your taste buds!
- Spicy Twist: Add diced jalapeños to the filling for a fiery kick that will tantalize your palate. The heat elevates every bite, making them a zesty treat!
- Cheese Lovers: Swap cheddar for pepper jack cheese for an extra layer of spice. The melty goodness binds the flavors beautifully, delighting cheese enthusiasts.
- Nutrition Boost: Incorporate black beans or corn into the filling for added texture and nutrition. They’ll pack a healthy punch and offer a delightful crunch!
- Gluten-Free: Use corn tortillas instead of flour for a gluten-free version that everyone can enjoy. They work beautifully, ensuring all can savor this tasty meal.
- Saucy Dipping: Experiment with different dipping sauces like ranch, salsa verde, or a spicy chipotle sauce. Each brings a unique flavor, creating a dipping party to enhance your dining experience.
- Creamy Addition: Mix in some diced avocado or guacamole in the filling for a creamy texture. Those buttery bites offer a delightful twist with every crunch.
- Vegetarian Option: Substitute the chicken with sautéed mushrooms and spinach for a delicious vegetarian alternative. This variation is just as satisfying and packed with flavor!
- Make-Ahead Magic: Assemble them ahead of time and freeze for later. (Just pop them in the oven when you’re ready to bake!) This tip works wonders if you’re looking for a quick meal option during busy weeks.
Inspired to add your own flair? If you love flavorful chicken dishes, don’t forget to try Caramelised Soy Chicken or Cajun Chicken Sloppy to keep things exciting in the kitchen!
Expert Tips for Crispy Chicken Taquitos
• Warm Tortillas: Make sure to warm the tortillas in the microwave before rolling to prevent cracking and tearing, ensuring your Crispy Chicken Taquitos hold together beautifully.
• Customize the Filling: Feel free to add diced jalapeños or black beans for an extra flavor boost. Don’t be shy—experiment with your favorite ingredients!
• Avoid Overfilling: Stick to 2-3 tablespoons of filling per tortilla; overfilling can cause them to burst during baking, leading to a messy experience.
• Use Parchment Paper: Line your baking sheet with parchment to avoid sticking and make cleanup easy—your future self will thank you!
• Broil for Crunch: For an additional layer of crispiness, broil the taquitos for the last 1-2 minutes of baking, but keep an eye on them to avoid burning.
• Freeze for Later: Assemble your taquitos ahead of time, freeze them, and bake from frozen later—a time-saver for busy weeknights or unexpected guests!
Make Ahead Options
Crispy Chicken Taquitos are perfect for meal prep enthusiasts seeking to save time on busy weeknights! You can assemble the taquitos and refrigerate them for up to 24 hours before baking. To do this, simply follow the steps until they’re rolled and placed on the baking sheet, but don’t bake them yet. Cover the baking sheet tightly with plastic wrap or foil to maintain freshness. When you’re ready to serve, just pop them in the preheated oven for baking, adding an extra 2-5 minutes if they were chilled. This way, you can enjoy your delicious, homemade taquitos with minimal effort, and they will be just as crispy and flavorful!
Crispy Chicken Taquitos Recipe FAQs
How do I choose the right chicken for the filling?
Absolutely! For the best flavor and texture in your Crispy Chicken Taquitos, opt for cooked shredded chicken. You can easily use leftover rotisserie chicken for a quick meal. Just make sure the chicken is seasoned well, as it will serve as the foundation for your filling.
What’s the best way to store leftover taquitos?
Very good question! Once your Crispy Chicken Taquitos are fully cooled, store any leftovers in an airtight container in the refrigerator for up to 3 days. This helps preserve both their flavor and texture. When reheating, pop them back in the oven for a few minutes to regain that delightful crunch!
Can I freeze the taquitos before baking? How?
Absolutely! You can prepare your Crispy Chicken Taquitos in advance and freeze them. Here’s how: After rolling the taquitos, wrap each one tightly in plastic wrap and place them in a freezer-safe container or a ziplock bag. They can be frozen for up to 3 months. When you’re ready to bake, you can cook them directly from frozen at 425°F (220°C) for 20-25 minutes, or until they’re heated through and beautifully crispy!
What if my tortillas crack while rolling?
Don’t worry; it happens! If your tortillas crack, it usually means they need a little warmth. Make sure to warm them in the microwave for about 20 seconds before attempting to fill and roll. Additionally, using corn tortillas can be more forgiving in terms of cracking, as they are naturally more pliable when warmed.
Are there any dietary considerations I should keep in mind?
Great point! If you’re looking for gluten-free options, make sure to use corn tortillas instead of flour. Additionally, be cautious with the cheese and salsa if you have dairy allergies. You can easily substitute the cream cheese with a dairy-free alternative and select a compliant salsa for your family’s needs.
How can I customize the flavors in my taquitos?
You’re in for a treat! Get creative by adding diced jalapeños for some heat, or mix in black beans and corn for extra texture and nutrition. I also often suggest experimenting with different cheeses—like pepper jack for a spicy twist—or try unique dipping sauces like salsa verde or ranch for a fun pairing!
Crispy Chicken Taquitos Easy Baked Delight for All Taste Buds
Ingredients
Equipment
Method
- Preheat your oven to 425°F (220°C) and line a baking sheet with parchment paper.
- Combine all the filling ingredients in a large mixing bowl and stir until well-blended and creamy.
- Warm the tortillas in the microwave for about 20 seconds for easier rolling.
- On one side of each tortilla, spoon 2-3 tablespoons of filling and roll tightly, seam-side down.
- Place rolled taquitos seam-side down on the baking sheet, spaced apart for heat circulation.
- Brush or spray the taquitos lightly with cooking spray or oil.
- Bake the taquitos for 15-20 minutes until golden brown and crispy.
- For extra crispiness, broil the taquitos for an additional 1-2 minutes, watching closely.
- Remove from oven and let cool slightly before serving with your favorite toppings.
Leave a Reply