
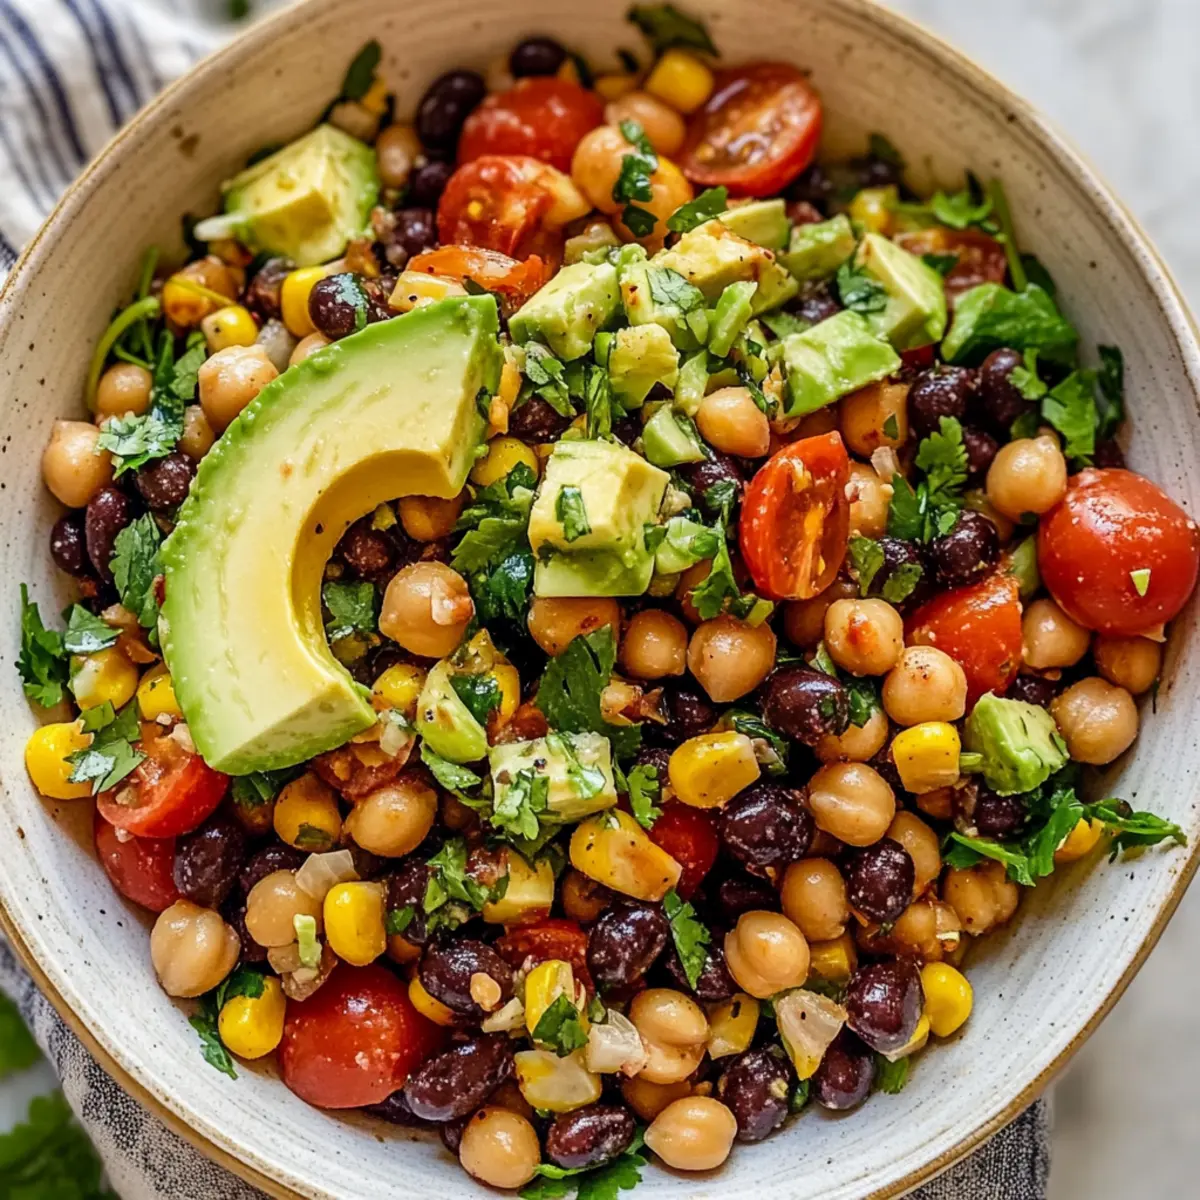
In a bustling kitchen filled with the aroma of spices and fresh ingredients, I stumbled upon a delightful culinary gem that’s perfect for any occasion: the Southwest Chickpea Black Bean Salad. This vibrant dish not only comes together in a swift 15 minutes but also delivers a punch of nutrients that your body will thank you for. It’s a fabulous option for those seeking a no-cook, plant-based meal that’s both budget-friendly and packed with flavor. Whether it’s a quick lunch or a colorful addition to your summer gatherings, this salad shines with its zesty chili lime vinaigrette and dynamic textures. Have you ever craved something refreshing yet filling? Let’s dive in and whip up this must-try recipe!
Why is this salad a must-try?
Quick Preparation: In just 15 minutes, you can have this nutritious and scrumptious salad ready to serve, making it perfect for busy days or last-minute gatherings.
Vegan Delight: Naturally vegan and gluten-free, it’s suitable for everyone at the table, catering to diverse dietary needs with ease.
Fresh Ingredients: Packed with crisp veggies and protein-rich legumes, each bite is a burst of freshness that will awaken your taste buds.
Versatile Options: Feel free to customize with your favorite beans or veggies, or try it with a tangy dressing for a completely new flavor experience.
Meal Prep Friendly: This salad is perfect for meal prep, allowing you to enjoy healthy lunches all week long without breaking the bank.
Elevate your culinary creations with more delightful recipes, like these Orange White Chocolate or the festive White Chocolate Peppermint Cookies!
Southwest Chickpea Black Bean Salad Ingredients
• Perfect for vibrant meals!
For the Salad Base
- Chickpeas – Main protein source; rinse canned chickpeas to reduce sodium.
- Black Beans – Adds texture and further boosts plant protein; can substitute with other beans if desired.
- Corn – Fire-roasted corn provides a smoky sweetness; substitute with fresh or canned corn if necessary.
- Cherry Tomatoes – Offer freshness and acidity; substitute with diced roasted red peppers if not preferred.
- Red Onion – Provides sharpness; can be swapped with pickled onions or caramelized onions if preferred.
- Cilantro – Adds a burst of fresh flavor; omit or use parsley as a substitute.
- Avocado – Adds creaminess to the salad; increase amount for a richer texture.
- Jalapeño – For spice; can omit or replace with other peppers for a milder flavor.
For the Dressing
- Lime Juice & Zest – Key for the dressing’s tanginess; essential for flavor.
- Extra Virgin Olive Oil – Used in the vinaigrette for richness; substitute with another oil or omit for fewer calories.
- Maple Syrup – Balances the acidity of the vinaigrette; use any liquid sweetener if maple syrup is unavailable.
- Garlic & Spices – Essential for flavor depth in vinaigrette.
Dive into this delightful combination of ingredients and get ready to whip up a refreshing Southwest Chickpea Black Bean Salad that will please everyone!
Step‑by‑Step Instructions for Southwest Chickpea Black Bean Salad
Step 1: Prepare the Salad Base
In a large mixing bowl, combine 1 can of rinsed chickpeas, 1 can of black beans, 1 cup of thawed fire-roasted corn, 1 cup of halved cherry tomatoes, 1 finely diced red onion, and 1/2 cup of chopped cilantro. Stir gently to mix, allowing the vibrant colors to blend together. This colorful base sets the stage for your flavorful Southwest Chickpea Black Bean Salad.
Step 2: Whisk the Vinaigrette
In a separate bowl, whisk together the zest and juice of 2 limes, 1/4 cup of extra virgin olive oil, 1 tablespoon of maple syrup, and 2 minced garlic cloves. Season with salt, pepper, and your favorite spices for extra depth. Aim for a smooth consistency and taste for the right balance of tanginess and sweetness in the vinaigrette that will enhance the salad.
Step 3: Combine and Toss
Pour the freshly made vinaigrette over the chickpea and black bean mixture. Using a large spoon, gently toss the ingredients together until everything is evenly coated in the zesty dressing. Be careful not to mash the ingredients; you want to maintain the integrity of the black beans and chickpeas.
Step 4: Add Avocado
Right before serving, dice 1 ripe avocado and gently fold it into the salad. This step adds creaminess to your Southwest Chickpea Black Bean Salad. To prevent the avocado from browning, only add it just before serving, ensuring it retains its beautiful color and texture.
Step 5: Serve and Store
Transfer the tossed salad into a large serving bowl or plated individual servings. For those who want to enjoy it later, store any leftovers in an airtight container in the fridge for up to 4 days. If planning to meal prep, keep the avocado separate until you’re ready to serve for optimal freshness.
Make Ahead Options
These Dubai Chocolate Cakes are perfect for meal prep enthusiasts! You can prepare the cake layers up to 24 hours in advance; simply bake and cool the cake completely before wrapping it tightly in plastic wrap and refrigerating to maintain its moisture. Additionally, make the pistachio filling and chocolate sauce ahead of time; store the filling in an airtight container and the sauce in the fridge for up to 3 days. When you’re ready to serve, frost the cake with the filling followed by the chocolate layer, and you’ll have a stunning dessert that’s just as delicious as if made fresh, saving you time for entertaining or other activities!
How to Store and Freeze Dubai Chocolate Cake
Room Temperature: Cake can be stored at room temperature for up to 3 days. Keep it covered with a cake dome or plastic wrap to maintain moisture and freshness.
Fridge: If you prefer a firmer texture, refrigerate the Dubai Chocolate Cake for up to a week. Ensure it’s well-wrapped to avoid drying out.
Freezer: For longer storage, freeze individual slices in airtight containers or plastic wrap for up to 3 months. Thaw overnight in the fridge before serving.
Reheating: To enjoy the cake warm, microwave a slice for 10-15 seconds, just until warmed through. Avoid overheating, which could dry out the cake.
Expert Tips for the Dubai Chocolate Cake
-
Perfectly Measure Ingredients: Use a kitchen scale for accurate measurements, especially with flour and sugar, which can affect the cake’s texture.
-
Avoid Overmixing: Gently mix the batter until just combined to prevent a dense Dubai Chocolate Cake. Overmixing can activate gluten and lead to a tougher cake.
-
Cool Before Frosting: Ensure the cake is completely cool before spreading the pistachio filling and chocolate layer. This prevents melting and ensures a beautiful finish.
-
Choose Quality Chocolate: Invest in good quality chocolate for the sauce; it makes all the difference in flavor and texture.
-
Experiment with Flavors: Don’t hesitate to customize! Adding orange or almond extract can enhance the chocolate notes in your Dubai Chocolate Cake.
What to Serve with Luxurious Dubai Chocolate Cake?
Indulging in the rich, velvety slices of this elegant dessert is just the beginning; let’s elevate your dining experience further.
-
Vanilla Ice Cream: A scoop of creamy vanilla ice cream contrasts beautifully with the chocolate richness, creating a delightful balance of flavors and textures.
-
Whipped Cream: Light and airy, this fluffy topping adds a velvety touch that enhances every bite of the cake, making each forkful feel extra special.
-
Fresh Berries: Raspberries or strawberries offer a tart freshness that cuts through the sweetness, adding a burst of color and flavor to your dessert plate.
-
Mint Tea: Serve a warm cup of mint tea alongside for a refreshing herbal note that perfectly complements the chocolate and pistachio flavors.
-
Coffee: A rich espresso or cappuccino pairs wonderfully with chocolate, enhancing the cake’s complex flavors and balancing the sweetness with its boldness.
-
Pistachio Crumble: Sprinkle some crushed pistachios on top for an added crunch, echoing the cake’s filling and providing a delightful texture contrast.
-
Chocolate Sauce: Drizzle extra chocolate sauce on top for those who can’t get enough of that decadent chocolate experience; it’s an indulgent and luscious addition.
-
Coconut Milkshake: Opt for a thick and creamy coconut milkshake to add a tropical flair that complements the cake’s luxurious feel and lusciousness.
Variations & Substitutions for Dubai Chocolate Cake
Feel free to make this Dubai Chocolate Cake truly yours with a few simple twists and substitutions!
- Gluten-Free: Use a gluten-free flour blend instead of all-purpose flour for a gluten-free delight that everyone can enjoy.
- Dairy-Free: Substitute milk with almond or coconut milk, and use vegan butter to create a fully dairy-free cake without sacrificing taste.
- Nut-Free: Skip the pistachio filling and swap it out for a fruit filling, like raspberry or strawberry, for a fresh, fruity alternative.
- Flavor Boost: Add a teaspoon of orange extract to the batter for a zesty kick that pairs beautifully with chocolate.
- Richness Upgrade: Replace vegetable oil with melted coconut oil or butter for a lush and rich flavor throughout the cake.
- Texture Twist: Try using crunchy crushed cookies instead of kataifi for the filling, adding a delightful texture and extra flavor.
- Chocolate Variation: For those who love a darker flavor, substitute semi-sweet chocolate with high-quality dark chocolate for a more intense chocolate experience.
- Easy Assembly: If you’re short on time, turn this into a layered dessert by using store-bought chocolate mousse in between the layers!
Whichever variation you choose, you’ll find delicious inspiration for a cake that can fit any occasion. For more delightful treats, don’t miss out on our Chocolate Peppermint Cupcakes or the festive Orange White Chocolate to tantalize your taste buds!
Dubai Chocolate Cake Recipe FAQs
What type of chocolate works best for this cake?
Absolutely! Using high-quality semi-sweet or dark chocolate will bring out the rich flavors in your Dubai Chocolate Cake. Brands like Ghirardelli or Callebaut are fantastic choices. If you prefer a hint of bitterness, opt for a dark chocolate bar with at least 70% cocoa content.
How can I tell if my cake is baked perfectly?
The best way to check is by inserting a toothpick into the center of the cake; it should come out clean or with a few moist crumbs attached. Baking for about 25 minutes at 350°F (175°C) is typically perfect, but every oven varies. Keep an eye on it towards the end of the baking time!
What should I do if my cake is too dense?
Very! If your Dubai Chocolate Cake turns out dense, it might be due to overmixing the batter. To avoid this, mix the ingredients until just combined—no more. Another tip is to ensure your baking powder is fresh for proper leavening, contributing to a fluffier cake.
How should I store the Dubai Chocolate Cake properly?
To keep your Dubai Chocolate Cake fresh, you can store it at room temperature for up to 3 days in a covered cake dome or tightly wrapped in plastic wrap. If you prefer a firmer texture, refrigerate it for up to a week. Just make sure it’s sealed well so it doesn’t dry out!
Can I freeze this cake? If so, how?
Absolutely! To freeze the Dubai Chocolate Cake, slice the cooled cake (if you prefer individual portions) and wrap each slice tightly in plastic wrap, then place them in an airtight container or freezer bag. It can last up to 3 months in the freezer. When you’re ready to enjoy, thaw the slices overnight in the fridge and give them a quick 10-15 seconds in the microwave to warm them up.
Is there a nut-free option for this cake?
Yeah! If you want to enjoy this treat without nuts, you can simply omit the pistachio filling and use a fruit filling like raspberry or strawberry instead. It will give a delightful contrast to the chocolate and keeps the dessert vibrant and appealing!
Decadent Dubai Chocolate Cake: A Slice of Heaven at Home
Ingredients
Equipment
Method
- Preheat oven to 350°F (175°C). Grease and flour two 9-inch round cake pans.
- In a mixing bowl, combine flour, sugar, cocoa powder, baking powder, baking soda, and salt.
- Add milk, oil, eggs, and vanilla to the dry ingredients. Beat on medium speed for 2 minutes.
- Stir in boiling water until the batter is smooth.
- Pour the batter into the prepared pans and bake for 30-35 minutes, or until a toothpick comes out clean.
- While the cakes are cooling, prepare the frosting by beating together softened butter, cocoa powder, and powdered sugar.
- Add milk and vanilla, beating until smooth and creamy.
- Once the cakes are completely cool, frost the top of one cake layer, place the second layer on top, and frost the top and sides.
Leave a Reply