
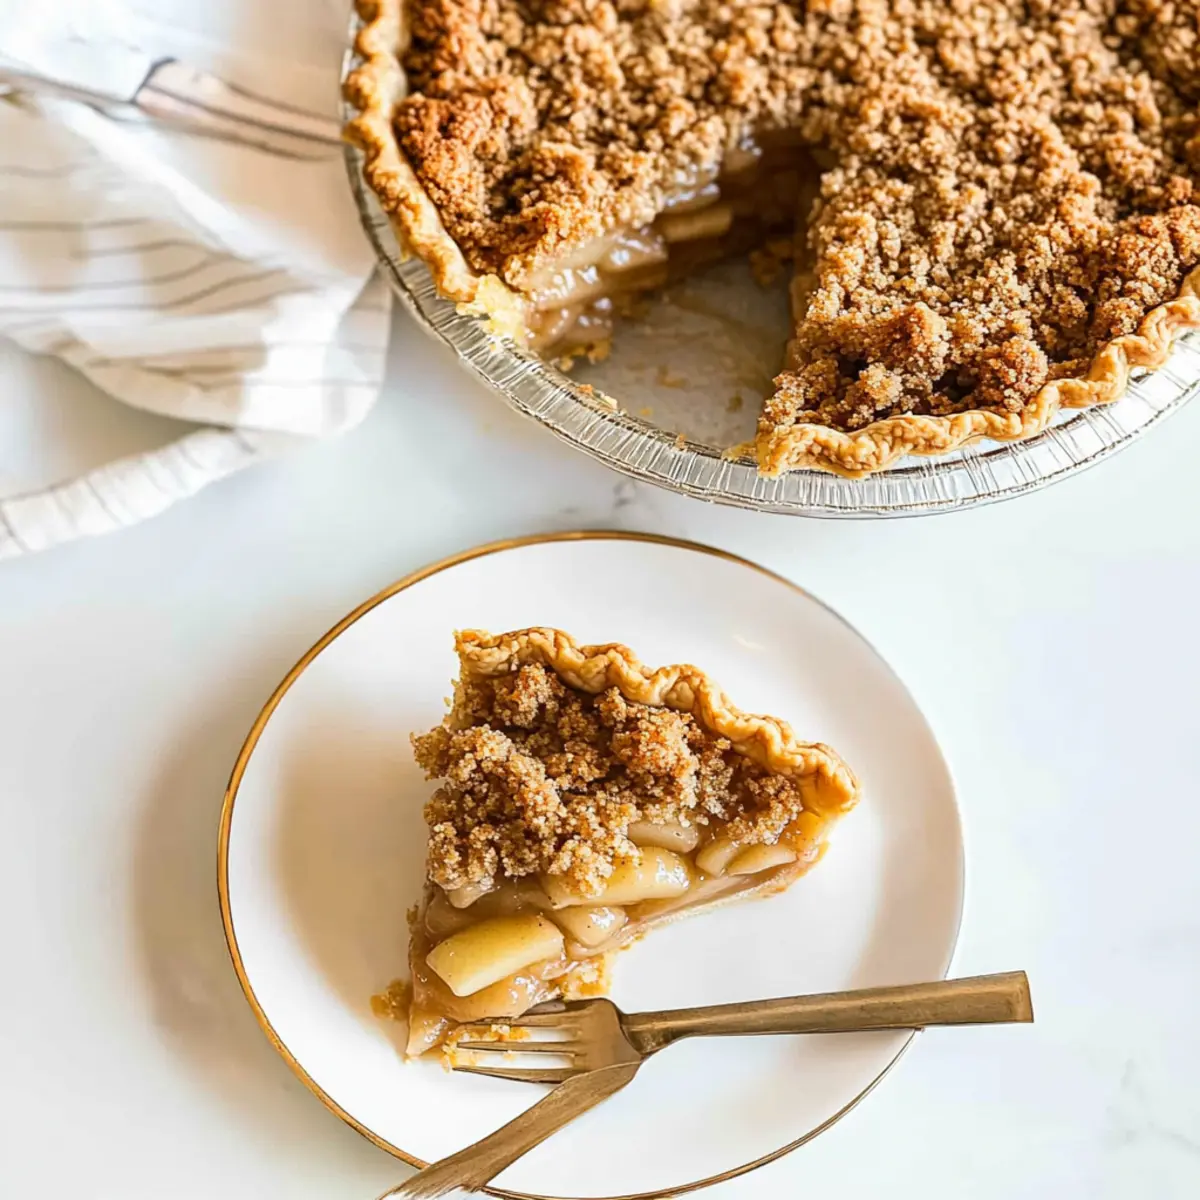
As I stood in my kitchen, the warm aroma of cinnamon and baked apples whisked me back to my childhood, where nothing beat the comforting ritual of making a Dutch Apple Pie. This classic dessert is more than just a recipe; it’s a cherished tradition that beautifully intertwines sweet and slightly tangy flavors, all wrapped in a flaky homemade crust. The star of this pie is undoubtedly its buttery streusel topping, offering a satisfying crunch that contrasts with the tender apples below. Perfect for family gatherings or a quiet night in, this Dutch Apple Pie not only delights the taste buds but also warms the heart. Plus, it’s a breeze to prepare, letting you enjoy more time with loved ones. So, are you ready to bake the pie that will become your new family favorite?

Why is Dutch Apple Pie So Special?
Iconic Tradition: This Dutch Apple Pie is a staple dessert that evokes nostalgia, infusing your home with the essence of family gatherings and holiday cheer.
Flavorful Harmony: The balance of tart Granny Smith and sweet Golden Delicious apples creates a flavor explosion, enhanced with warm spices like cinnamon and nutmeg.
Effortless Preparation: Whether you opt for a homemade crust or a convenient store-bought one, the process is quick and straightforward, perfect for novice and seasoned bakers alike.
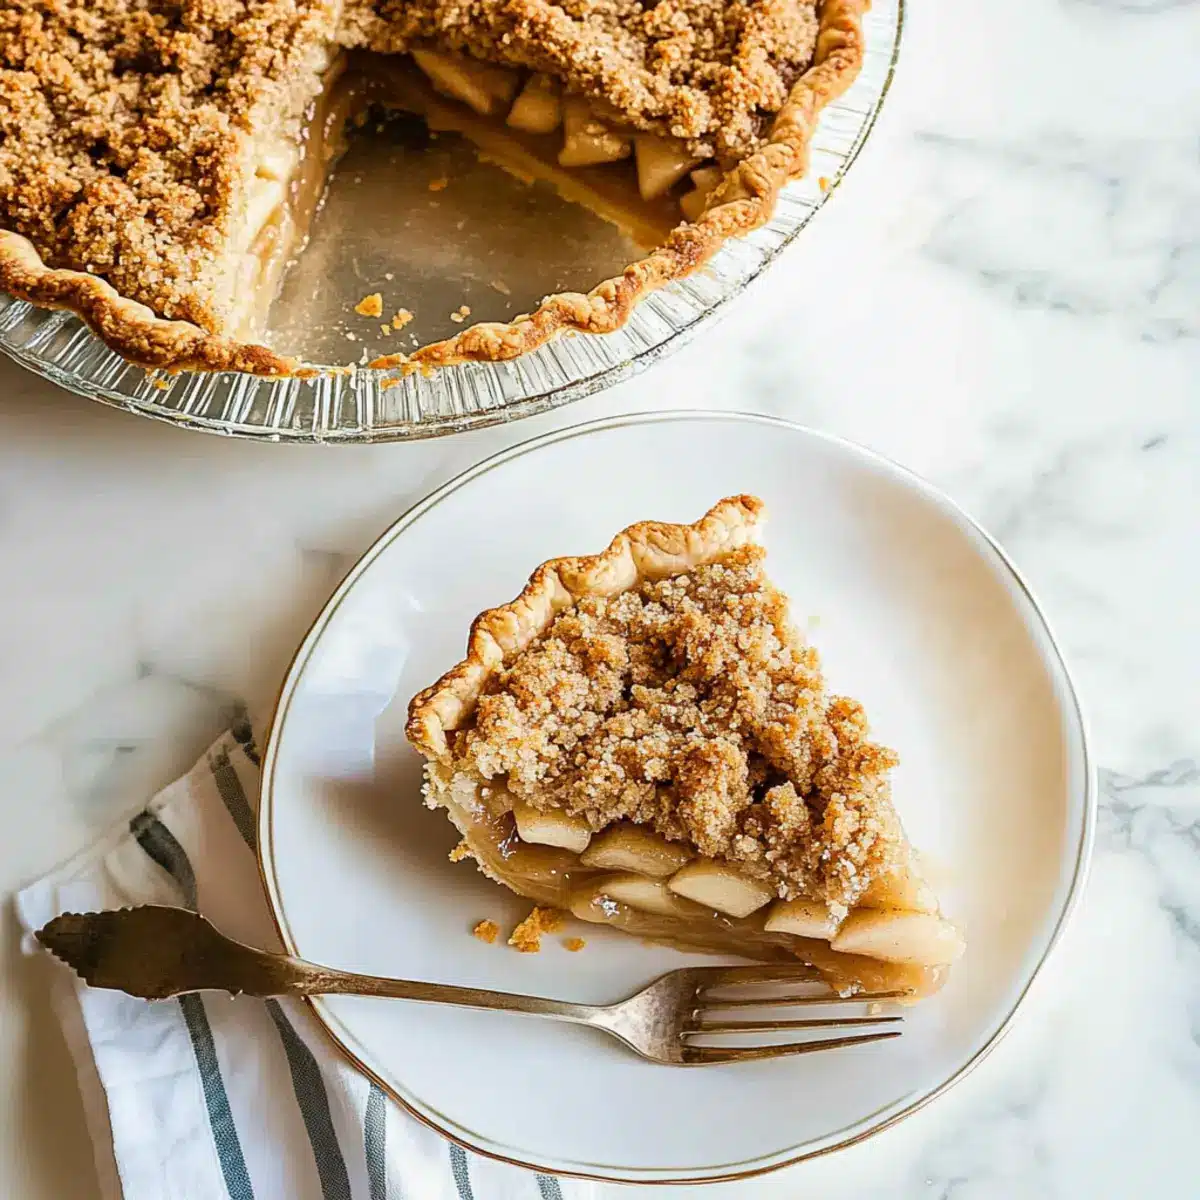
Crowd-Pleasing Delight: Serve this pie at your next gathering, and watch as it quickly vanishes, leaving everyone asking for seconds. Pair it with a scoop of ice cream for the ultimate treat! If you’re looking for other delicious dessert ideas, don’t miss my recipe for Apple Chips Snacking or for festive vibes check out Pineapple Christmas Balls. Enjoy the joy of baking!
Dutch Apple Pie Ingredients
• Get ready to bake this comforting classic!
For the Crust
- All-Purpose Flour – Provides structure; unbleached flour enhances texture.
- Granulated Sugar – Adds sweetness; can be reduced for a less sweet crust.
- Salt – Balances flavors; essential for a perfect crust.
- Unsalted Butter – Ensures flakiness in the crust; use well-chilled butter for best results.
- Ice Water – Binds the dough; crucial for achieving the right consistency.
For the Filling
- Granny Smith Apples – Tartness that balances sweetness; helps create a flavorful filling.
- Golden Delicious Apples – Adds sweetness and moisture; perfect for a balanced taste.
- Lemon Juice – Prevents browning of the apples and brightens the overall flavor.
- Light Brown Sugar – Deepens flavor; adds moisture to the filling.
- Ground Cinnamon – Provides warm aroma; a classic spice for apple desserts.
- Nutmeg – Adds warmth and depth; use freshly grated for best flavor.
For the Streusel Topping
- Light Brown Sugar – Sweetness and moisture for a delectable crumb topping.
- All-Purpose Flour – Creates structure in the streusel; ensures a great crunch.
- Unsalted Butter – Adds richness; melted for easy mixing into the topping.
- Ground Cinnamon – Enhances the topping’s flavor profile; a touch is all you need.
This classic Dutch Apple Pie indulges your taste buds while bringing warmth and nostalgia to your kitchen!
Step‑by‑Step Instructions for Dutch Apple Pie
Step 1: Prepare the Crust
In a mixing bowl, whisk together all-purpose flour, granulated sugar, and salt. Cut in well-chilled unsalted butter using a pastry cutter until the mixture resembles pea-sized crumbs. Gradually add ice water, stirring until the dough comes together. Shape the dough into a disk, wrap it in plastic wrap, and refrigerate for about 1 hour until firm.
Step 2: Blind Bake Crust
Roll the chilled dough on a floured surface until it’s about 12 inches in diameter. Fit the rolled dough into a 9-inch pie plate, gently pressing it into the sides. Chill the prepared crust again while you preheat the oven to 400°F (204°C). Once heated, cover the crust with foil and fill it with pie weights. Bake for 15 minutes, then remove the weights, prick the bottom with a fork, and bake until slightly dry, about 5-7 minutes more.
Step 3: Make the Streusel
In a mixing bowl, combine light brown sugar, all-purpose flour, ground nutmeg, and a pinch of salt. Pour in melted unsalted butter and a splash of vanilla extract, mixing until the mixture resembles coarse crumbs. Set the streusel aside in the refrigerator while you prepare the apple filling, allowing the flavors to meld.
Step 4: Prepare Filling
In another large bowl, toss the peeled and sliced Granny Smith and Golden Delicious apples with melted butter, lemon juice, granulated sugar, flour, and cinnamon. Ensure each apple slice is evenly coated with the mixture to maximize flavor. The filling will be sweet and a bit tangy, providing a delightful contrast in the Dutch Apple Pie.
Step 5: Assemble Pie
Layer the apple filling into the pre-baked pie crust, spreading it evenly. As you build the layers, sprinkle a generous amount of streusel topping over the apples. This will create a crunchy, flavorful crust that enhances the overall texture of your Dutch Apple Pie. Make sure to cover the apples well with streusel for perfect baking.
Step 6: Bake
Lower the oven temperature to 350°F (177°C) and place your assembled Dutch Apple Pie on the middle rack. Bake for 45-55 minutes, or until the apples are tender and the streusel is golden brown. Keep an eye on the pie—if the topping browns too quickly, loosely cover it with foil to prevent burning.
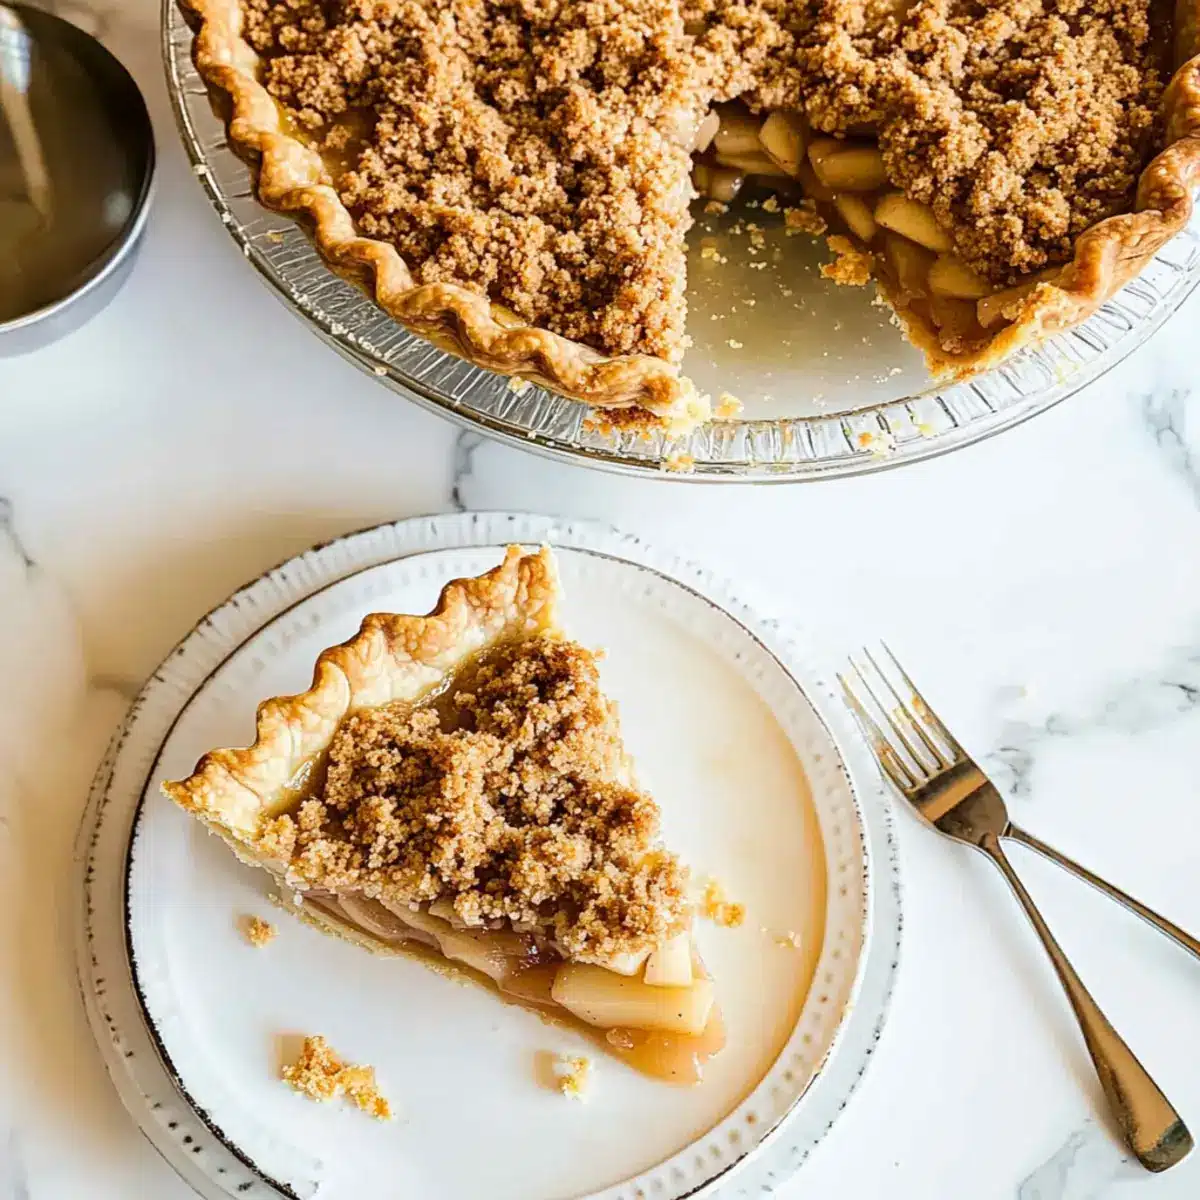
Step 7: Cool and Serve
Once baked, remove the pie from the oven and allow it to cool on a wire rack for at least 2 hours. This cooling period is essential for the pie to set properly, ensuring the filling holds together when sliced. Serve your delicious Dutch Apple Pie warm, preferably with a scoop of vanilla ice cream or a dollop of whipped cream for added indulgence.
How to Store and Freeze Dutch Apple Pie
Fridge: Store leftover Dutch Apple Pie covered with plastic wrap or in an airtight container for up to 2 days to maintain freshness.
Freezer: To freeze, wrap the cooled pie tightly in plastic wrap and foil. It can be stored in the freezer for up to 2 months without losing flavor.
Reheating: To enjoy, thaw the pie in the fridge overnight and reheat individual slices in the microwave or bake at 350°F (177°C) for about 15-20 minutes until warm.
Room Temperature: If you plan to consume the pie within a day, it can be left at room temperature covered loosely with a clean kitchen towel.
Make Ahead Options
These delicious Dutch Apple Pies are perfect for meal prep enthusiasts! You can prepare the crust and streusel topping up to 24 hours in advance. Simply follow the initial steps of making the crust and streusel, then store them wrapped tightly in the refrigerator to maintain their quality. The apple filling can also be prepped and kept in an airtight container in the fridge for up to 3 days to prevent browning—just toss the apple slices with lemon juice. When you’re ready to bake, assemble the pie, sprinkle the streusel on top, and pop it in the oven. This way, you’ll have a warm, homemade Dutch Apple Pie with minimal effort, ready to delight your family or guests!
Expert Tips for Dutch Apple Pie
-
Apple Variety Matters: Use a blend of tart and sweet apples like Granny Smith and Golden Delicious for the best flavor balance in your Dutch Apple Pie.
-
Mind the Temperature: Ensure your butter is well-chilled when making the crust to achieve that perfect flaky texture.
-
Prevent Sogginess: Cool your blind-baked crust completely before adding the filling; this helps prevent a soggy bottom in your pie.
-
Streusel Success: Don’t skip chilling the streusel topping before baking; it helps maintain its crunchiness while the apples cook.
-
Watch the Clock: Keep a close eye on the pie during baking; if the streusel begins to brown too quickly, cover it loosely with foil to avoid burning.
Dutch Apple Pie Variations & Substitutions
Feel free to let your creativity shine and enhance your Dutch Apple Pie with these fun twists that will tantalize your taste buds!
-
Alternative Apples: Experiment with different varieties like Jonagold or Braeburn for unique flavors. Mixing apples can create an exciting taste adventure.
-
Dairy-Free: Substitute the unsalted butter with coconut oil or vegan butter to make your pie dairy-free. You won’t lose the delicious flakiness and richness!
-
Sweetener Swap: Use maple syrup or honey instead of granulated sugar for a new flavor profile. The natural sweetness can enhance the pie’s overall character.
-
Add a Crunch: Toss in some chopped walnuts or pecans into your streusel for added texture. This delightful crunch pairs perfectly with the soft apples!
-
Fruit Fusion: Combine in some dried cranberries or raisins with the apples for a burst of juicy flavor. It’s a nostalgic nod that adds an extra layer of sweetness.
-
Spice it Up: Don’t be shy with your spices! Try adding allspice or cardamom to give your pie a new aromatic twist and make your kitchen smell incredible.
-
Store-Bought Ease: If you’re short on time, don’t hesitate to use a store-bought crust. It allows you to skip the dough preparation while keeping the delicious filling intact.
-
Slow Cooker Magic: For a different approach, make this pie filling in a slow cooker. Just combine the ingredients and let it bubble away for a cozy, aromatic dessert! Pair your apple creation with my recipe for delectable Apple Chips Snacking or delight in the festive spirit with Pineapple Christmas Balls. Happy baking!
What to Serve with Classic Dutch Apple Pie
Picture this: a cozy kitchen filled with laughter and warmth, where slices of delectable pie are served alongside irresistible companions.
- Vanilla Ice Cream: Creamy and sweet, it melts beautifully over the warm pie, adding a delightful contrast of temperature and texture.
- Whipped Cream: Light and airy, it enhances the pie’s flavors without overshadowing the apple filling, perfect for a fluffy topping.
- Cheddar Cheese: An unexpected pairing, sharp cheddar complements the sweetness of the pie, creating a rich and savory balance.
- Caramel Sauce: Drizzling warm caramel over each slice adds a sweet, buttery richness that makes each bite even more indulgent.
- Coffee or Tea: A warm cup of coffee or spiced chai rounds out the meal, providing a comforting drink that enhances the pie’s warm spices.
- Spiced Nuts: Crunchy, roasted nuts with a hint of spice offer a delightful contrast to the soft apples, adding an additional layer of flavor and texture.
- Cranberry Sauce: The tartness of cranberry sauce brightens up the pie’s sweetness, perfect for those who enjoy contrasting flavors.
- Apple Cider: A refreshing glass pairs perfectly with the apple-filled dessert, evoking a sense of seasonal joy with every sip.
- Pecan Pie Bars: For a dessert duo, these sweet bars bring rich, nutty flavors that harmonize well with the Dutch Apple Pie.
- Bourbon or Apple Brandy: A splash of spirit to serve alongside can elevate the pie’s flavors, adding warmth and depth to your meal.
Dutch Apple Pie Recipe FAQs
What types of apples are best for Dutch Apple Pie?
Absolutely! The best choices for Dutch Apple Pie are tart Granny Smith apples combined with sweet Golden Delicious apples. This mix creates a perfect balance of flavor, with the tartness complimenting the sweetness. You can also try apples like Jonagold or Braeburn for added depth.
How should I store leftover Dutch Apple Pie?
Very simply! Store your leftover Dutch Apple Pie in the refrigerator, covered with plastic wrap or in an airtight container, for up to 2 days. Reheating individual slices in the microwave for about 20-30 seconds brings back that delicious, fresh-baked flavor.
Can I freeze Dutch Apple Pie, and if so, how?
Of course! To freeze your Dutch Apple Pie, first allow it to cool completely. Then, wrap the pie tightly in plastic wrap followed by aluminum foil to prevent freezer burn. It can be stored in the freezer for up to 2 months. When ready to enjoy, thaw it overnight in the fridge and reheat at 350°F (177°C) for about 15-20 minutes.
What can I do if my pie crust turns out soggy?
If you find that your pie crust has turned soggy, there are a few steps you can take to ensure this doesn’t happen in the future. Firstly, make sure to properly blind bake the crust until it’s slightly dry before adding your filling. Cooling the crust completely before adding the apple mixture also helps. If you’re in a pinch, you can sprinkle a thin layer of breadcrumbs or cornmeal on the bottom of the crust before adding the apples, which acts as a barrier.
Can I accommodate dietary restrictions while making Dutch Apple Pie?
Absolutely! If you’re looking to make a gluten-free version, simply substitute the all-purpose flour with a 1:1 gluten-free baking flour. For those with dairy allergies, you can use vegan butter or coconut oil in the crust and topping. Just remember to double-check ingredients like sugar and cinnamon to ensure they meet your dietary needs.
Do I need to use fresh apples, or can I use canned?
While fresh apples create the best texture and flavor, you can use canned apple pie filling in a pinch. If doing so, ensure to drain it well to avoid excess moisture in your pie, which could lead to a soggy crust. However, I recommend experimenting with fresh, seasonal apples for that homemade charm!
Delicious Dutch Apple Pie with Crunchy Streusel Bliss
Ingredients
Equipment
Method
- Prepare the Crust: In a mixing bowl, whisk together the flour, sugar, and salt. Cut in unsalted butter until crumbly. Gradually add ice water until dough forms. Shape into a disk and refrigerate for 1 hour.
- Blind Bake Crust: Roll out chilled dough and fit into pie plate. Chill while preheating oven to 400°F. Cover crust with foil and pie weights. Bake for 15 minutes, remove weights, prick bottom, and bake for another 5-7 minutes.
- Make the Streusel: Combine brown sugar, flour, nutmeg, and salt in a bowl. Mix in melted butter and vanilla until crumbly. Chill while preparing filling.
- Prepare Filling: Toss apple slices with melted butter, lemon juice, sugar, flour, and cinnamon in a large bowl. Ensure even coating.
- Assemble Pie: Layer apple filling in pre-baked crust and top generously with streusel.
- Bake: Lower oven to 350°F and bake for 45-55 minutes until apples are tender and streusel is golden. Cover if browning too quickly.
- Cool and Serve: Cool pie on wire rack for 2 hours before serving. Enjoy warm with ice cream or whipped cream.
Leave a Reply