
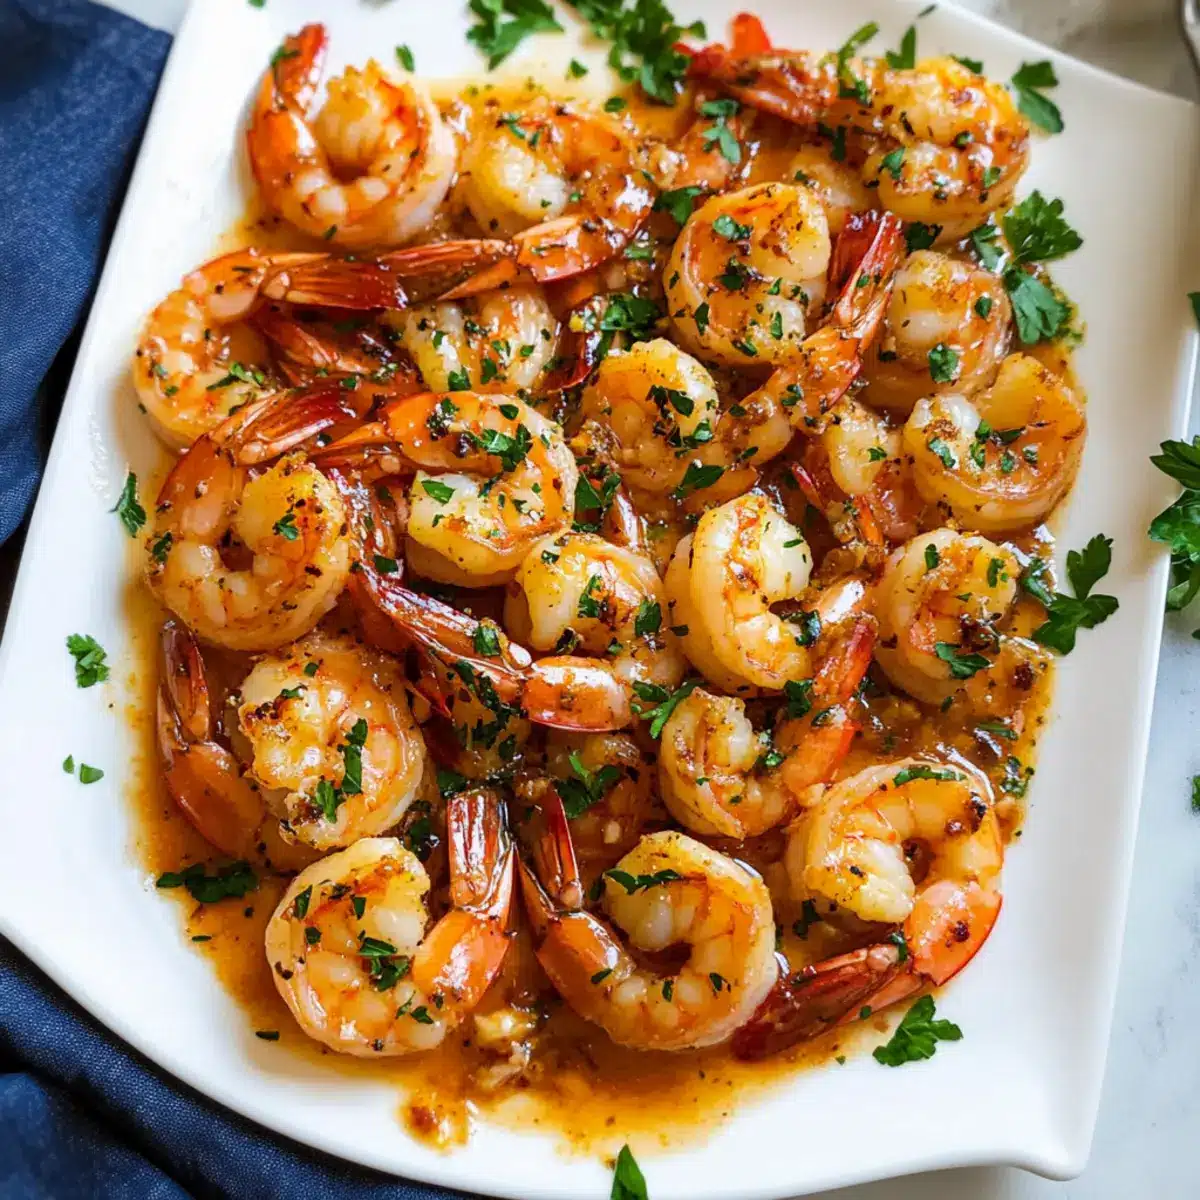
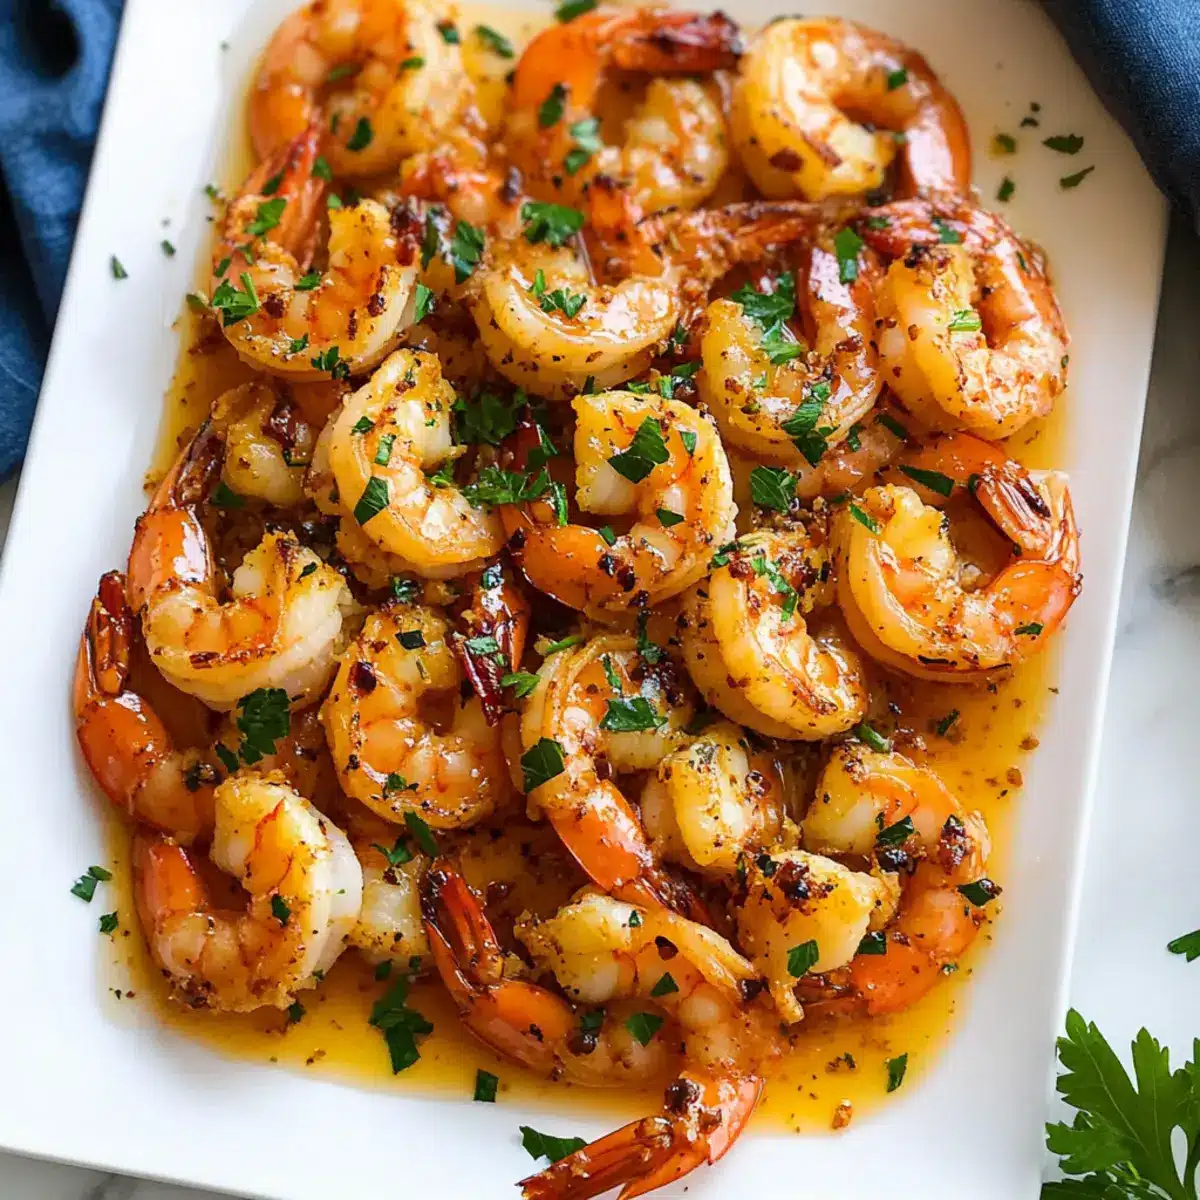
The tantalizing scent of sizzling garlic fills the air, whisking me away to the sun-kissed shores of Hawaii. Today, I’m thrilled to share my recipe for Hawaiian Garlic Shrimp—an absolute delight that’s sure to become a favorite in your kitchen. This dish merges the sweetness of succulent shrimp with a rich, garlicky butter sauce that clings lovingly to each morsel, resulting in a sumptuous experience that’s impossible to resist. One of the best parts? You can whip this up in just 20 minutes, making it perfect for those busy weeknights or when you’re entertaining guests. Furthermore, with simple, fresh ingredients, this Garlic Shrimp not only satisfies your cravings but also keeps your cooking stress-free. Are you ready to dive into a plate that takes you straight to a tropical paradise? Let’s get started!

Why is Garlic Shrimp a Must-Try?
Simplicity at its finest: With just a few pantry staples, this dish can be prepared in a flash, making it ideal for anyone craving a gourmet meal without the hassle.
Mouthwatering flavor: The rich garlic butter sauce envelops the shrimp, creating a burst of flavor that’s both savory and satisfying—perfect for impressing guests or treating yourself.
Versatility reigns: Feel free to swap shrimp for scallops or chicken to satisfy varying palates, or toss in seasonal vegetables for a colorful addition.
Quick cooking time: Whipping up this recipe takes just 20 minutes, making it easier than ever to enjoy homemade gourmet dining any night of the week.
Crowd-pleaser: Whether you serve it with jasmine rice or garnish it with fresh parsley, this Garlic Shrimp dish is guaranteed to be a hit at your dinner table. For more delicious variations, check out Lemon Garlic Parmesan or Honey Garlic Shrimp.
Garlic Shrimp Ingredients
For the Shrimp
- Extra large shrimp – Ensure shrimp is peeled and deveined for the best texture and flavor.
- All-purpose flour – Coats shrimp for better browning and ensures the sauce clings nicely.
For the Sauce
- Unsalted butter – The primary source of richness in the sauce; for a lighter option, use margarine.
- Olive oil – Helps sauté the shrimp and garlic without burning; vegetable oil can be a great substitute.
- Fresh garlic – Provides that iconic strong aroma and garlicky punch; using freshly minced garlic elevates the dish.
For Seasoning
- Paprika – Adds depth of flavor and a hint of color; try smoked paprika for a unique twist.
- Cayenne pepper – Optional for a bit of heat; omit for a milder flavor tailored to your taste.
- Salt and freshly ground black pepper – Essential for balancing flavors; adjust according to your preference.
For Garnishing
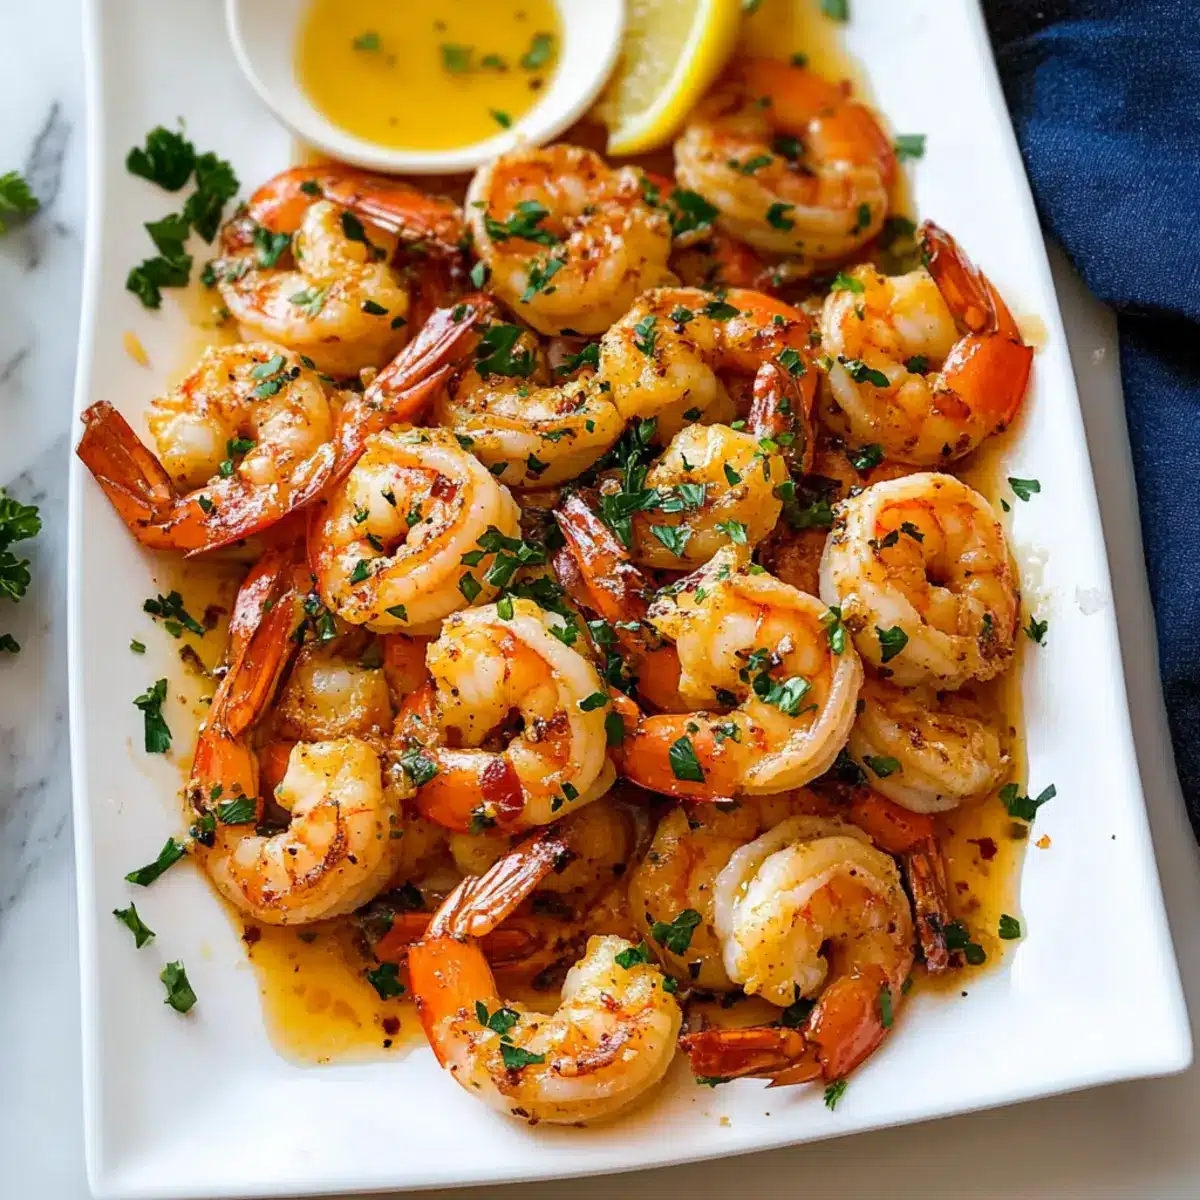
- Fresh lemon juice – Brightens the dish and adds acidity; lime juice can work for a different citrus flair.
- Fresh parsley – Optional garnish for flavor and a pop of color; cilantro is a wonderful alternative for a fresh herb twist.
With these treasured ingredients, your journey to creating delightful Garlic Shrimp is just around the corner!
Step-by-Step Instructions for Garlic Shrimp
Step 1: Prepare Shrimp
Start by patting the extra large shrimp dry with paper towels to remove excess moisture. This ensures that the shrimp sear beautifully in the pan. Place the dried shrimp in a medium bowl, preparing them for seasoning.
Step 2: Season Shrimp
In the bowl with the shrimp, sprinkle the all-purpose flour, paprika, cayenne pepper, salt, and freshly ground black pepper. Toss the shrimp gently until they are evenly coated in the mixture, ensuring every piece is beautifully seasoned for optimal flavor in your Garlic Shrimp.
Step 3: Cook Garlic
Heat a large skillet over medium heat and add the unsalted butter and olive oil. Allow the butter to melt completely, then add the minced garlic, stirring constantly for about 30 seconds. The garlic should become fragrant but not brown, which will enhance the rich flavor of your Garlic Shrimp sauce.
Step 4: Cook Shrimp
Carefully place the seasoned shrimp in an even layer in the skillet. Cook for approximately 2 minutes without disturbing them until the shrimp turn pink on one side. Flip each shrimp and continue cooking for an additional 2 minutes or until just cooked through, watching for that perfect tenderness.
Step 5: Finish
Once the shrimp are cooked, remove the skillet from heat. Squeeze fresh lemon juice over the shrimp and toss gently to combine, allowing the zesty brightness to enhance the savory garlic butter sauce. If desired, garnish with fresh parsley for a pop of color and added flavor.
Step 6: Serve Immediately
Dish up your delicious Garlic Shrimp right away to enjoy that perfect blend of flavors! Serve with extra garlic butter sauce from the pan on the side, and consider pairing it with jasmine rice or a fresh salad for a delightful meal.
What to Serve with Authentic Hawaiian Garlic Shrimp
Creating a delightful meal is easier when you have the perfect pairings in mind to complement your savory dish.
-
Steamed Jasmine Rice: Fluffy and fragrant, jasmine rice soaks up the rich garlic butter sauce beautifully, enhancing every bite.
-
Pineapple Rice: Combining sweetness and tropical flavors, pineapple rice adds a fruity contrast that brightens the meal and brings out the Hawaiian essence.
-
Roasted Vegetables: Colorful roasted veggies add a crisp texture and savory element to your plate, balancing the buttery sauce of the shrimp perfectly.
-
Green Salad: A fresh green salad with citrus dressing acts as a refreshing palate cleanser against the richness of the garlic shrimp.
-
Garlic Bread: Reinforce those delightful garlic flavors with warm, buttery garlic bread, perfect for mopping up any leftover sauce on your plate.
-
Mojito: A refreshing mojito offers a cool and minty contrast to the warmth of the dish, creating a balanced dining experience.
-
Hibiscus Iced Tea: This fragrant, sweet tea provides a lovely aesthetic and a hint of floral notes, making it a great beverage companion for your meal.
-
Coconut Flan: End your meal on a sweet note with a rich coconut flan that pairs well with the bold flavors, echoing tropical vibes.
-
Fruit Salad: A light and sweet fruit salad offers freshness and a delightful end, making it a perfect conclusion to your dining experience.
Expert Tips for Garlic Shrimp
- Perfect Cooking Time: Keep a close eye on the shrimp while cooking; overcooking makes them tough, so aim for just pink and firm.
- Even Shrimp Size: Choosing shrimp of similar size ensures even cooking and a polished presentation in your Garlic Shrimp dish.
- Non-Stick Skillet: Using a non-stick skillet prevents the shrimp from sticking and breaking apart, leading to a better-textured meal.
- Fresh Garlic Only: Opt for freshly minced garlic rather than pre-minced to elevate the flavor of the sauce and avoid bitterness.
- Garnish Wisely: Adding fresh parsley or cilantro not only enhances flavor but also brightens the dish visually—don’t skip this step!
Garlic Shrimp Variations & Substitutions
Feel free to let your creativity shine by adjusting this delightful dish to fit your taste buds!
-
Protein Swap: Replace shrimp with scallops or chicken for a hearty alternative. Both options offer a delicious twist while still capturing that garlicky essence.
-
Wine Boost: Add a splash of white wine while cooking to deepen the flavor. It transforms your sauce into a luxurious experience that will wow your guests.
-
Veggie Add-in: Include seasonal vegetables like bell peppers or snap peas for a vibrant touch. They not only enhance the dish’s color but also add a pleasant crunch.
-
Gluten-Free: Use gluten-free flour as a replacement for all-purpose flour to accommodate dietary needs without sacrificing texture or flavor.
-
Herb Variation: Swap parsley for cilantro to introduce a different herbal note. This simple change can give your Garlic Shrimp a fresh, zesty finish.
-
Heat Level: Adjust the cayenne pepper to taste, or completely omit it for a milder dish. This allows you to tailor the heat according to your family’s preferences.
-
Citrus Twist: Instead of fresh lemon juice, try using lime juice. It lends a unique citrus kick that brightens every bite.
-
Flavor Enhancement: For an extra flavor layer, incorporate fresh ginger along with the garlic. This brings a delightful warmth and complexity to your Garlic Shrimp.
Each of these variations can lead you on a new flavor adventure! With shortcuts like Honey Garlic Shrimp or a freshly inspired twist like Lemon Garlic Parmesan, you’re bound to have an unforgettable culinary journey!
Storage Tips for Garlic Shrimp
- Fridge: Store leftover Garlic Shrimp in an airtight container for up to 2 days to maintain freshness. This way, you can enjoy the rich flavors again without compromising quality.
- Freezer: If you wish to freeze Garlic Shrimp, place it in a single layer on a baking sheet first. Once frozen, transfer to an airtight container or freezer bag. It can last up to 2 months.
- Reheating: Gently reheat in a skillet over low heat to avoid rubbery shrimp. Adding a splash of lemon juice can help bring back that fresh taste!
- Thawing: For frozen shrimp, thaw in the refrigerator overnight before reheating. This ensures the shrimp remain flavorful and succulent.
Make Ahead Options
These Hawaiian Garlic Shrimp are perfect for meal prep enthusiasts looking to save time on busy weeknights! You can season the shrimp with flour, paprika, cayenne, salt, and pepper up to 24 hours in advance, just keep them covered in the refrigerator to maintain freshness. The garlic can be minced ahead as well; store it in an airtight container to prevent browning. When you’re ready to serve, simply heat the butter and olive oil in the skillet, cook the shrimp for 4 minutes until just pink, and finish with fresh lemon juice. By prepping these components ahead of time, you’ll enjoy delicious, restaurant-quality Garlic Shrimp with minimal effort!
Hawaiian Garlic Shrimp Recipe FAQs
What type of shrimp should I use for this recipe?
Absolutely! For the best results, use extra large shrimp that are peeled and deveined. This size ensures a sumptuous bite and quick cooking, yielding delightful tenderness. If you’re looking for an alternative, feel free to swap in scallops or chicken for a different twist!
How should I store leftover Garlic Shrimp?
Leftover Garlic Shrimp can be stored in an airtight container in the refrigerator for up to 2 days. To maintain its deliciousness, gently reheat it in a skillet over low heat, avoiding high temperatures that can make shrimp rubbery. I often add a splash of lemon juice during reheating to revive the flavors!
Can I freeze Garlic Shrimp?
Great question! Yes, you can freeze Garlic Shrimp. Start by arranging the cooked shrimp in a single layer on a baking sheet and freeze until solid. Once frozen, transfer the shrimp to an airtight container or a heavy-duty freezer bag. It can last for up to 2 months. To enjoy, just thaw in the fridge overnight and reheat gently.
What if my shrimp are overcooked?
If you find that your shrimp have turned out overcooked and tough, worry not! One way to remedy this is to serve them in a rich sauce or incorporate them into a noodle or rice dish with additional moisture. You can also add some cream or broth to soften the texture for a more enjoyable meal.
Are there any dietary considerations for this dish?
Very! If you have dietary restrictions, like gluten sensitivities, you can easily replace the all-purpose flour with a gluten-free alternative. Additionally, always check for shellfish allergies, as shrimp can trigger reactions in some people. It’s essential to communicate any substitutes or dietary needs when serving!
How can I tell if the shrimp are fresh at the store?
When shopping for shrimp, look for firm and shiny shells, without any dark spots or odor. Fresh shrimp should have a mild scent of the ocean, rather than a strong fishy smell. It’s often best to buy shrimp that’s frozen if you don’t plan to cook them immediately.
Irresistibly Buttery Garlic Shrimp in Just 20 Minutes
Ingredients
Equipment
Method
- Start by patting the extra large shrimp dry with paper towels to remove excess moisture. This ensures the shrimp sear beautifully in the pan.
- In the bowl with the shrimp, sprinkle the all-purpose flour, paprika, cayenne pepper, salt, and freshly ground black pepper. Toss the shrimp gently until they are evenly coated in the mixture.
- Heat a large skillet over medium heat and add the unsalted butter and olive oil. Allow the butter to melt completely, then add the minced garlic, stirring constantly for about 30 seconds.
- Carefully place the seasoned shrimp in an even layer in the skillet. Cook for approximately 2 minutes until the shrimp turn pink on one side. Flip each shrimp and continue cooking for an additional 2 minutes or until just cooked through.
- Once the shrimp are cooked, remove the skillet from heat. Squeeze fresh lemon juice over the shrimp and toss gently to combine.
- Dish up your delicious Garlic Shrimp right away to enjoy that perfect blend of flavors!
Leave a Reply