
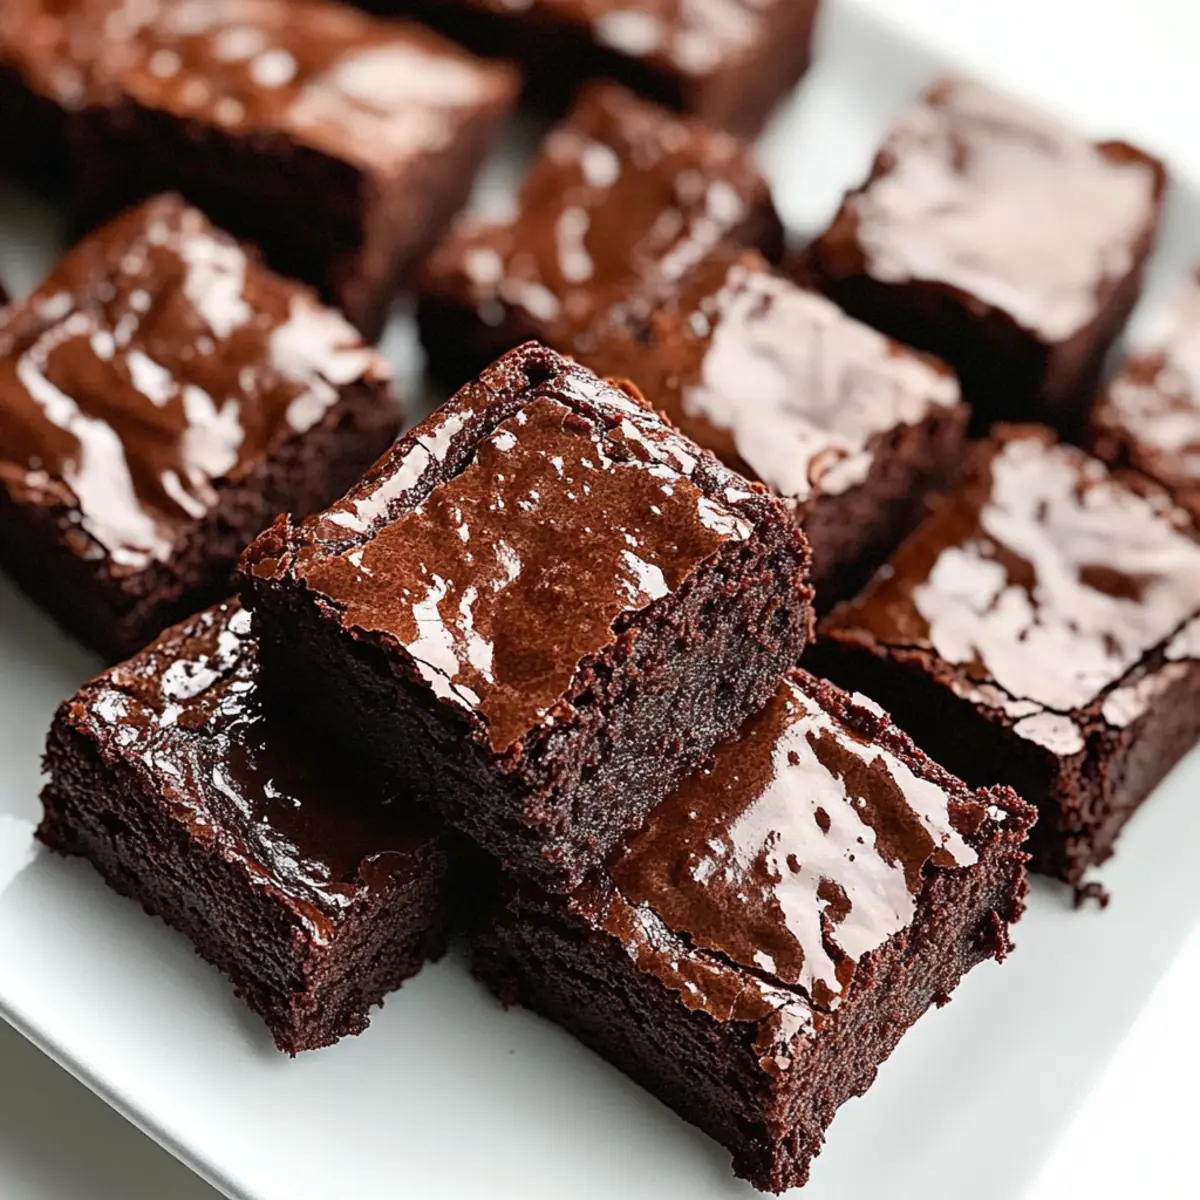
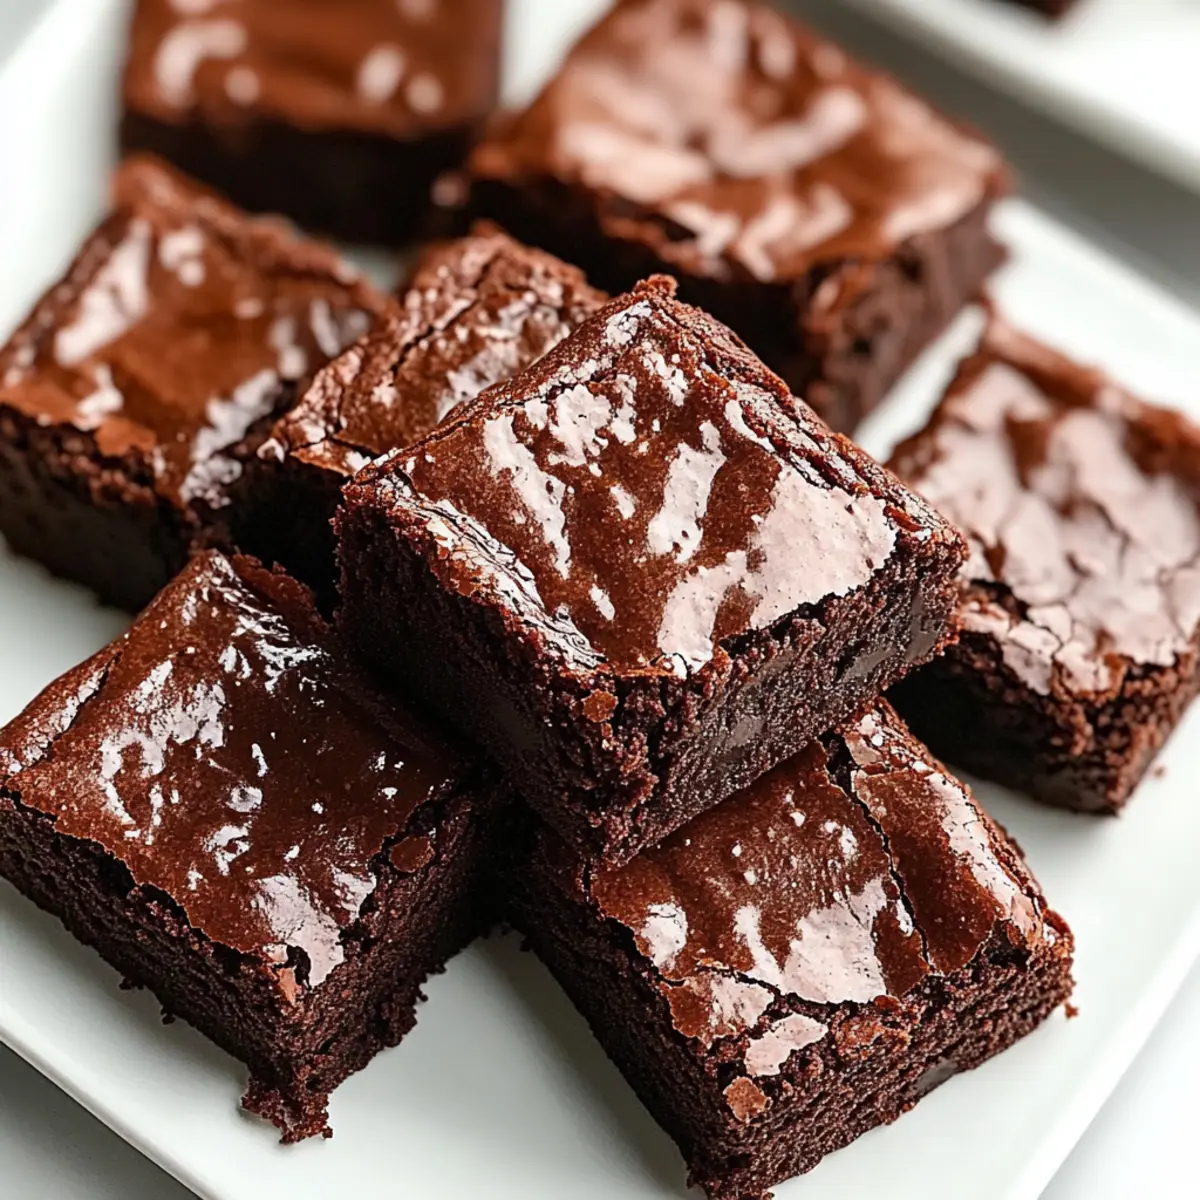
As I whisked together a few simple ingredients one afternoon, a delightful surprise emerged: Flourless Greek Yogurt Brownies that are as satisfying as they are wholesome. These brownies redefine indulgence with their rich, fudgy chocolate goodness while embracing a guilt-free twist that makes them the perfect treat. Not only are they incredibly easy to whip up in just one bowl, but they’re also gluten-free and packed with protein, making them a fantastic option for those of us who crave comfort without compromising health. Whether you need a sweet pick-me-up or a delightful dessert to impress your friends, these Greek Yogurt Brownies are sure to become a new favorite. Curious to see how this simple recipe comes together? Let’s dive in!
Why Choose Greek Yogurt Brownies?
Deliciously Guilt-Free: Indulge in the rich, fudgy texture of these brownies without the guilt!
Quick and Easy: Made in just one bowl, they’re perfect for busy cooks craving a homemade treat.
Nutritious Twist: Made with Greek yogurt, they pack a protein punch while keeping calories in check.
Gluten-Free Goodness: Enjoy classic brownie flavor while accommodating dietary restrictions with this gluten-free dessert.
Crowd-Pleasing Treat: Perfect for gatherings, they impress friends and family with their deliciousness and healthy ingredients.
Elevate your dessert game with these delightful brownies, or check out our other delicious options for a satisfying meal that won’t compromise your health!
Greek Yogurt Brownies Ingredients
For the Brownies
• Greek Yogurt – Provides moisture and richness; swap for plant-based yogurt for a dairy-free treat.
• Eggs – Acts as a binding agent to ensure perfect structure; no substitutes recommended for best results.
• Honey – A natural sweetener that brings sweetness; feel free to use maple syrup for a vegan version.
• Vanilla Extract – Enhances flavor and depth; this ingredient is essential for that rich taste.
• Cocoa Powder – The star for chocolate flavor and color; check that it’s gluten-free if necessary.
• Baking Soda – A leavening agent that helps the brownies rise; no need for substitutions here!
• Salt – Balances the sweetness and lifts all the flavors; an essential component with no replacements.
With these Greek Yogurt Brownies ingredients in hand, you’re set to create a delightfully fudgy dessert that will impress your taste buds while keeping your health in check!
Step‑by‑Step Instructions for Guilt-Free Flourless Greek Yogurt Brownies
Step 1: Preheat the Oven
Begin by preheating your oven to 350°F (175°C). While it warms up, prepare a 9×9-inch baking pan by lining it with parchment paper, leaving some overhang for easy lifting later. This will ensure that the brownies come out easily and retain their shape.
Step 2: Mix the Wet Ingredients
In a large mixing bowl, add 1 cup of Greek yogurt, 2 eggs, 1/2 cup of honey, and 1 teaspoon of vanilla extract. Using a whisk, mix these ingredients together until they are creamy and well combined, about 1-2 minutes. The mixture should be smooth and slightly thick, providing a rich base for your Greek Yogurt Brownies.
Step 3: Incorporate the Dry Ingredients
Sift in 1/2 cup of cocoa powder, 1 teaspoon of baking soda, and 1/4 teaspoon of salt to the wet mixture. Using a spatula, gently fold these dry ingredients into the batter until it just comes together—this should take just about 30 seconds. Avoid overmixing to maintain that fudgy texture that makes these brownies so delectable!
Step 4: Pour the Batter
Pour the smooth brownie batter into the prepared baking pan, spreading it evenly with your spatula. Ensure the surface is level for even baking. This step is crucial for perfect brownies, as an uneven surface can lead to inconsistent cooking results.
Step 5: Bake the Brownies
Place the pan in the preheated oven and bake for 20–25 minutes. Check for doneness by inserting a toothpick into the center; it should come out with a few moist crumbs attached. The edges will look set while the center remains slightly soft, giving you the ideal fudgy texture of Greek Yogurt Brownies.
Step 6: Cool and Slice
Once baked, remove the brownies from the oven and allow them to cool completely in the pan for about 30 minutes. Once cool, lift them out using the parchment overhang and transfer to a cutting board. Slice into squares and savor the rich, chocolatey goodness that is your guilt-free dessert!

Expert Tips for Greek Yogurt Brownies
-
Mix with Care: Avoid overmixing the batter to keep your brownies fudgy. Gently fold in the dry ingredients until just combined for optimal texture.
-
Check Your Ingredients: Make sure your cocoa powder and baking soda are labeled gluten-free if necessary. This guarantees your Greek Yogurt Brownies remain safe for those with dietary restrictions.
-
Cool Completely: Allow your brownies to cool completely in the pan. This helps them set properly and makes cutting them into squares much easier.
-
Add Extra Richness: For an indulgent twist, consider stirring in dark chocolate chips or a tablespoon of espresso powder before baking to elevate the chocolate flavor.
-
Experiment with Swaps: If you’re looking for a dairy-free option, substitute Greek yogurt with a plant-based alternative. The brownies will still turn out deliciously moist!
What to Serve with Guilt-Free Flourless Greek Yogurt Brownies
Indulging in these decadent brownies is a treat on its own, but pairing them with the right sides can elevate your dessert experience to a whole new level.
-
Vanilla Ice Cream: A classic pairing that adds creamy sweetness, creating a delightful contrast with the fudgy texture of the brownies.
-
Fresh Berries: Juicy strawberries or raspberries bring freshness and a tartness that enhances the richness of the brownies, balancing flavors beautifully.
-
Espresso Coffee: The bold, rich flavor of coffee serves as the perfect complement, making your dessert feel gourmet while enhancing the chocolate notes.
-
Coconut Whipped Cream: Light and fluffy, this coconut alternative adds a tropical twist that pairs wonderfully with the dense brownies, enhancing moisture and flavor.
-
Peanut Butter Drizzle: A warm drizzle of peanut butter adds a nutty richness that complements the chocolate perfectly, making each bite even more satisfying.
-
Nutty Granola: A sprinkle of crunchy granola offers a delightful texture contrast, giving each mouthful an exciting crunch alongside the softness of the brownies.
-
Mint Chocolate Tea: The refreshing mint flavor in this tea cuts through the richness, making for a delightful and soothing after-dinner drink to enjoy with the brownies.
-
Chocolate-Covered Pretzels: The sweet and salty combination of chocolate-covered pretzels creates an irresistible snack alongside the brownies, perfect for sharing during gatherings.
Make Ahead Options
These Flourless Greek Yogurt Brownies are a fantastic recipe that can be prepped in advance, making them perfect for busy weeknights or last-minute gatherings! You can prepare the brownie batter up to 24 hours ahead; simply mix the ingredients and store it tightly covered in the refrigerator. This not only saves you time but also enhances the flavors as they meld together. When you’re ready to bake, pour the chilled batter into your prepared pan and bake as directed. For longer storage, you can bake the brownies and keep them in an airtight container in the fridge for up to 5 days without losing their delicious fudginess. Enjoy your homemade Greek Yogurt Brownies with minimal effort and maximum flavor!
Greek Yogurt Brownies Variations & Substitutions
Explore exciting twists to make these brownies uniquely yours and delight your taste buds!
- Dairy-Free: Substitute Greek yogurt with plant-based yogurt to enjoy a delicious dairy-free treat.
- Vegan Option: Replace honey with maple syrup and use flax eggs (1 tablespoon ground flaxseed mixed with 2.5 tablespoons water) for a vegan-friendly brownie.
- Nutty Flavor: Fold in a half cup of chopped nuts like walnuts or almonds for an added crunch and rich flavor.
- Chocolate Lovers: Boost the chocolate intensity by mixing in dark chocolate chips or espresso powder for an irresistible depth.
- Fruit Infusion: Add some mashed bananas or a handful of raspberries for a fruity twist that enhances moisture and flavor.
- Spicy Kick: Sprinkle in a pinch of cayenne pepper or cinnamon for a surprising warmth that beautifully complements the chocolate.
- Texture Variation: For chewy edges, bake the brownies in a smaller pan to create thicker sides, resulting in a delightful contrast of textures.
- Frosted Delight: Top with a creamy avocado chocolate frosting or a simple dusting of powdered sugar for a final touch of indulgence.
Remember, these variations are merely a suggestion to enhance your baking adventure! For more delightful flavor combinations, consider our other dessert recipes that are sure to impress. Whether you’re craving a twist on classic flavors or looking for a nutritious alternative, these brownies will satisfy your sweet tooth! Enjoy your culinary journey!
How to Store and Freeze Greek Yogurt Brownies
-
Fridge: Store your Greek Yogurt Brownies in an airtight container for up to 5 days. This keeps them fresh and prevents them from drying out.
-
Freezer: For longer storage, wrap the brownies in parchment paper and place them in a freezer-safe container. They can be frozen for up to 3 months.
-
Thawing: To enjoy frozen brownies, thaw them overnight in the fridge or leave them at room temperature for about 1 hour.
-
Reheating: If you prefer warm brownies, simply microwave a square for about 10–15 seconds or warm in an oven preheated to 350°F (175°C) for a couple of minutes. Enjoy the fudgy goodness!

Greek Yogurt Brownies Recipe FAQs
How do I choose the best Greek yogurt for this recipe?
Absolutely! When selecting Greek yogurt, opt for a plain, full-fat variety for the richest flavor and moisture. If you’re looking for a lighter option, low-fat yogurt will also work well, just be aware it may slightly alter the texture. Avoid flavored yogurts, as they can add unwanted sugars and flavors to your brownies.
What’s the best way to store these Greek Yogurt Brownies?
For sure! Store your brownies in an airtight container in the fridge for up to 5 days. This will keep them fresh and moist. If you want to enjoy them longer, you can freeze them—see next question for details!
Can I freeze Greek Yogurt Brownies? If so, how?
Absolutely! To freeze your brownies, first, let them cool completely. Then, wrap them individually in parchment paper and place them in a freezer-safe container or a resealable plastic bag. They’ll maintain their taste and texture for up to 3 months. When you’re ready to enjoy one, simply thaw in the fridge overnight or leave at room temperature for about 1 hour.
Why didn’t my brownies rise as expected?
Very! If your brownies didn’t rise properly, it might be due to the leavening agent, baking soda, being outdated, or you might have overmixed the batter. To ensure the right rise, always check the expiration dates on your baking soda, and fold in the dry ingredients gently until just combined for that perfect fudgy texture you’re after.
Are these brownies safe for people with gluten allergies?
Yes, indeed! The Greek Yogurt Brownies are naturally gluten-free since they contain no flour. Just be sure to check your cocoa powder and baking soda for gluten-free certification to avoid cross-contamination. Always a good idea to keep health in mind!
Can I make these brownies dairy-free?
Of course! Simply swap the Greek yogurt with a plant-based yogurt that you enjoy. Make sure it has a similar thickness to Greek yogurt for the best results. You can still indulge in the fudgy goodness with no dairy involved!
Decadent Greek Yogurt Brownies That Are Guilt-Free Delicious
Ingredients
Equipment
Method
- Preheat your oven to 350°F (175°C) and prepare a 9x9-inch baking pan by lining it with parchment paper.
- In a large mixing bowl, add 1 cup of Greek yogurt, 2 eggs, 1/2 cup of honey, and 1 teaspoon of vanilla extract. Mix until creamy and well combined.
- Sift in 1/2 cup of cocoa powder, 1 teaspoon of baking soda, and 1/4 teaspoon of salt. Gently fold these dry ingredients into the wet mixture.
- Pour the smooth brownie batter into the prepared baking pan, spreading it evenly.
- Bake for 20–25 minutes, checking for doneness by inserting a toothpick into the center.
- Allow the brownies to cool completely in the pan for about 30 minutes before slicing.
Leave a Reply