
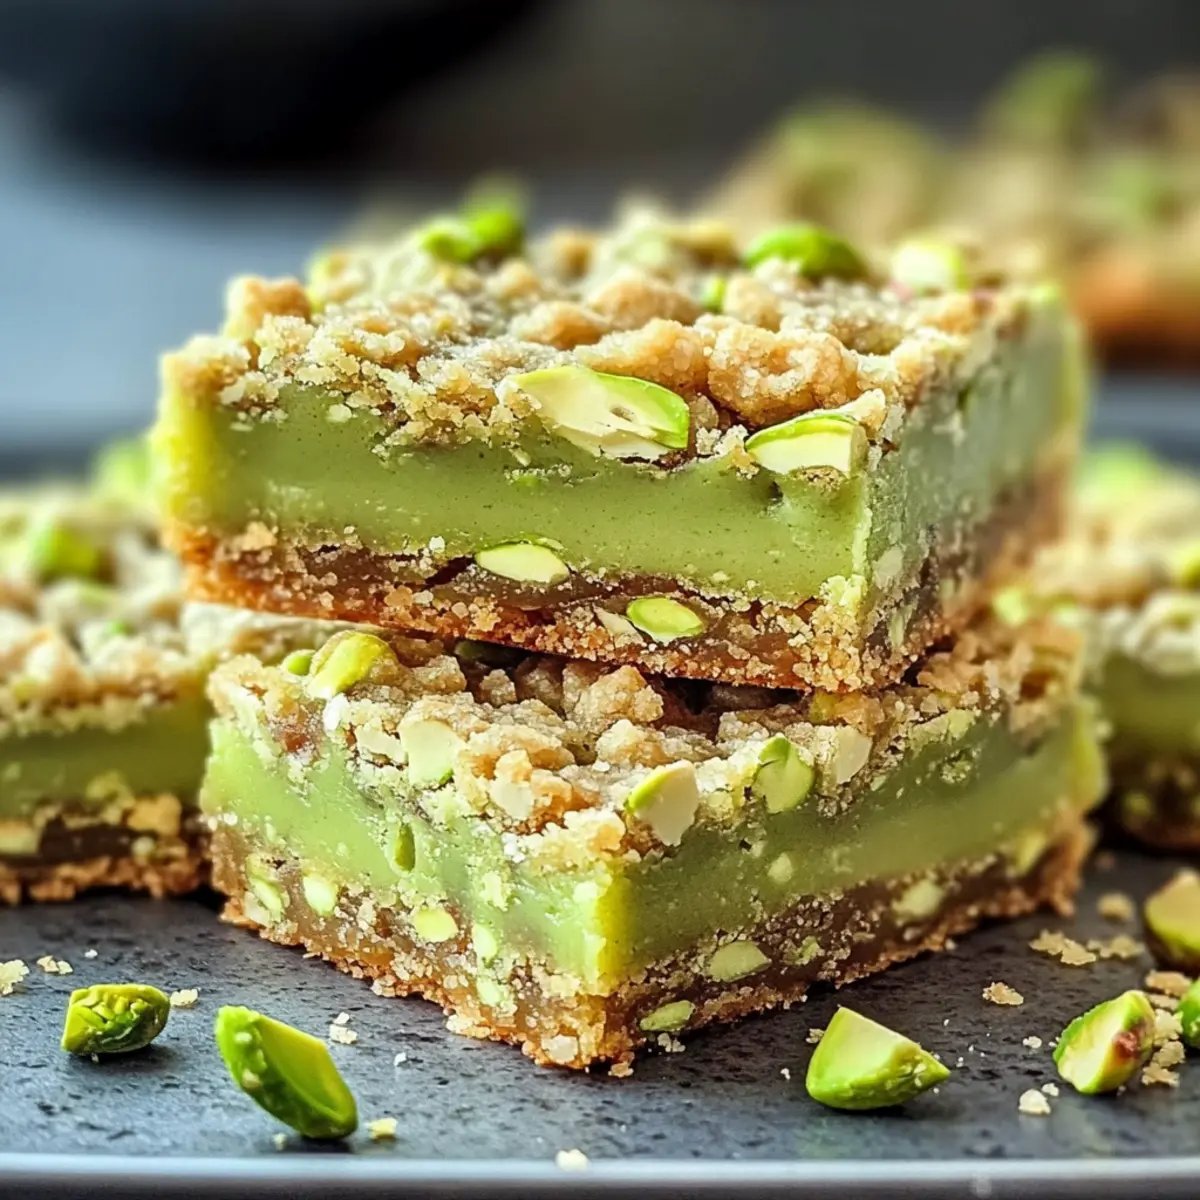
“You know what’s nicer than a store-bought treat? A warm batch of homemade Pistachio Dream Cookie Bars right from your oven.” The sweet, nutty aroma fills your kitchen, promising a little slice of heaven. With their soft, chewy texture, these bars combine the buttery goodness of a cookie with the enchanting flavor of pistachio pudding, making them a perfect option for dessert lovers of all kinds. Not only can you prepare this indulgent recipe in just 30-35 minutes, but they also offer a fantastic twist on traditional cookie bars, catering to gluten-free and vegan diets with simple substitutions. Whether you’re hosting a gathering or simply craving something sweet, these cookie bars will surely impress. Ready to turn your kitchen into a baking haven? Let’s dive in!
Why Are These Cookie Bars a Must-Try?
Irresistibly Flavorful: The delightful combination of pistachio pudding and buttery cookie mix creates a rich, nutty flavor that’s simply unforgettable.
Quick Preparation: In just 30-35 minutes, you can whip up a batch of these dreamy cookie bars, making them perfect for spontaneous sweet cravings or impromptu gatherings.
Dietary Friendly: With easy substitutions, you can easily adapt this recipe to be gluten-free or vegan, ensuring everyone can indulge without worry.
Endless Variations: Whether you prefer the classic version or want to jazz things up with chocolate chips or extra nuts, this recipe is incredibly versatile.
Perfect for Any Occasion: Ideal as a dessert centerpiece or paired with coffee during afternoon tea, they’ll impress your guests at potlucks or casual get-togethers.
For more sweet inspiration, don’t miss our Christmas Sugar Cookies or Zesty Orange Cookie recipes!
Pistachio Dream Cookie Bars Ingredients
For the Batter
• ½ cup unsalted butter – Adds richness and moisture; can be substituted with vegan butter for a dairy-free option.
• 2 large eggs – Provides structure and moisture; try using flax eggs for a vegan-friendly version.
• 3.4 oz pistachio instant pudding mix – Imparts a rich pistachio flavor and contributes to the bars’ soft texture; feel free to experiment with flavors like vanilla or chocolate for exciting variations.
• 1 package sugar cookie mix – Serves as the base for the cookie bars, offering sweetness and structure; opt for a gluten-free cookie mix if needed.
Optional Toppings
• Chopped pistachios, almonds, or walnuts – Perfect for adding a crunchy texture; sprinkle on top before baking for extra flavor.
• Chocolate chips – A delightful addition for those who crave chocolate; fold into the dough for an indulgent twist.
• Cream cheese frosting or light glaze – Elevate your cookie bars by drizzling them with a sweet topping for added indulgence.
With these Pistachio Dream Cookie Bars ingredients in hand, you’re all set for a baking adventure!
Step‑by‑Step Instructions for Pistachio Dream Cookie Bars
Step 1: Preheat the Oven
Begin by preheating your oven to 375°F (190°C). This allows the heat to circulate evenly, ensuring your Pistachio Dream Cookie Bars bake perfectly. While the oven heats up, gather all your ingredients and equipment, including a mixing bowl, a whisk, and a greased 10 x 15-inch baking sheet for later use.
Step 2: Cream Ingredients Together
In a large mixing bowl, combine ½ cup of softened unsalted butter, 2 large eggs, and 3.4 oz of pistachio instant pudding mix. Using a whisk, mix these ingredients until the mixture is smooth and creamy—around 2-3 minutes. The rich green hue of the pistachio pudding should begin to shine through, giving you a delightful base for your cookie bars.
Step 3: Incorporate Sugar Cookie Mix
Gradually add in your package of sugar cookie mix to the creamy mixture, stirring continuously until a sticky dough forms. This step should take about 1-2 minutes, as you want the dough to be cohesive but still thick. Don’t forget to scrape down the sides of the bowl to ensure everything is well combined for your Pistachio Dream Cookie Bars.
Step 4: Spread the Dough in the Pan
Once your dough is ready, grease the 10 x 15-inch baking sheet with cooking spray or butter. Transfer the sticky dough onto the prepared pan, and use a spatula or the back of a spoon to evenly press the dough to the edges. Aim for a smooth, even layer to ensure consistent baking across your cookie bars in the oven.
Step 5: Bake the Cookie Bars
Place the baking sheet in the preheated oven and bake for 18-22 minutes. Keep a close eye on them; you’re looking for the edges to turn a light golden brown while the center remains slightly soft but set—a true testament to the perfect pistachio dream!
Step 6: Cool and Serve
Once baked, remove the pan from the oven and allow the cookie bars to cool completely in the pan on a wire rack. This should take about 30 minutes. Once cooled, slice them into squares or rectangles, showcasing the beautiful green color, and serve as a delightful treat for family and friends to enjoy your delicious Pistachio Dream Cookie Bars.
Expert Tips for Pistachio Dream Cookie Bars
-
Even Dough Spread: Ensure the dough is evenly spread across the baking pan to achieve uniform baking and delightful texture in your Pistachio Dream Cookie Bars.
-
Cool Completely: Allow the bars to cool fully in the pan before slicing. This prevents them from crumbling and helps maintain their soft, chewy consistency.
-
Add Extra Nuts: For an enhanced flavor and crunch, consider folding in additional chopped pistachios and topping the bars with them before baking.
-
Watch the Baking Time: Keep an eye on the cookie bars as they bake. Overbaking can lead to dryness, while properly baked bars should have a slightly soft center when removed from the oven.
-
Flavor Variations: Experiment with different pudding flavors like vanilla or chocolate to personalize your cookie bars while still enjoying the foundational pistachio goodness.
Storage Tips for Pistachio Dream Cookie Bars
- Room Temperature: Store the cookie bars in an airtight container at room temperature for up to 3-4 days, ensuring they remain soft and chewy.
- Fridge: If you prefer a cooler treat, refrigerate the bars in an airtight container for up to a week, keeping their delightful texture intact.
- Freezer: These Pistachio Dream Cookie Bars freeze beautifully! Wrap them individually in plastic wrap and store in a freezer-safe container for up to 3 months.
- Reheating: To enjoy the bars slightly warm, microwave for 10-15 seconds, just enough to enhance their gooey middle while preserving their delicious flavor.
Pistachio Dream Cookie Bars Variations
Feel free to get creative and customize your Pistachio Dream Cookie Bars with these delightful twists!
-
Dairy-Free: Substitute the unsalted butter with vegan butter to make these bars completely dairy-free without sacrificing flavor.
-
Nut-Free: Swap out pistachios for sunflower seeds or pumpkin seeds to create a nut-free treat that still packs a crunch.
-
Chocolate Lovers: Fold in a cup of chocolate chips into the batter for an indulgent chocolate-pistachio combination that’s sure to satisfy any sweet tooth.
-
Add a Zing: Incorporate a teaspoon of orange or almond extract into the dough to elevate the flavors and add a refreshing twist to your bars.
-
Gluten-Free: Use a gluten-free sugar cookie mix to make these cookie bars accessible for everyone at your gathering. They’ll still be delicious!
-
Fruity Flair: Mix in dried cranberries or raisins for a chewy texture and a hint of sweetness that pairs beautifully with the nutty flavors.
-
Baked Topping: Before baking, sprinkle some chopped nuts or crushed pretzels on top for added texture and taste that brings a delightful crunch to every bite.
-
Bigger Batch: Double the recipe and bake it in a larger pan so you can share even more of these delightful bars with friends and family!
These versatile variations ensure that your Pistachio Dream Cookie Bars can be tailored to suit every taste, whether you’re aiming for a classic flavor or something a bit more adventurous. Enjoy your baking adventure, and for more tasty ideas, check out our Marshmallow Swirl Cookies and Chocolate Peppermint Cookies for some festive inspiration!
Make Ahead Options
These Pistachio Dream Cookie Bars are an excellent choice for meal prep, saving you valuable time on busy days! You can prepare the cookie dough up to 24 hours in advance and store it in the refrigerator (just make sure to cover it tightly to prevent drying). You can also bake the bars ahead of time; they will remain fresh for up to 3 days at room temperature when stored in an airtight container. When ready to serve, simply slice the cooled bars and, if desired, reheat them briefly in the microwave for a warm, gooey treat. With these make-ahead tips, you can enjoy these delightful cookie bars with minimal effort whenever the craving strikes!
What to Serve with Pistachio Dream Cookie Bars
Imagine a delightful gathering where the sweet aroma of fresh-baked treats mingles with laughter and joy.
-
Creamy Vanilla Ice Cream: The rich creaminess of vanilla ice cream provides a perfect contrast to the chewy texture of the cookie bars. The delightful pairing melts in your mouth, enhancing the pistachio experience.
-
Fresh Berries Mix: A vibrant medley of strawberries, blueberries, and raspberries adds a tartness that beautifully balances the sweetness of the bars. This fresh element brightens up the entire dessert spread.
-
Nutty Coffee Blend: A warm cup of nutty coffee brings out the pistachio’s flavors and pairs wonderfully with the soft, chewy treats. Sip it slowly as you savor each bite for a truly comforting experience.
-
Whipped Cream Topping: A dollop of whipped cream adds a light and airy element to the rich cookie bars. It’s an appealing contrast that elevates the dessert to heavenly heights.
-
Milk Chocolate Drizzle: Drizzling melted milk chocolate over the bars brings a decadent touch that any chocolate lover will adore. The sweetness of the chocolate complements the nutty flavors splendidly.
-
Chilled Green Tea: Refresh with a glass of chilled green tea for a lighter alternative. Its slight bitterness cuts through the sweetness of the bars, making every bite feel balanced and refreshing.
-
Almond Biscotti: Serve alongside crunchy almond biscotti for a delightful textural contrast. The nutty flavors will bring out the pistachio notes in the cookie bars, creating a tempting duo.
-
Coconut Macaroon Cookies: These sweet coconut treats provide a chewy, tropical flair, adding a fun twist that pairs delightfully with the earthiness of pistachios.
-
Caramel Sauce Dip: A warm, luscious caramel dip can take your bars to the next level. Dip each piece for a sweet, gooey experience that’s simply irresistible.
-
Choco-Pistachio Smoothie: Blend up a smoothie with chocolate milk, yogurt, and pistachios for a creamy drink that ties the dessert theme together. Enjoy it as a cool accompaniment to your Pistachio Dream Cookie Bars.
Pistachio Dream Cookie Bars Recipe FAQs
What’s the best way to select ripe ingredients for this recipe?
Absolutely! When choosing your pistachio pudding mix, aim for one that looks vibrant and has no lumps, as this ensures the best flavor and texture. For the butter, it’s best to use unsalted, room temperature butter, which should be soft to the touch but not melted. If you’re using eggs, try to select ones that are as fresh as possible—check the expiration date on the carton. Fresh eggs will give your cookie bars the structure they need.
How should I store leftover Pistachio Dream Cookie Bars?
Very simple! To retain their delicious softness, store the cookie bars in an airtight container at room temperature for up to 3-4 days. If you want them to last longer, refrigerate them for about a week in a sealed container. Just make sure they are fully cooled before you store them, as this helps keep them from becoming soggy.
Can I freeze Pistachio Dream Cookie Bars? If so, how?
Yes, you definitely can! To freeze your cookie bars, wrap each individual square in plastic wrap, then place them in a freezer-safe container or a resealable freezer bag. They can be frozen for up to 3 months. To enjoy them later, simply take out a bar, let it thaw in the fridge, and if you prefer, warm it in the microwave for about 10-15 seconds to restore that gooey goodness!
What do I do if my cookie bars crumbled while cutting?
If your bars are crumbling, it’s likely due to either overbaking or not allowing them to cool completely before slicing. Ensure that you watch the baking time closely, aiming for golden edges with a soft center. If they are still too crumbly, you may want to let them cool longer in the pan—try 30 minutes to an hour. To salvage crumbly bars, consider serving them as a delightful crumble over vanilla ice cream instead!
Are there any allergy considerations with this recipe?
Absolutely! This recipe contains eggs, butter, and may include gluten depending on your choice of sugar cookie mix. If you’re looking for a gluten-free version, opt for a gluten-free cookie mix, and use vegan butter and flax eggs to adapt it to a dairy-free and egg-free recipe. Always check the labels for cross-contamination if allergies are a concern when purchasing your ingredients.
Pistachio Dream Cookie Bars That Melt in Your Mouth
Ingredients
Equipment
Method
- Preheat your oven to 375°F (190°C). Gather all your ingredients and equipment.
- In a large mixing bowl, combine unsalted butter, eggs, and pistachio pudding mix. Whisk until smooth and creamy.
- Gradually add the sugar cookie mix, stirring continuously until a sticky dough forms.
- Grease the baking sheet with cooking spray or butter. Spread the dough evenly in the pan.
- Bake for 18-22 minutes until edges are golden brown and center is slightly soft.
- Allow the cookie bars to cool completely in the pan on a wire rack for about 30 minutes before slicing.
Leave a Reply