
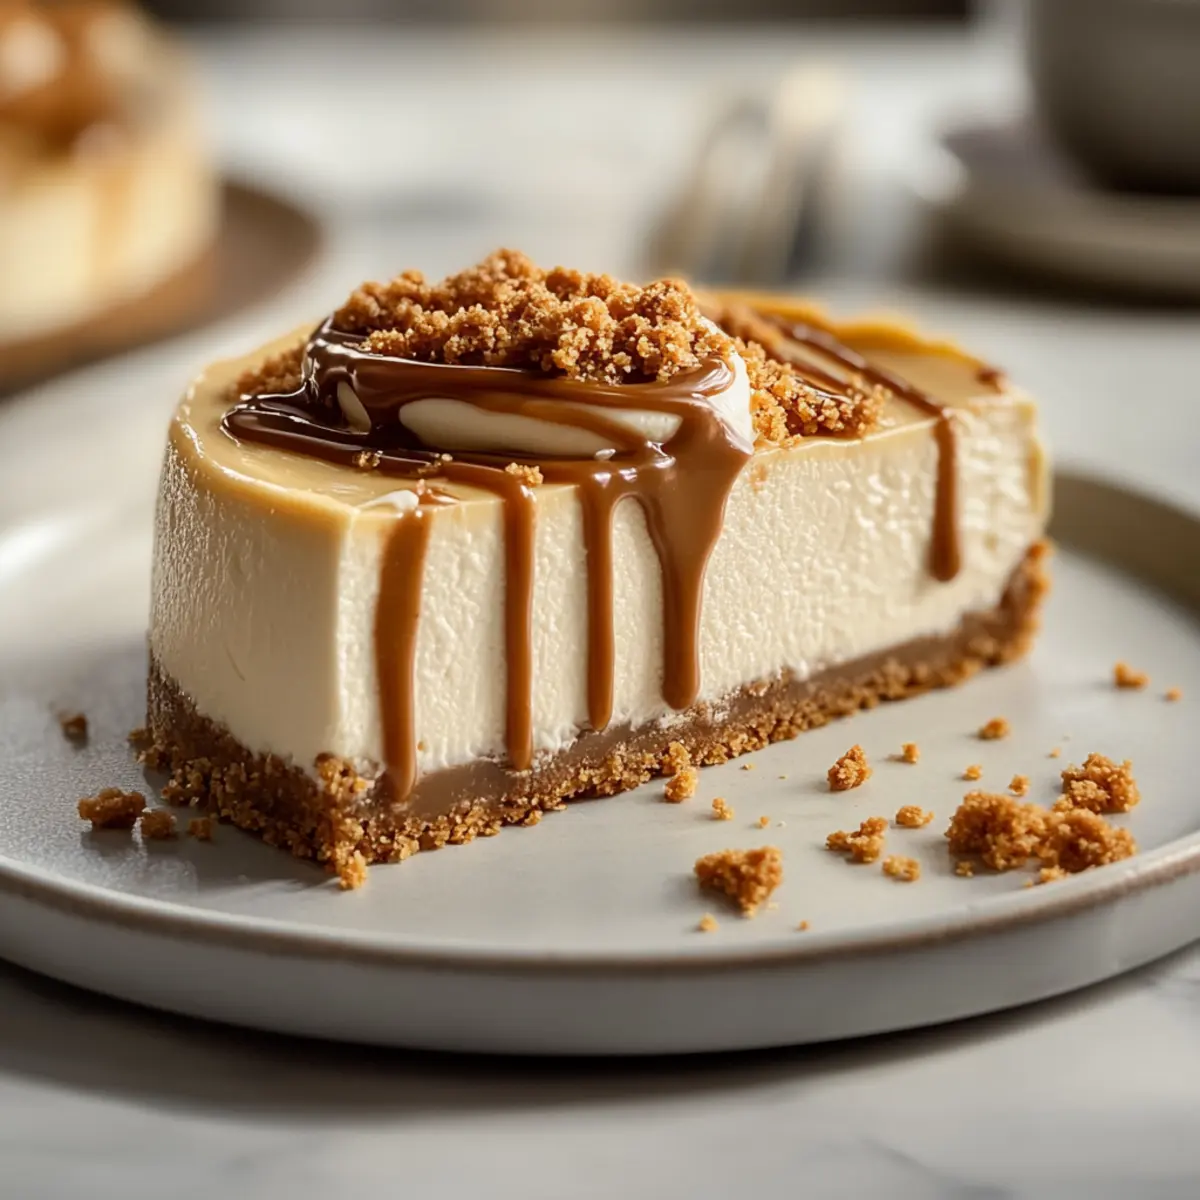
As I craved something sweet yet effortless, my thoughts turned to a delightful creation—No Bake Biscoff Cheesecake. This dreamy dessert marries velvety cream cheese with the rich flavors of Biscoff cookie butter, delivering a symphony of taste without the fuss of baking. With its luscious, creamy filling nestled in a buttery cookie crust, this treat is perfect for warm summer gatherings or when you simply want to impress guests with minimal effort. Plus, it’s a real crowd-pleaser that’s vegetarian-friendly! Imagine serving up slices of this indulgence, all while keeping your kitchen cool and stress-free. Curious about how you can whip up this luxurious dessert? Let’s dive in!
Why Is No Bake Biscoff Cheesecake Amazing?
Simplicity at its Finest: No baking means you can enjoy this decadent dessert without any oven-related stress.
Creamy Bliss: A dreamy filling that combines rich cream cheese and sweet cookie butter promises every bite is a taste of heaven.
Versatile Delight: Adjust the flavor profile by mixing in peanut butter or layering melted chocolate into the filling for a creative twist.
Make-Ahead Magic: Prep it in advance and let it chill—perfect for a dinner party or unexpected guests! Serve it alongside a delightful Baked Cottage Cheese for a well-rounded dessert spread.
Crowd Favorite: Its glorious combination of flavors and textures will have everyone coming back for seconds!
No Bake Biscoff Cheesecake Ingredients
For the Crust
- Biscoff Cookies – Provides the base and flavor of the crust; substitute with graham crackers or Oreos for a different taste.
- Unsalted Butter – Binds the crumbs together for a firm crust; no substitutions recommended unless dietary restrictions apply.
For the Filling
- Cream Cheese – The main component that creates a rich and creamy texture; use full-fat for the best results.
- Biscoff Cookie Butter – Adds sweetness and a distinctive spiced flavor; can be replaced with another cookie butter or nut butter.
- Powdered Sugar – Sweetens the filling; adjust quantity to taste for your perfect No Bake Biscoff Cheesecake.
- Vanilla Extract – Enhances flavor; optional but recommended for added depth.
- Heavy Whipping Cream – Whipped to add lightness to the filling; ensure it’s cold before whipping for best volume.
Optional Toppings
- Warmed Cookie Butter – Drizzle on top for an extra sweet kick; heating makes it more pourable.
- Crushed Biscoff Cookies – Sprinkle for added texture; they make a delightful finish to your cheesecake.
- Dark Chocolate or Caramel Sauce – Drizzle for an indulgent touch; these can elevate your dessert even further!
Step‑by‑Step Instructions for NO BAKE BISCOFF CHEESECAKE
Step 1: Prepare Crust
Begin by crushing Biscoff cookies in a food processor until you achieve a fine crumb, which should take about 1-2 minutes. In a mixing bowl, combine the crumbs with melted unsalted butter, ensuring they are fully coated. Press this mixture firmly into the bottom of a 9-inch springform pan, creating an even layer. Chill the crust in the refrigerator for 15-20 minutes until it firms up.
Step 2: Make Filling
In a large mixing bowl, beat the softened cream cheese with an electric mixer on medium speed until smooth and creamy, about 2-3 minutes. Gradually mix in the Biscoff cookie butter, powdered sugar, and vanilla extract, making sure the mixture is well combined and silky. This luscious filling is the heart of your No Bake Biscoff Cheesecake, so take your time to blend it perfectly.
Step 3: Whip Cream
In a separate, chilled bowl, pour in the heavy whipping cream. Use an electric mixer to whip the cream on high speed until stiff peaks form, which typically takes about 3-5 minutes. Make sure not to over-whip, as this can turn the cream grainy. Gently fold the whipped cream into the cream cheese mixture, ensuring a light and airy texture throughout the filling.
Step 4: Assemble Cheesecake
Remove the chilled crust from the refrigerator and spoon the creamy filling into the crust, spreading it evenly with a spatula until smooth. You want to create a nice, flat top for your No Bake Biscoff Cheesecake. Cover the pan loosely with plastic wrap and refrigerate for at least 6 hours, or ideally overnight, allowing the cheesecake to set perfectly.
Step 5: Finish & Serve
When you’re ready to serve, gently remove the sides of the springform pan. Drizzle warmed Biscoff cookie butter over the top of the cheesecake and generously sprinkle with crushed Biscoff cookies for added texture and flavor. For a truly indulgent twist, consider adding a drizzle of dark chocolate or caramel sauce. Slice and enjoy this delightful No Bake Biscoff Cheesecake with family and friends!
Tips for the Best No Bake Biscoff Cheesecake
- Cream Cheese Prep: Always ensure cream cheese is softened to avoid lumps in your filling. If needed, warm it in the microwave for 10-second increments.
- Whip with Care: Beat the heavy cream just until stiff peaks form; over-whipping can make it grainy, affecting the cheesecake’s light texture.
- Chill the Crust: Don’t skip chilling the cookie crust properly! It ensures a firm base that holds its shape once the creamy filling is added.
- Flavor Adjustments: Feel free to customize your No Bake Biscoff Cheesecake by adding a layer of melted chocolate in the filling for extra richness.
- Enhance Presentation: For an eye-catching finish, drizzle warmed cookie butter and sprinkle crushed cookies just before serving.
Storage Tips for No Bake Biscoff Cheesecake
- Fridge: Keep your No Bake Biscoff Cheesecake covered in the refrigerator for up to 4 days. This will help maintain its creamy texture and rich flavor.
- Freezer: For longer storage, wrap the cheesecake tightly in plastic wrap and then foil, freezing for up to 2 months. Just remember, add any toppings right before serving to keep them fresh!
- Thawing: When ready to enjoy, move the cheesecake from the freezer to the fridge for 6-8 hours to thaw gently. Avoid microwave thawing to preserve its texture.
- Serving Reminder: After thawing, garnish with warmed cookie butter and crushed cookies for that wow factor when serving!
NO BAKE BISCOFF CHEESECAKE Variations & Substitutions
Feel free to get creative and tailor this delightful cheesecake to your unique tastes and dietary needs!
-
Graham Cracker Crust: Substitute half the Biscoff cookies with graham crackers for a more classic flavor profile. This twist brings a touch of nostalgia to your dessert.
-
Peanut Butter Swirl: Add creamy peanut butter to the filling for a nutty richness. This simple addition will surprise and delight peanut butter lovers!
-
Chocolate Lovers: Incorporate melted dark chocolate into the filling for an indulgent flair. Swirling it gently creates a beautiful marbled effect.
-
Vegan Option: Swap cream cheese for a plant-based alternative and use coconut cream instead of heavy whipping cream for a vegan twist that everyone can enjoy.
-
Flavor Boost: Mix in a teaspoon of cinnamon or a splash of caramel extract into the filling for an extra depth of flavor. These subtle notes can elevate your cheesecake remarkably.
-
Nutty Crunch: Top with chopped nuts or a sprinkle of crushed Biscoff cookies to add a delightful crunch. This contrast in texture makes every bite even more enjoyable.
-
Fruit Garnish: Consider adding a layer of fresh fruits like sliced strawberries or raspberries on top for a pop of color and flavor. Their tartness beautifully balances the cheesecake’s sweetness.
For a delightful presentation, serve your cheesecake with an additional slice of your favorite Baked Pears with Goat Cheese dessert!
Make Ahead Options
These No Bake Biscoff Cheesecake slices are perfect for busy home cooks looking to save time while impressing guests! You can prepare the crust and filling up to 24 hours in advance. Simply make the crust and chill it as instructed, then prepare the filling and spoon it into the crust. Cover the cheesecake with plastic wrap and refrigerate overnight to allow it to set beautifully. When you’re ready to serve, simply drizzle warm cookie butter on top and garnish with crushed Biscoff cookies. This way, you’ll have a delicious dessert ready to enjoy without any last-minute stress—just as indulgent as if freshly made!
What to Serve with No Bake Biscoff Cheesecake
Experience a delightful dining experience by pairing your creamy dessert with some stellar side options.
-
Fresh Berries: Juicy strawberries and raspberries add a burst of acidity to balance the sweetness of the cheesecake. They’re also a visually appealing touch!
-
Coffee: A warm, rich brew provides a comforting contrast to the silky cheesecake. The bitterness complements the sweet notes beautifully, making every bite more enjoyable.
-
Whipped Cream: Light and fluffy, a dollop of freshly whipped cream enhances the richness. Consider infusing the cream with vanilla or a touch of cinnamon for added warmth.
-
Chocolate Truffles: Indulgent chocolate truffles offer a luxurious element to your dessert spread. The smooth texture and rich flavor create a delightful pairing with each slice.
-
Sparkling Lemonade: A refreshing, fizzy drink with a hint of citrus elevates the overall experience and cleanses the palate beautifully.
-
Nuts and Candies: Serve a small assortment of lightly salted nuts or sweet candies for an enjoyable crunch. The contrast in texture rounds out the dish splendidly.
-
Dark Chocolate Sauce: Drizzle over the cheesecake for an extra layer of richness. This simple addition enhances the dish and might even leave guests begging for more!
No Bake Biscoff Cheesecake Recipe FAQs
What type of Biscoff cookies should I use for the crust?
I recommend using regular Biscoff cookies for the authentic flavor that complements the cheesecake beautifully. If you can’t find them, you can substitute with graham crackers or Oreos for a different taste experience!
How long can I store the No Bake Biscoff Cheesecake in the refrigerator?
You can keep your No Bake Biscoff Cheesecake covered in the refrigerator for up to 4 days. Just ensure it’s stored in an airtight container or wrapped tightly to prevent drying out or absorbing other fridge odors.
Can I freeze the No Bake Biscoff Cheesecake?
Absolutely! To freeze, omit any toppings and wrap the cheesecake tightly in plastic wrap, followed by aluminum foil for extra protection. It will stay fresh for up to 2 months. When you’re ready to enjoy it, simply transfer it from the freezer to the fridge to thaw slowly for 6-8 hours.
What should I do if my cream cheese mixture has lumps?
No worries! This can happen if the cream cheese isn’t softened properly. If you find lumps in your mixture, you can use a hand mixer or whisk it vigorously to smooth it out, or even place it in a microwave-safe bowl and heat in 10-second increments until just soft enough to mix smoothly.
Are there any dietary considerations I should be aware of?
Yes, this No Bake Biscoff Cheesecake is vegetarian-friendly, but check your specific cookie butter and cookie choices to ensure they’re suitable for your dietary needs. If you’re serving this to guests, it’s always a good idea to inquire about any potential allergies regarding dairy and sugar.
Delicious No Bake Biscoff Cheesecake for Effortless Indulgence
Ingredients
Equipment
Method
- Crush Biscoff cookies in a food processor until fine crumbs form, about 1-2 minutes.
- Combine crumbs with melted butter in a mixing bowl, ensuring fully coated.
- Press mixture firmly into the bottom of a 9-inch springform pan, creating an even layer.
- Chill the crust in the refrigerator for 15-20 minutes until firm.
- Beat softened cream cheese with an electric mixer on medium speed until smooth, about 2-3 minutes.
- Gradually mix in the cookie butter, powdered sugar, and vanilla until well combined.
- In a chilled bowl, whip cold heavy cream on high speed until stiff peaks form, about 3-5 minutes.
- Gently fold whipped cream into the cream cheese mixture until combined.
- Spoon the filling into the chilled crust and smooth the top with a spatula.
- Cover loosely with plastic wrap and refrigerate for at least 6 hours or overnight to set.
- Remove the sides of the springform pan gently.
- Drizzle warmed Biscoff cookie butter and sprinkle crushed cookies on top before serving.
Leave a Reply