
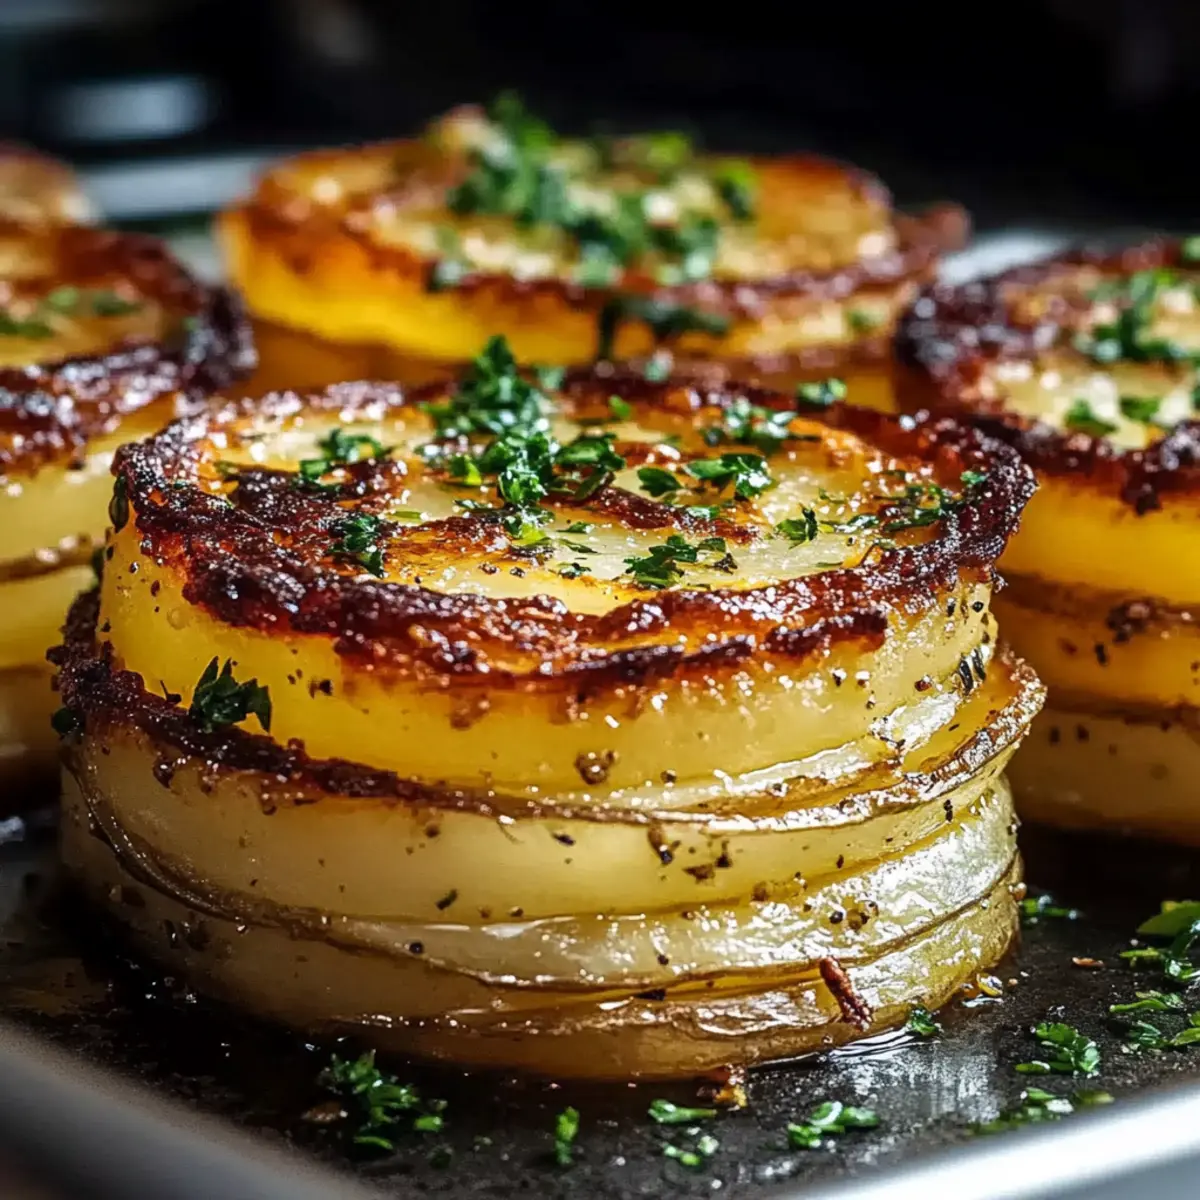
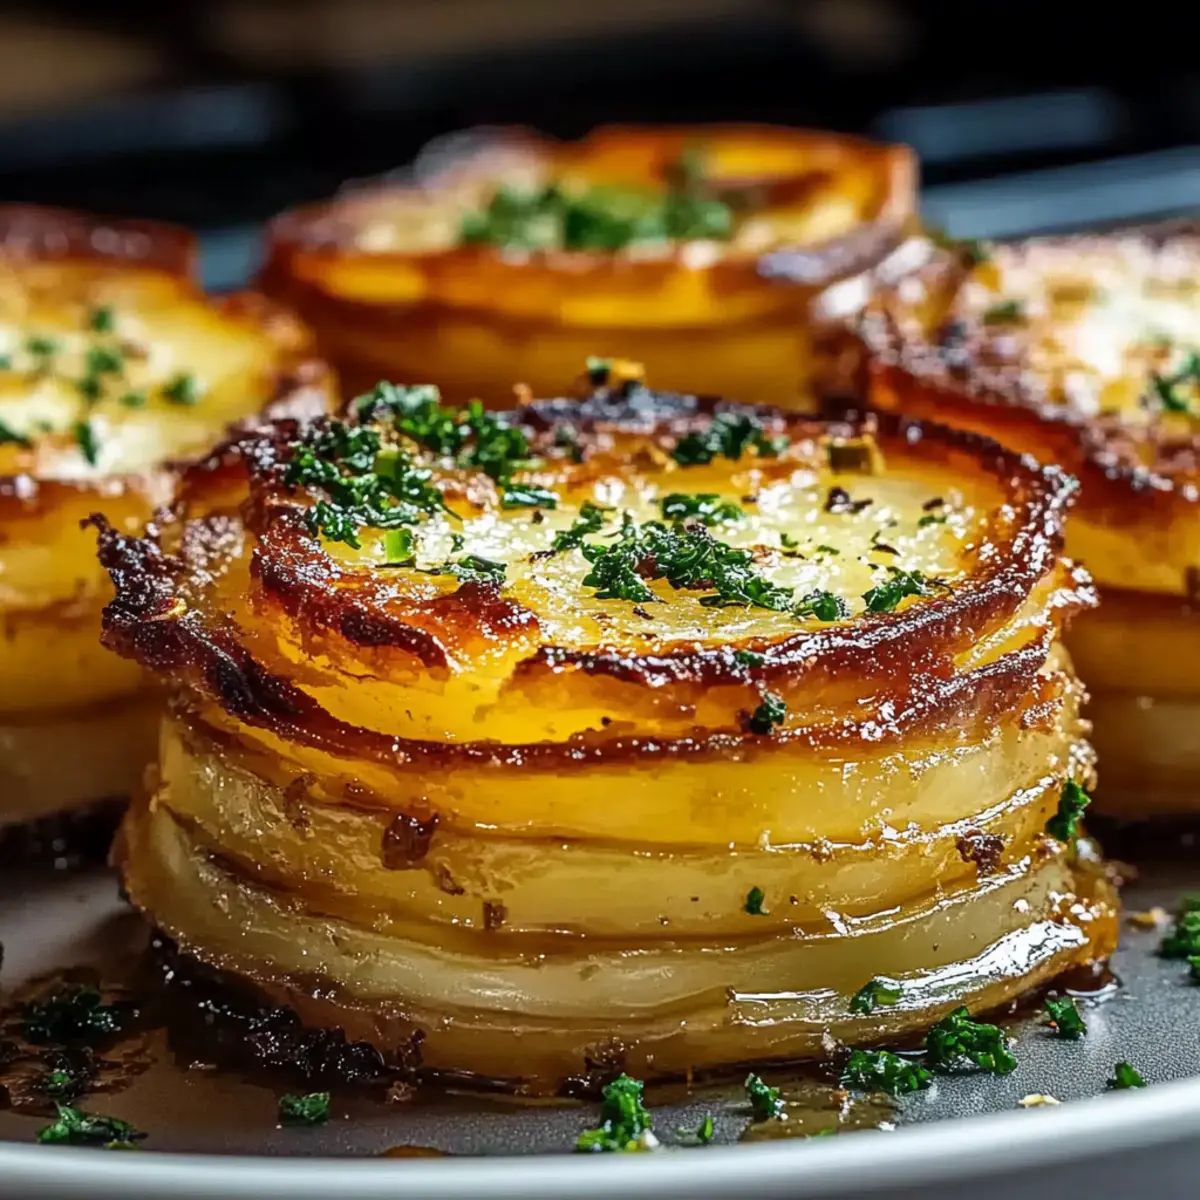
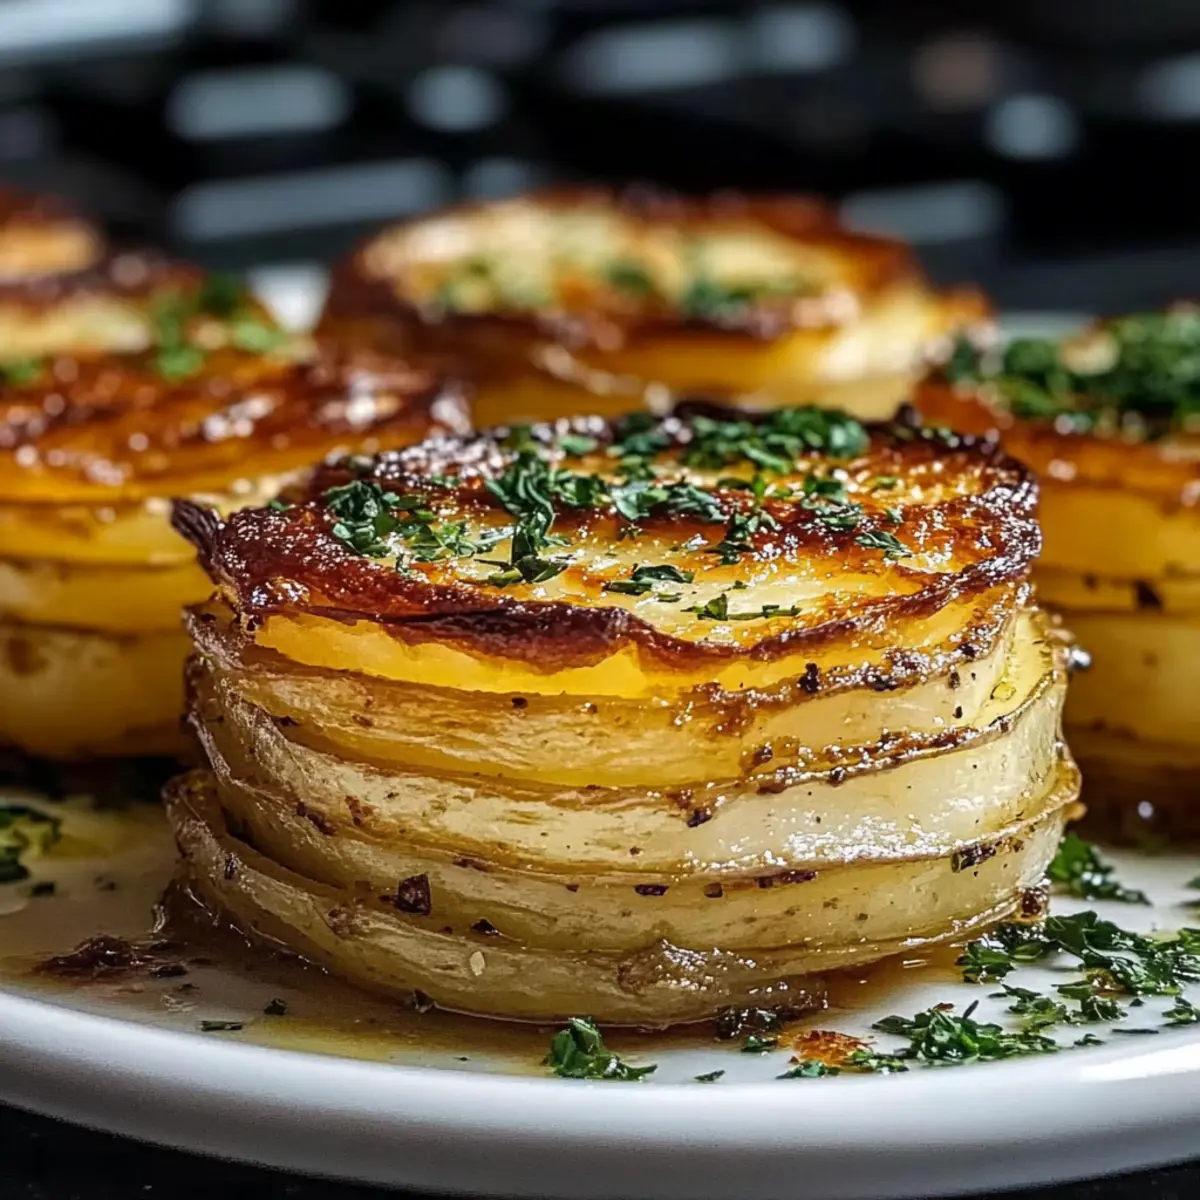
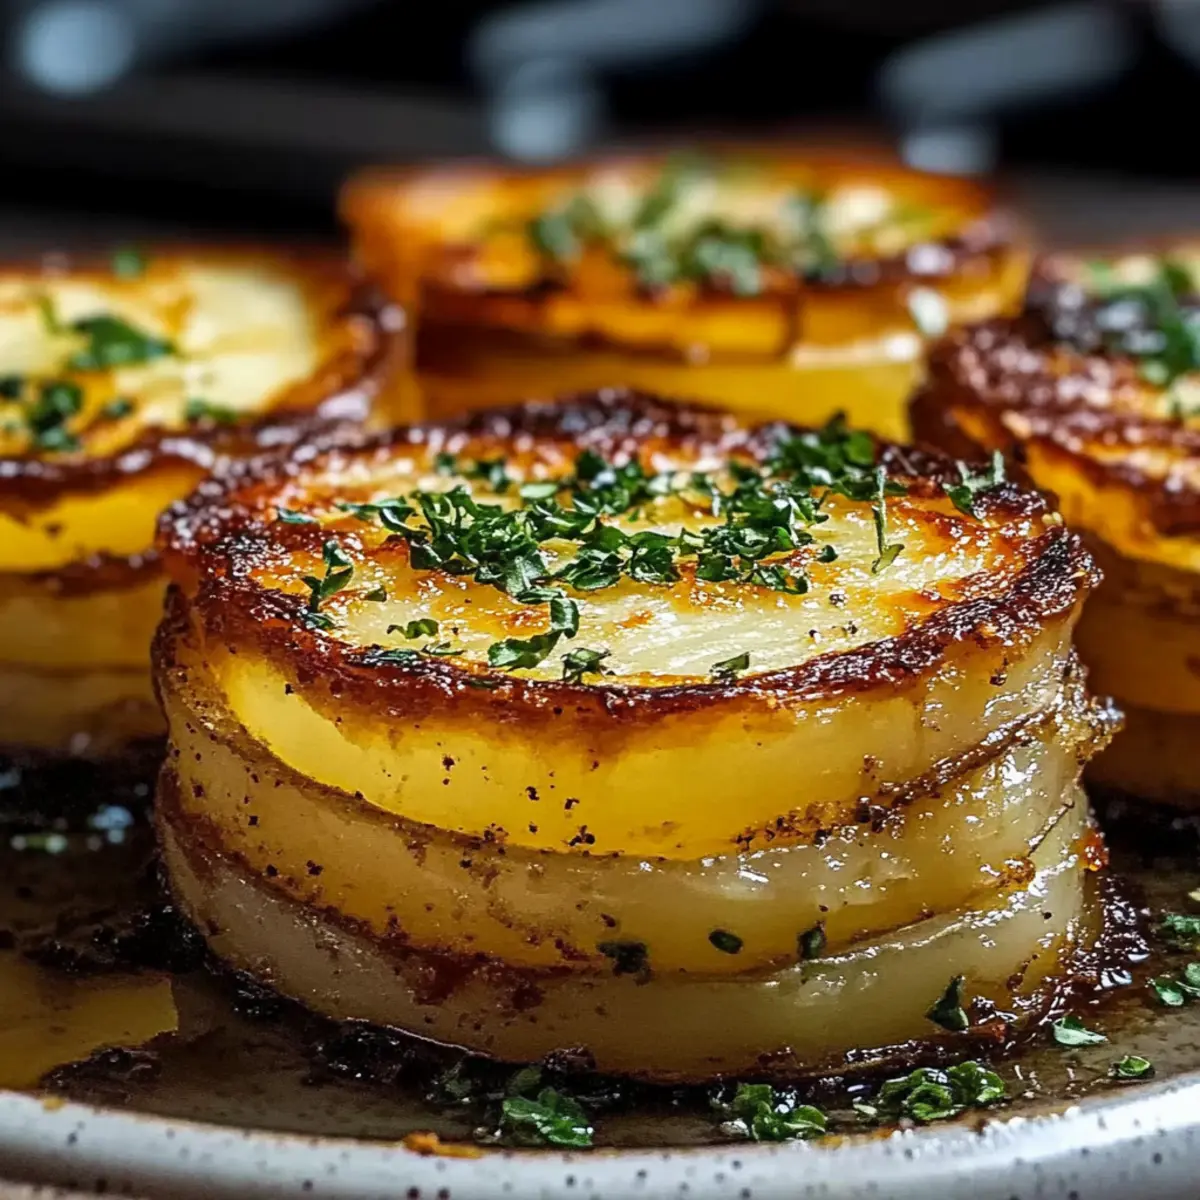
As I stood in my kitchen one evening, the aroma of roasting garlic filled the air, wrapping me in the comfort of a warm embrace. I was on a mission to prepare an elegant side dish that would impress my guests without overwhelming my time. Enter Potato Pave—a French-inspired recipe that takes everyday Yukon Gold potatoes and transforms them into a luxurious, crispy delight. With its easy prep and impressive presentation, this gluten-free comfort food is perfect for dinner parties or cozy family gatherings alike. Just imagine miraculous slices of buttery layers that melt in your mouth, elevating any meal. Are you ready to uncover the secret to this delightful creation?
Why Is Potato Pave a Must-Try?
Comforting, Yet Elegant: This dish redefines comfort food, bringing a touch of sophistication to your table.
Effortless Preparation: With simple steps, you can turn basic ingredients like Yukon Gold potatoes into a culinary masterpiece.
Versatile Pairing: Serve it alongside roasted meats or a refreshing salad, and it effortlessly elevates any meal, making it a crowd favorite.
Crispy Exterior, Creamy Interior: Achieve that perfect contrast of textures, delivering a bite that is both crunchy and velvety.
Make-Ahead Convenience: Prep in advance and simply reheat when your guests arrive, giving you more time to socialize!
Try this delightful side dish with options like Cheesy Taco Potatoes for a heartwarming meal that pleases everyone!
Potato Pave Ingredients
• Unlock the secrets of this luxurious side dish!
For the Base
- Yukon Gold Potatoes – The foundation of this dish, delivering creaminess and structure perfect for layering.
- Clarified Butter – Ensures a rich flavor and golden crust; olive oil can work, but results may vary.
- Salt – A vital enhancer of the potatoes’ natural flavors; adjust according to your preference.
- Black Pepper – Offers mild spice and depth to the dish.
For Flavor Boosters (Optional)
- Garlic – Infuse with smashed cloves for a subtle aromatic touch.
- Fresh Herbs – Thyme or rosemary can elevate the fragrance and add an extra flavor layer.
- Parmesan Cheese – Sprinkle between layers for savory richness, but skip if you’re keeping it gluten-free.
For Finishing Touch
- Olive Oil or Butter – Essential for searing the golden, crispy edges of your slices once baked.
Dive into the wonderful world of Potato Pave and transform ordinary dinners into extraordinary experiences!
Step‑by‑Step Instructions for Potato Pave
Step 1: Preheat and Prepare the Pan
Begin by preheating your oven to 325°F (160°C). While it’s heating, line a loaf pan with parchment paper, allowing some overhang for easy removal later. This is crucial for your Potato Pave, ensuring it retains its shape and releases easily after baking.
Step 2: Slice the Potatoes
Peel and finely slice the Yukon Gold potatoes into 1/16-inch rounds using a mandoline for uniformity. To prevent browning, place the slices in a bowl of cold water as you work. Once all the potatoes are sliced, thoroughly dry them with a clean kitchen towel to ensure they crisp up beautifully during baking.
Step 3: Layer the Potatoes
Begin layering the dry potato slices in your prepared loaf pan, ensuring each layer is neatly arranged. Generously brush each layer with clarified butter and season lightly with salt and black pepper. This layering technique is vital to creating the rich, buttery flavor profile that defines your Potato Pave.
Step 4: Optional Flavor Additions
If desired, incorporate herbs or cheese by sprinkling them over every third or fourth layer of potatoes. Fresh thyme or rosemary can elevate the dish’s fragrance, while Parmesan cheese adds a savory richness. Continue stacking potatoes until the pan is filled, pressing down gently to compact the layers.
Step 5: Cover and Compress
Once fully layered, cover the top of the Potato Pave with a piece of parchment paper to shield it, then tightly seal the pan with aluminum foil. Place a weight, such as another baking dish or some heavy cans, on top to compress the layers. This step is key to achieving a perfect texture and form.
Step 6: Bake to Perfection
Place the covered loaf pan in the oven and bake for approximately 1 hour 45 minutes to 2 hours, until the potatoes are tender when pierced with a knife. The Potato Pave should be soft inside but hold its shape, creating the foundation for that divine golden crust.
Step 7: Cool and Chill
Once baked, remove the Potato Pave from the oven and allow it to cool to room temperature. After cooling, refrigerate it overnight while still weighted down—this essential step ensures clean slicing and enhances the flavors, giving you the perfect base for your elegant side dish.
Step 8: Unmold and Slice
After chilling, carefully remove the weights and unfold the foil and parchment. Gently lift the Potato Pave from the loaf pan using the parchment overhang and place it on a cutting board. Slice it into squares or rectangles, revealing the beautiful layers inside.
Step 9: Sear for Crispiness
In a nonstick skillet over medium heat, add a touch of butter and heat until melted. Place the slices of Potato Pave in the pan, searing each side until golden and crispy—about 3 to 4 minutes per side. This step guarantees a delightful crunch that contrasts the creamy interior.
Step 10: Serve and Enjoy
Serve your warm, crispy Potato Pave garnished with fresh herbs or a drizzle of truffle oil for added luxury. This stunning dish will not only elevate your meal but also impress your guests with its rich flavors and elegant presentation.
Make Ahead Options
These Potato Pave are perfect for busy home cooks looking to save time without sacrificing flavor! You can prepare the entire dish up to 3 days in advance, baking the potato layers and letting them cool completely. After cooling, refrigerate the Potato Pave while still weighted to maintain their shape and quality. When you’re ready to serve, simply slice and sear them in a pan for a few minutes on each side until golden and crispy. By prepping ahead, you’ll have a delightful, restaurant-quality side dish ready to impress your guests with minimal effort, allowing you to focus on the rest of your meal!
What to Serve with Crispy Potato Pave?
Looking to build a delightful meal around this elegant side dish that’s sure to impress?
-
Herb-Roasted Chicken: The juicy, herb-infused chicken pairs beautifully with the crispy texture of the Potato Pave, creating a comforting balance of flavors.
-
Grilled Salmon: Rich and flaky, the buttery salmon complements the crispy layers, offering a satisfying contrast that’s light yet fulfilling.
-
Fresh Arugula Salad: Crisp greens with a zesty lemon vinaigrette provide a refreshing counterpoint to the richness of the Potato Pave, brightening the overall meal.
-
Braised Short Ribs: Indulge in tender, flavorful short ribs drizzled with their savory sauce, perfect for soaking into the layers of the Pave’s buttery goodness.
-
Roasted Vegetables: Toss seasonal veggies in olive oil and herbs for a vibrant, healthy side that enhances the dish’s elegance and adds nutritional value without overpowering it.
-
Garlic Butter Shrimp: Sweet, succulent shrimp sautéed in garlic butter create an irresistible pairing, echoing the buttery notes of the Potato Pave while adding depth to the meal.
-
Red Wine: A glass of full-bodied red wine beautifully complements the rich flavors of the Pave and hearty mains, making every bite even more delightful.
As you explore these pairings, imagine the flavors melding together on your table, promising a meal filled with satisfaction and warmth.
How to Store and Freeze Potato Pave
Refrigerator: Store baked Potato Pave in an airtight container for up to 3 days. Ensure it’s tightly covered to maintain moisture and prevent drying out.
Freezer: For longer storage, wrap slices well in plastic wrap and foil, then place them in a freezer-safe bag. They can be frozen for up to 2 months.
Reheating: Thaw in the fridge overnight for best results, then warm slices gently in a skillet over medium heat until heated through and crisp.
Make-Ahead: Prepare your Potato Pave ahead of time, refrigerate it overnight, then heat and serve on the day of your gathering for a stress-free experience.
Potato Pave Variations & Substitutions
Get ready to explore endless possibilities that will make your Potato Pave even more delightful and uniquely yours!
-
Sweet Potato Pave: Swap Yukon Golds for sweet potatoes and add a teaspoon of cornstarch for an extra crispy texture. The sweetness from the sweet potatoes will bring a new dimension to your dish!
-
Herb Infusion: Experiment with fresh herbs like dill or tarragon instead of thyme for a different flavor profile. These aromatic additions can brighten up your layered creation, transforming it into something extraordinary.
-
Creamy Cheddar Addition: Layer in some shredded cheddar cheese between the potato layers for a cheesy twist. This will create a rich, comforting flavor that cheese lovers will adore!
-
Caramelized Onions: Introduce a layer of caramelized onions for a touch of sweetness and depth of flavor. It’s a small addition that makes a big impact, bringing a new layer of savory sweetness.
-
Sautéed Mushrooms: Add a few layers of sautéed mushrooms for an earthy flavor. Their umami richness beautifully complements the buttery potatoes, making each bite a tasty surprise.
-
Spicy Kick: Sprinkle in some crushed red pepper flakes between layers if you like a bit of heat. This subtle yet spicy twist can elevate your Potato Pave to a whole new level of flavor.
-
Garlic Lover’s Delight: Increase the garlic by using roasted garlic purée blended into the clarified butter. This will ensure that every bite has that delightful garlicky aroma!
-
Gluten-Free Cheese: Make use of a gluten-free cheese alternative if you are keeping the dish gluten-free yet still fancy a cheesy layer. This way, you can indulge in that creamy, savory richness without the gluten concerns.
Feel free to pair your Potato Pave with stunning sides like Garlic Butter Potatoes or Sweet Potato Cranberry for an unforgettable dining experience!
Expert Tips for Perfect Potato Pave
-
Use a Mandoline: Ensure uniform slices for even cooking; this is essential to achieve the perfect texture and crispy bite.
-
Clarified Butter Necessity: Opt for clarified butter to prevent burning; regular butter has a lower smoke point, which can ruin your Potato Pave’s exterior.
-
Chill is Key: Don’t skip the overnight refrigeration step. This crucial process allows for clean slicing and helps enhance the flavors.
-
Avoid Early Flipping: When searing, resist the urge to flip too soon. Let a crust form to achieve that delightful golden-brown color on each slice.
-
Layering Magic: Be generous with butter and seasoning; this will ensure each layer is bursting with flavor, complementing the creamy interior perfectly.
Potato Pave Recipe FAQs
What types of potatoes are best for Potato Pave?
I recommend using Yukon Gold potatoes for their perfect balance of starch and moisture, which creates a creamy texture and holds up well in layers. Their natural buttery flavor is also a delightful complement to the dish!
How should I store Potato Pave once baked?
After baking, store your Potato Pave in an airtight container in the refrigerator for up to 3 days. Ensure it is tightly covered to maintain moisture. I often place parchment between the layers to avoid sticking while storing.
Can I freeze Potato Pave for later use?
Absolutely! To freeze, first allow the cooked and cooled Potato Pave to chill overnight in the refrigerator. Then, wrap slices tightly in plastic wrap and aluminum foil, placing them in a freezer-safe bag. This way, your Potato Pave can be frozen for up to 2 months.
What’s the best way to reheat Potato Pave?
For the best results, thaw the slices in the fridge overnight. Once thawed, heat a nonstick skillet over medium heat with a small amount of butter, and sear each side for about 3 to 4 minutes until they are heated through and crispy again. This will help restore that wonderful golden crust!
Can I customize the ingredients for dietary needs?
Certainly! This recipe is gluten-free as is, but if you’re avoiding dairy, you can substitute clarified butter with high-quality olive oil or duck fat. Just keep in mind that the texture might differ slightly. You can also skip the Parmesan cheese for a dairy-free option.
What should I do if my Potato Pave falls apart when slicing?
If this happens, don’t worry! It likely needs a longer chilling time, or it wasn’t compressed enough during baking. To improve texture, make sure to weigh down the dish as you chill it overnight; this will help the layers hold together better for clean slicing the next time you prepare it!
Savory Potato Pave: Elevate Your Comfort Food Game
Ingredients
Equipment
Method
- Preheat your oven to 325°F (160°C) and line a loaf pan with parchment paper.
- Peel and finely slice the Yukon Gold potatoes into 1/16-inch rounds.
- Begin layering the dry potato slices in your prepared loaf pan.
- If desired, sprinkle herbs or cheese over some of the layers.
- Cover with parchment paper and seal with foil, then add a weight on top.
- Bake for approximately 1 hour 45 minutes to 2 hours until tender.
- Cool to room temperature, then refrigerate overnight.
- Carefully remove from the pan and slice into squares or rectangles.
- Sear slices in a skillet until golden and crispy, about 3-4 minutes per side.
- Serve warm garnished with fresh herbs or a drizzle of truffle oil.
Leave a Reply