
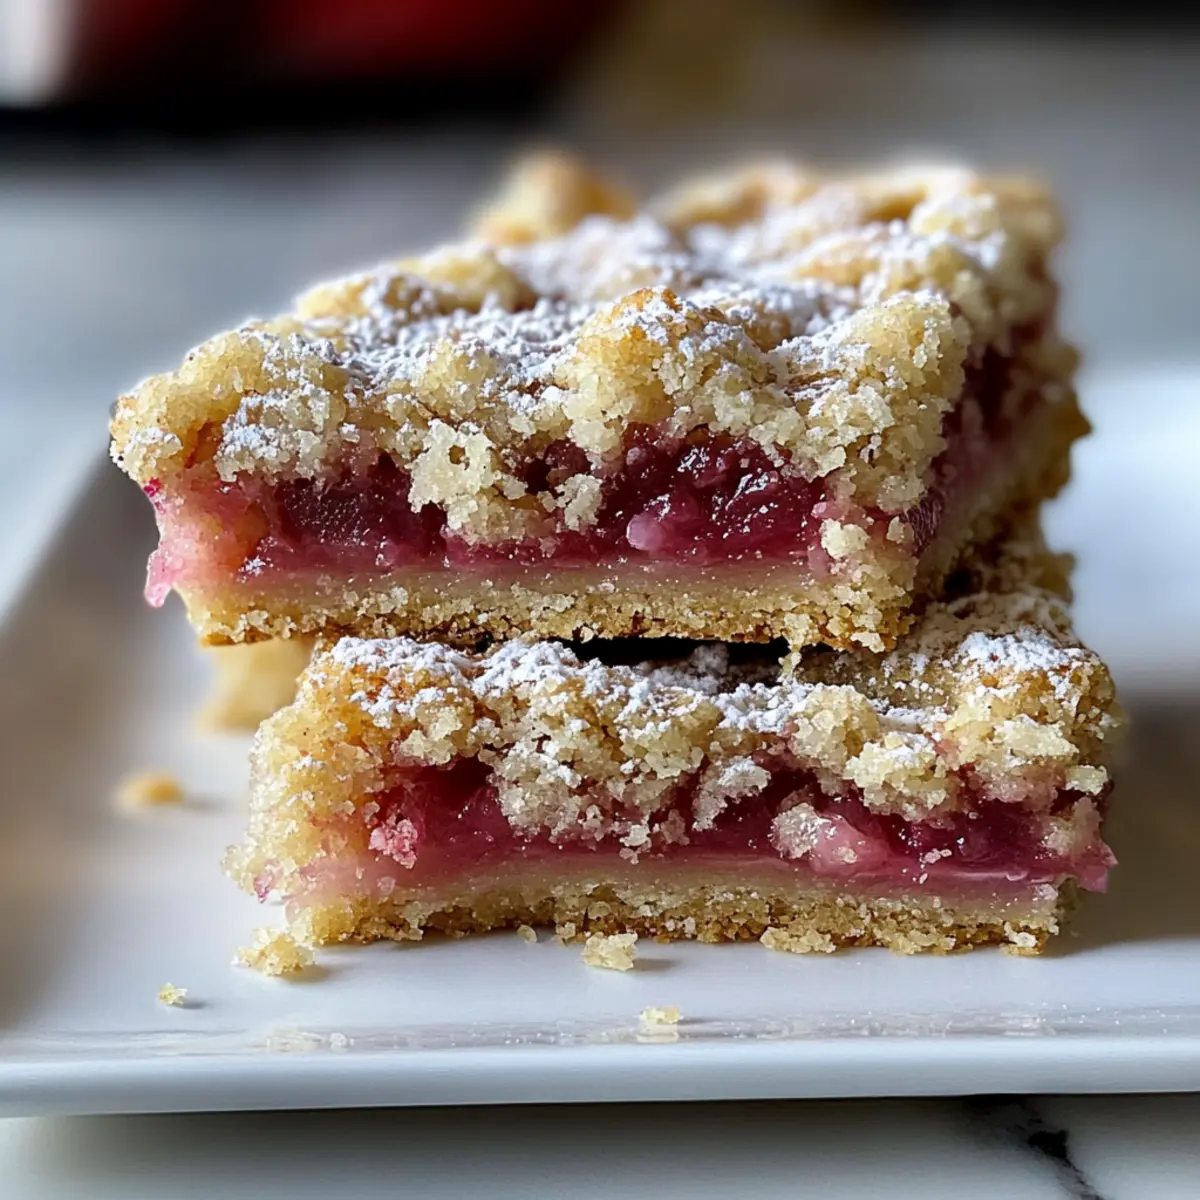
As I stood in the kitchen, the fragrant aroma of freshly chopped rhubarb danced around me, transporting me to vibrant spring markets brimming with these tart treasures. My heart raced as I prepared to bake the most delightful Rhubarb Dream Bars, combining that vivid tang with a buttery, crumbly crust. This recipe not only showcases the beautiful contrast of flavors but is impressively easy to whip up—perfect for home-cooks looking to impress without spending hours in the kitchen. Each bite offers the perfect balance of sweet and sour, making these bars an irresistible dessert option. And the best part? They can easily be adapted to suit gluten-free and vegan diets without sacrificing taste. Are you ready to transform your next baking adventure with these dreamy bars? Let’s dive in!
Why are these Rhubarb Dream Bars special?
Irresistible Flavor: The blend of sweet and tangy rhubarb creates a uniquely delicious dessert that delights the taste buds.
Effortlessly Simple: Made with pantry staples, this recipe is perfect for bakers of all skill levels—no complicated techniques needed!
Versatile Options: Easily adapt the recipe to be gluten-free or vegan, ensuring everyone can enjoy these scrumptious bars. Check out my guide on gluten-free baking for tips!
Crowd-Pleasing Dessert: Ideal for gatherings, these bars are sure to impress family and friends, leaving everyone asking for the recipe.
Perfect Texture: Enjoy a flaky shortbread crust paired with a luscious, vibrant filling that just melts in your mouth—truly the best of both worlds!
Rhubarb Dream Bars Ingredients
For the Crust
• All-purpose flour – Provides structure and stability; for a gluten-free version, substitute with a 1:1 gluten-free flour blend.
• Powdered sugar – Adds sweetness and a smooth texture; no substitutions necessary.
• Cold butter – Creates a flaky crust when worked into the flour; use vegan butter for a dairy-free option.
For the Filling
• Chopped rhubarb – The star ingredient that gives the bars their tangy filling; fresh rhubarb is preferred, but frozen can work if thawed and patted dry.
• Granulated sugar – Enhances sweetness and balances the tartness of rhubarb; no substitutions necessary.
• Eggs – Bind the filling and provide richness; for a vegan version, substitute with flax eggs (2 tbsp ground flaxseed + 5 tbsp water).
• Vanilla extract – Adds depth and enhances flavor; no substitutions necessary.
Feel free to explore these sumptuous Rhubarb Dream Bars—your new favorite dessert treat awaits!
Step‑by‑Step Instructions for Rhubarb Dream Bars
Step 1: Preheat the Oven
Begin by preheating your oven to 350°F (175°C). This ensures a perfectly baked base for your Rhubarb Dream Bars. While the oven warms up, gather all your ingredients to make the process smooth and enjoyable.
Step 2: Prepare the Crust
In a mixing bowl, combine 1½ cups of all-purpose flour and powdered sugar. Cut in ¾ cup of cold butter using a pastry cutter or fork until the mixture resembles coarse crumbs. Once ready, press this buttery mixture firmly into the bottom of a greased 9×13-inch baking dish, ensuring an even layer for a solid foundation.
Step 3: Bake the Crust
Place the crust in your preheated oven and bake for about 15 minutes, until it turns light golden brown. Keep an eye on it, as the perfect crust is golden and firm to the touch. This sets the stage for the delicious rhubarb filling that will follow.
Step 4: Make the Filling
While the crust bakes, prepare the filling by tossing 2 cups of chopped rhubarb with ¾ cup of granulated sugar in a separate bowl. In another bowl, lightly beat 2 eggs before mixing in ¼ cup of flour and a splash of vanilla extract. Combine this egg mixture with the rhubarb, stirring gently until all the fruit is well-coated.
Step 5: Combine and Bake
Once the crust is baked, remove it from the oven and pour the rhubarb filling evenly over the hot crust. Spread it out gently and pop it back into the oven. Bake for an additional 30-35 minutes, or until the filling is set and slightly wobbly in the center—this indicates your Rhubarb Dream Bars are nearly ready!
Step 6: Cool and Serve
After baking, let the bars cool in the pan at room temperature. For best results, chill them in the refrigerator for at least 1 hour. This cooling step will help the bars set up even more, making them easier to slice into perfect squares for serving. Enjoy these delightful Rhubarb Dream Bars chilled or at room temperature!
Rhubarb Dream Bars Variations
Feel free to make these delightful bars even more your own with these fun and flavorful twists!
-
Gluten-Free: Substitute all-purpose flour with a 1:1 gluten-free flour blend for delicious bars anyone can enjoy.
-
Vegan-Friendly: Swap regular butter for vegan butter and use flax eggs in place of chicken eggs for a plant-based version.
-
Spiced Up: Add a dash of cinnamon or nutmeg to your rhubarb filling for a warm, aromatic flavor that dances on the palate.
-
Nutty Texture: Incorporate chopped nuts like almonds or walnuts into the crust for extra crunch and a satisfying bite.
-
Berry Additions: Toss in some fresh strawberries or raspberries along with the rhubarb for a burst of fruity sweetness.
-
Zesty Twist: Grate some lemon or orange zest into the filling; it adds a refreshing brightness that pairs perfectly with tart rhubarb. This zest creates a symphony of flavors that linger beautifully on the tongue.
-
Chocolate Drizzle: For a decadent touch, melt dark chocolate and drizzle it over the cooled bars before slicing. This heavenly addition elevates them to a whole new level of indulgence.
-
Coconut Dream: Replace some of the flour with shredded coconut for a tropical twist that complements the tangy rhubarb beautifully. Get creative and embrace the flavor-packed possibilities!
These variations will take your Rhubarb Dream Bars to delightful new heights, each one enticing in its own right. Enjoy the journey of crafting your perfect treat!
Make Ahead Options
These Rhubarb Dream Bars are perfect for meal prep enthusiasts! You can prepare the crust and filling separately up to 24 hours in advance for a seamless baking experience. To do this, bake the crust, let it cool completely, and then wrap it tightly in plastic wrap before refrigerating. For the filling, mix the rhubarb with sugar and the egg mixture, then store it in an airtight container in the fridge. When you’re ready to serve, simply pour the chilled filling onto the crust and bake as directed. This way, your bars will taste just as delicious, saving you time on busy weeknights!
What to Serve with Rhubarb Dream Bars
Nothing complements these delightful Rhubarb Dream Bars quite like a carefully curated selection of sides and beverages that enhance their sweet-tart magic.
-
Whipped Cream: A dollop of fresh whipped cream adds a luxurious touch that balances the tanginess perfectly.
-
Vanilla Ice Cream: A scoop of creamy vanilla ice cream melting atop the bars creates a heavenly contrast in temperature and flavor.
-
Minty Fruit Salad: Bright, vibrant fruits like strawberries and kiwi tossed with mint provide a refreshing burst that complements the bar’s flavors.
-
Lemonade: A glass of chilled lemonade brings a zesty zing that pairs beautifully with the sweet-tart notes of the rhubarb.
-
Coffee or Tea: A warm cup of coffee or herbal tea can elevate your dessert experience, offering a comforting essence alongside the bars.
-
Sliced Almonds: Sprinkle some slivered almonds on top, adding a delightful crunch and nutty flavor that enhances each bite.
-
Chocolate Drizzle: For a gourmet twist, drizzle melted dark chocolate over the bars, creating a decadent contrast that elevates the dessert to new heights.
Indulging in these pairings will take your Rhubarb Dream Bars from delightful to truly unforgettable, making any gathering feel special.
Expert Tips for Rhubarb Dream Bars
-
Uniform Chopping: Ensure your rhubarb is trimmed and chopped uniformly to promote even cooking and a consistent texture throughout the bars.
-
Cooling Matters: Don’t skip the chilling step! Let the bars cool completely in the refrigerator for at least one hour to ensure the filling sets properly, enhancing both flavor and texture.
-
Slicing Technique: For clean edges when slicing, allow the bars to sit at room temperature for about 10 minutes after chilling—it takes the chill off and makes for easier cutting.
-
Ingredient Quality: Use fresh rhubarb for the best flavor. If opting for frozen, be sure to thaw and pat dry to avoid excess moisture in your Rhubarb Dream Bars.
-
Watch Baking Time: Every oven is different, so keep an eye on the baking time. Bars should be set but slightly wobbly in the center when done, ensuring a luscious filling.
How to Store and Freeze Rhubarb Dream Bars
Fridge: Store leftover Rhubarb Dream Bars in an airtight container in the fridge for up to 5 days to maintain their freshness and flavor.
Freezer: For longer storage, freeze the bars by layering them with parchment paper in an airtight container. They can be kept for up to 3 months.
Thawing: To enjoy frozen bars, thaw them in the refrigerator overnight or at room temperature for a few hours before serving.
Reheating: If you prefer your bars warm, reheat in the oven at 300°F (150°C) for about 10 minutes, allowing them to regain their delightful texture.
Rhubarb Dream Bars Recipe FAQs
What type of rhubarb should I use?
Absolutely! Fresh rhubarb is preferred for its vibrant flavor and texture. Look for firm, bright stalks without any dark spots or wilting. If fresh isn’t available, you can use frozen rhubarb, but be sure to thaw and pat it dry to avoid a soggy filling.
How should I store my Rhubarb Dream Bars?
Store your leftover Rhubarb Dream Bars in an airtight container in the fridge for up to 5 days. This helps maintain their freshness and flavor. If you find yourself with extra bars, you can freeze them layered with parchment paper in an airtight container for up to 3 months.
What’s the best way to freeze Rhubarb Dream Bars?
To freeze, first cool the bars completely. Cut them into squares, then layer them with parchment paper in an airtight container. Seal tightly to prevent freezer burn, and label them with the date. When ready to enjoy, allow them to thaw in the refrigerator overnight or at room temperature for a few hours.
Can I make these bars gluten-free or vegan?
Very! For a gluten-free version, substitute all-purpose flour with a 1:1 gluten-free flour blend. For a vegan option, replace the eggs with flax eggs made from 2 tablespoons of ground flaxseed mixed with 5 tablespoons of water. This adaptation keeps the delicious flavor while accommodating dietary preferences.
What if my filling doesn’t set properly?
If your filling appears wobbly after baking, give it more time in the oven. Ovens can vary, so check for doneness. The center should be slightly wobbly but not liquid. If it doesn’t set after cooling, it may need to bake longer next time. Cooling in the fridge for at least an hour is crucial, as it helps firm up the filling.
Can my pets eat rhubarb?
No, rhubarb is toxic to pets, especially cats and dogs. It contains oxalic acid, which can cause gastrointestinal distress, and in severe cases, kidney failure. Always keep these delicious bars out of reach from your furry friends!
Delicious Rhubarb Dream Bars: Your New Favorite Dessert Treat
Ingredients
Equipment
Method
- Preheat your oven to 350°F (175°C).
- Combine flour and powdered sugar in a bowl. Cut in the cold butter until it resembles coarse crumbs. Press into a greased 9x13-inch baking dish.
- Bake the crust for about 15 minutes until light golden brown.
- Toss rhubarb with sugar in a separate bowl. Beat eggs with flour and vanilla, then mix with the rhubarb.
- Pour the filling over the baked crust and bake for 30-35 minutes until filling is set and slightly wobbly.
- Cool in the pan at room temperature, then chill in the refrigerator for at least one hour before serving.
Leave a Reply