
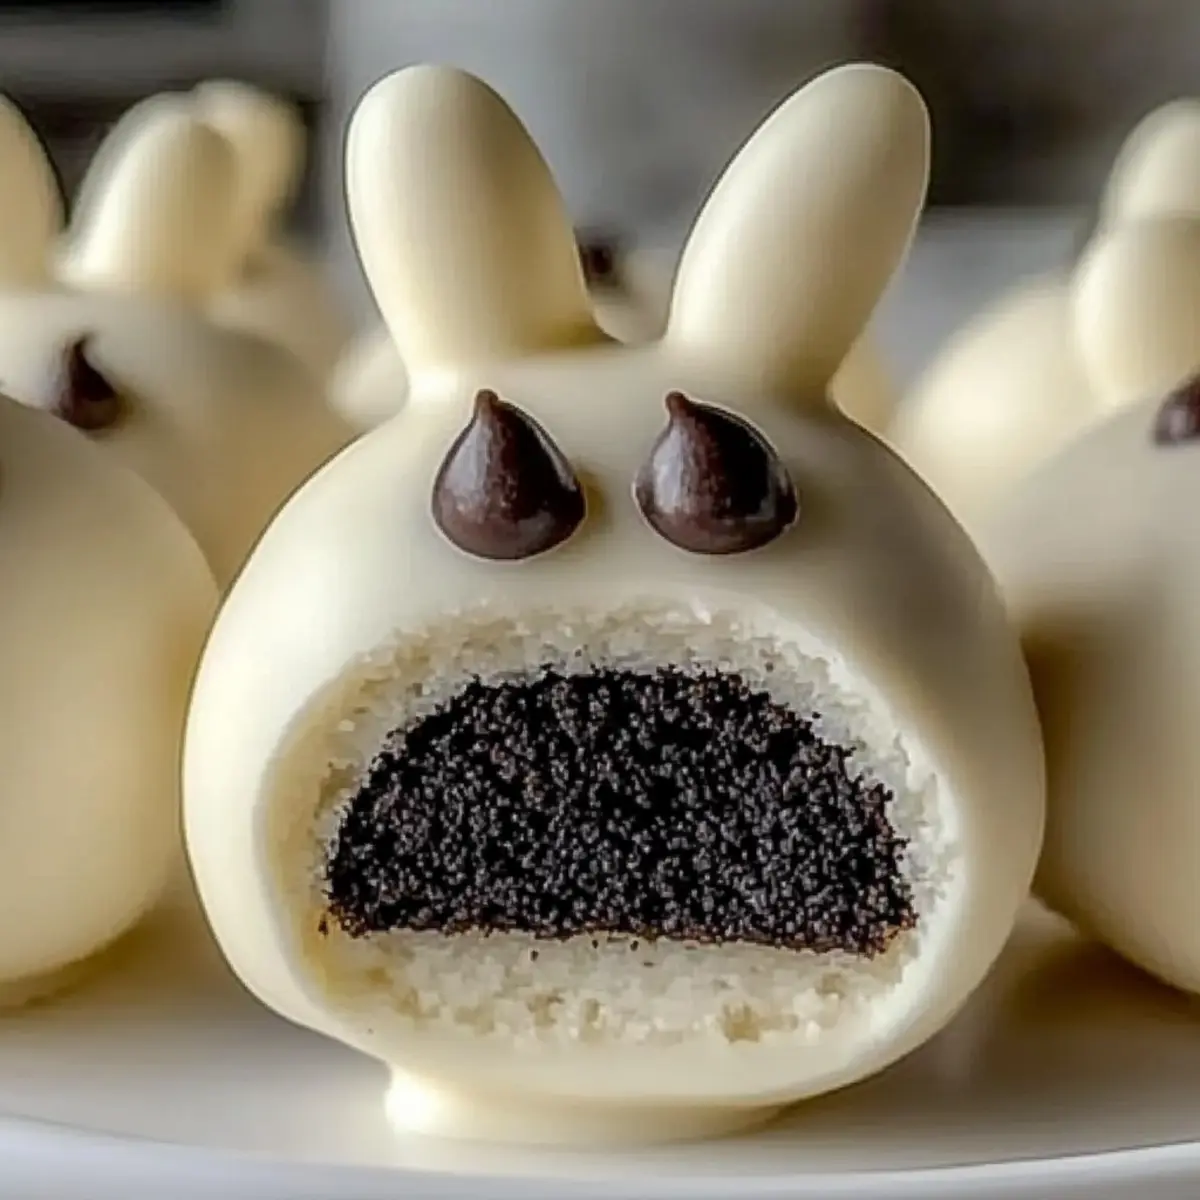
As I was rummaging through my pantry last week, a package of chocolate sandwich cookies caught my eye, sparking an idea that was simply irresistible: Bunny Oreo Balls! This delightful no-bake dessert combines the rich creaminess of cream cheese with a fudgy cookie base, creating a treat that’s not just playful but also perfect for family gatherings and special occasions. With their whimsical bunny shape, these treats add a touch of fun to any celebration and are a fantastic way to engage kids in the kitchen. Plus, they’re easy to whip up, making them a go-to when you want something sweet without the fuss. Ready to impress your loved ones? Let’s hop to it and create some Bunny Oreo Balls that will surely bring smiles all around!
Why Are Bunny Oreo Balls a Must-Try?
Playful and Delightful: These Bunny Oreo Balls bring a smile to everyone’s face with their adorable shape, making them perfect for any festive occasion.
No Bake: Skip the oven! This no-bake recipe is incredibly easy and quick, taking just a few steps to create a crowd-pleasing sweet treat.
Family-Friendly: Involve the kids! They’ll love shaping the bunnies and decorating them, making this recipe a fun kitchen project for the whole family.
Flavorful: The combination of cream cheese and chocolate sandwich cookies results in a rich yet delightful taste that’ll have everyone going back for seconds.
Versatile: Customize the appearance and toppings to fit any season or holiday—think pastel colors for Easter or vibrant hues for birthday parties!
Make-Ahead: Prepare these tasty bites up to 48 hours ahead of time, allowing you more time to focus on enjoying with loved ones, just like my beloved Thanksgiving Stuffing Balls.
Bunny Oreo Balls Ingredients
For the Bunny Base
• Chocolate Sandwich Cookies – Provides the foundation for a rich, fudgy texture; you can also use gluten-free cookies for a suitable alternative.
• Cream Cheese – Acts as a creamy binder for the mixture; light cream cheese offers a lighter option, although it makes the dough softer.
For the Coating
• White Chocolate or Candy Melts – Adds a sweet and smooth outer layer; consider using wafers for easier melting.
• Optional Pink Candy Melts or Colored Icing – Perfect for adding cute details like bunny noses and ears; it elevates the fun factor of Bunny Oreo Balls!
For Decoration
• Mini Chocolate Chips or Edible Eyes – Enhance the bunny’s face, making these treats irresistibly adorable.
• Pastel Sprinkles – Optional for extra flair; add a pop of color that fits festive occasions or celebrations.
Step‑by‑Step Instructions for Bunny Oreo Balls
Step 1: Crush Cookies
Begin by placing the chocolate sandwich cookies in a food processor. Pulse the cookies until they resemble fine crumbs, about 20–30 seconds. Once processed, transfer the crumbs to a medium mixing bowl. This will serve as the delicious base for your Bunny Oreo Balls.
Step 2: Mix Dough
Next, take your softened cream cheese and add it to the bowl of cookie crumbs. Using a spatula or your hands, mix thoroughly until the ingredients combine into a smooth, sticky dough, approximately 2–3 minutes. This creamy mixture will form the delightful filling for your Bunny Oreo Balls.
Step 3: Shape Bunnies
Now, scoop out about one tablespoon of the dough and roll it into a ball, roughly 1 inch in diameter. Pinch the top gently to create bunny ears, giving it a cute shape. Repeat this process with the remaining dough until all your Bunny Oreo Balls are formed, and place them on a parchment-lined baking sheet.
Step 4: Chill
Once shaped, place the baking sheet with your Bunny Oreo Balls in the refrigerator. Chill them for at least 30 minutes, allowing them to firm up. This step is crucial as it helps them hold their shape during the coating process.
Step 5: Melt Chocolate
While the bunnies chill, prepare to melt your white chocolate or candy melts. In a microwave-safe bowl, heat the chocolate in 20-30 second intervals, stirring in between until the chocolate is completely smooth and melted, around 1–2 minutes total. This smooth glaze will coat your Bunny Oreo Balls perfectly.
Step 6: Dip & Decorate
Retrieve the chilled Bunny Oreo Balls from the fridge. Dip each one into the melted chocolate, ensuring they are fully coated. Use a fork to lift each ball out, tapping it gently on the bowl’s edge to remove excess chocolate. Before the coating sets, embellish with mini chocolate chips or edible eyes for an adorable touch!
Step 7: Set
Finally, allow the Bunny Oreo Balls to sit at room temperature for about 10-15 minutes, or place them in the refrigerator for faster setting. Once the chocolate coating is firm, your delightful Bunny Oreo Balls are ready to be enjoyed!
Make Ahead Options
These Bunny Oreo Balls are ideal for busy cooks looking to streamline their meal planning! You can prepare the cookie dough and shape the bunnies up to 48 hours in advance, simply refrigerating them until you’re ready to dip. For best results, keep the formed Bunny Oreo Balls in an airtight container to maintain their freshness. When it’s time to complete your treats, melt the white chocolate and dip the chilled shapes, then decorate with mini chocolate chips or edible eyes before serving. With this prep, you’ll enjoy delicious, whimsical treats with minimal last-minute effort!
Expert Tips for Bunny Oreo Balls
Chill to Firm Up: Ensure your Bunny Oreo Balls are thoroughly chilled before dipping. This helps them keep their shape during coating.
Avoid Sticky Dough: If the dough feels too sticky, consider adding a little more crushed cookie to adjust the texture. This makes shaping easier.
Drizzle for Flair: After coating, consider drizzling melted chocolate or colored icing for an extra decorative touch that elevates the Bunny Oreo Balls presentation.
Microwave with Care: When melting chocolate, do it in small increments and stir often to prevent it from seizing, saving your delicious coating!
Storage Secrets: Keep your Bunny Oreo Balls refrigerated in an airtight container for up to 48 hours to maintain their freshness and flavor.
Bunny Oreo Balls Customization Ideas
Feel free to unleash your creativity and make these Bunny Oreo Balls uniquely yours with simple swaps and twists!
-
Gluten-Free: Substitute regular chocolate sandwich cookies with gluten-free versions for a delicious alternative that everyone can enjoy.
-
Dairy-Free: Use vegan cream cheese and dairy-free chocolate for a plant-based option without compromising flavor.
-
Flavorful Additions: Incorporate a splash of vanilla extract into the dough for an extra layer of deliciousness; it elevates the treat beautifully!
-
Nutty Twist: Add finely chopped nuts like pecans or almonds to the cookie mixture for added crunch and a nutty flavor that complements the sweetness.
-
Cute Shapes: Don’t limit yourself to bunnies! Use different cookie cutters to shape these treats into festive holiday figures, perfect for any celebration.
-
Creative Coatings: Try using colored candy melts (like pastel pink or blue) for a fun and colorful twist. It’s a great way to match your Bunny Oreo Balls to any theme or occasion.
-
Sprinkles Galore: Experiment with a variety of themed sprinkles, like Halloween sprinkles for a spooky treat or festive red and green for Christmas.
-
Cinnamon-Dusted Delight: Just like adding a pinch of cinnamon for warmth, dust the finished Bunny Oreo Balls with a light sprinkle of cocoa powder for a touch of elegance.
No matter how you choose to personalize your creations, they’re sure to bring joy to gatherings and delight everyone’s taste buds. Just like how my family enjoys these delicious treats, you can also explore delicious pairings with Cranberry Meatballs Savory to truly impress your guests!
How to Store and Freeze Bunny Oreo Balls
Room Temperature: Store Bunny Oreo Balls at room temperature for up to 2 hours before serving to keep their delightful texture before any gathering.
Fridge: Keep the Bunny Oreo Balls in an airtight container in the refrigerator for up to 48 hours to ensure they stay fresh and delicious.
Freezer: For longer storage, freeze shaped Bunny Oreo Balls in a single layer, then transfer to an airtight container or freezer bag. They will last up to 2 months.
Reheating: Thaw frozen Bunny Oreo Balls in the refrigerator overnight before serving, ensuring they maintain their creamy center and delicious coating.
What to Serve with Bunny Oreo Balls
Creating a beautiful spread around these cute treats can elevate any occasion into a memorable feast.
-
Fruity Yogurt Parfait: Layer Greek yogurt with fresh berries and granola for a refreshing and creamy contrast that complements the sweetness of the Bunny Oreo Balls.
-
Chocolate-Dipped Strawberries: These delightful bites add an elegant touch and a pop of color to your dessert table, making the overall experience even more festive.
-
Mini Cupcakes: Go for light vanilla or chocolate cupcakes topped with airy frosting. Their soft texture and familiar flavors create a comforting balance alongside the rich Bunny Oreo Balls.
-
Sparkling Lemonade: This zesty drink will keep the atmosphere lively! The citrusy notes contrast beautifully with the sweetness of the dessert, refreshing your palate.
-
Ice Cream Sundae Bar: Set up a fun sundae station with various toppings. The versatility allows everyone to enjoy a little creativity while indulging in rich flavors.
-
Mixed Fruit Skewers: These are not only visually appealing but also provide a juicy and fresh bite that enhances the overall meal experience. They’re great for cleansing the palate between sweet bites.
Bunny Oreo Balls Recipe FAQs
What type of chocolate sandwich cookies should I use?
You can use regular chocolate sandwich cookies for the classic taste, but feel free to substitute with gluten-free cookies if you’re looking for an alternative. Make sure the cookies are fresh, as stale ones can affect the overall texture of your Bunny Oreo Balls.
How long can I store Bunny Oreo Balls?
Bunny Oreo Balls are best stored in an airtight container in the refrigerator. They will stay fresh and delicious for up to 48 hours. However, if you need to make them ahead of time, they can also be frozen for up to 2 months—just remember to thaw them in the fridge overnight before serving!
Can I freeze Bunny Oreo Balls?
Absolutely! To freeze Bunny Oreo Balls, first arrange them in a single layer on a baking sheet and place them in the freezer until firm. Once they’re set, transfer these delightful treats to an airtight container or freezer bag. This prevents them from sticking together and keeps them fresh for up to 2 months.
What should I do if my chocolate seizes while melting?
If your chocolate seizes and becomes lumpy, don’t panic! Add a teaspoon of coconut oil or vegetable shortening to the chocolate and stir gently until it becomes smooth again. This little trick can rescue your melted chocolate and help you achieve that perfect coating for your Bunny Oreo Balls.
Can I make Bunny Oreo Balls safe for my pet?
It’s important to keep in mind that chocolate can be harmful to dogs and other pets. If you want a pet-friendly version, consider making a batch with carob chips instead of chocolate, as they are safe for pets. Just be sure to keep the regular Bunny Oreo Balls out of their reach!
Why are my Bunny Oreo Balls too sticky to shape?
If your dough feels too sticky, try chilling it for an additional 10–15 minutes in the refrigerator. This will help firm it up, making it easier to roll into those cute bunny shapes. Additionally, if it remains sticky, you can mix in a bit more crushed cookie to improve the texture.
Bunny Oreo Balls: Easy No-Bake Treats for Sweet Moments
Ingredients
Equipment
Method
- Begin by placing the chocolate sandwich cookies in a food processor. Pulse the cookies until they resemble fine crumbs, about 20–30 seconds. Transfer the crumbs to a medium mixing bowl.
- Add the softened cream cheese to the bowl of cookie crumbs. Mix thoroughly until combined into a smooth, sticky dough, approximately 2–3 minutes.
- Scoop out about one tablespoon of the dough and roll it into a ball, roughly 1 inch in diameter. Pinch the top gently to create bunny ears.
- Place the baking sheet with the Bunny Oreo Balls in the refrigerator. Chill for at least 30 minutes.
- Melt the white chocolate or candy melts in a microwave-safe bowl, heating in 20-30 second intervals and stirring in between until smooth, around 1–2 minutes total.
- Dip each chilled Bunny Oreo Ball into the melted chocolate, ensuring they are fully coated. Place them on a parchment-lined baking sheet.
- Allow the Bunny Oreo Balls to sit at room temperature for about 10-15 minutes, or refrigerate until the chocolate coating is firm.
Leave a Reply